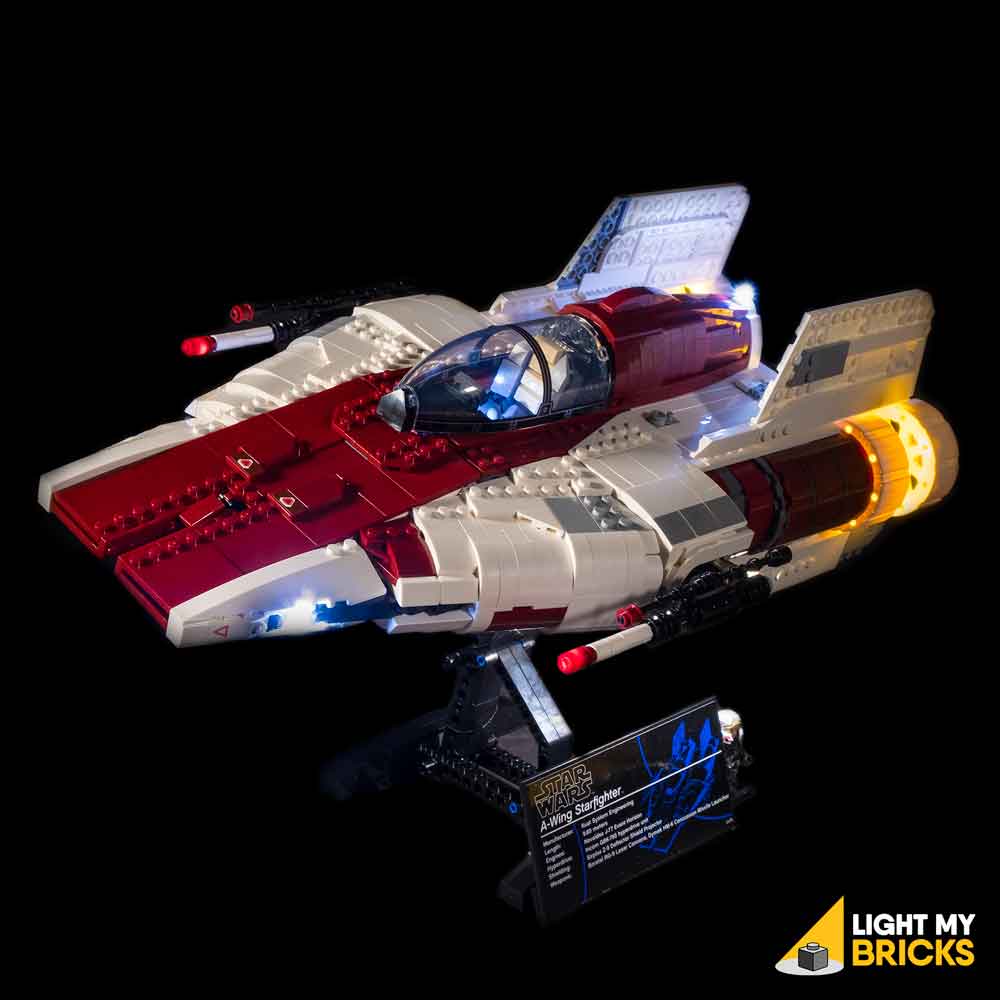
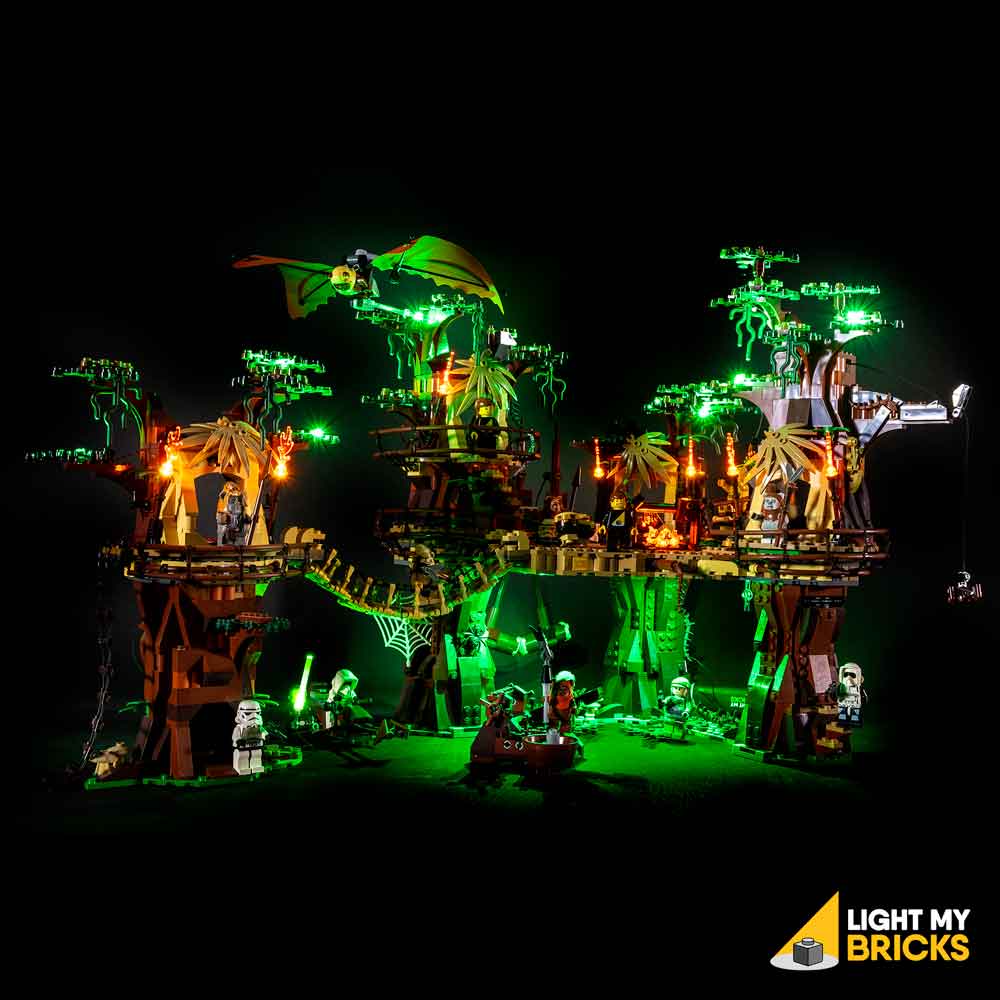
Light My Bricks: LEGO UCS A-Wing Starfighter 75275 Lighting Kit

The following page is the instructions for the Light My Bricks LEGO UCS A-Wing Starfighter (75275) LED light kit.
If you run into any issues, please refer to the online troubleshooting guide.
To ensure a trouble-free installation of your light kit, please read and follow each step carefully. These instructions can be downloaded in PDF format here
Please note: This page lists instructions for the LED light kit only. If you are wishing to purchase the Light My Bricks LEGO UCS A-Wing Starfighter (75275) LED light kit , please click here to view the product page
Package Contents:
- 8x Warm White 30cm Large Bit Lights
- 4x Cool White 30cm Bit Lights
- 2x Red 30cm Bit Lights
- 1x White Strip Light
- 1x 12-Port Expansion Board
- 1x 8-Port Expansion Board
- 1x 2-Port Expansion Board
- 1x Pulse Effects Board
- 1x Gun Effects Board
- 3x 5cm Connecting Cable
- 1x 15cm Connecting Cables
- 1x 30cm Connecting Cable
- 1x USB Power Cable
LEGO Pieces:
- 2x Trans Clear Plate 1×1
- 1x Trans Clear Round Plate 1×1
Important things to note:
Laying cables in between and underneath bricks
Cables can fit in between and underneath LEGO® bricks, plates, and tiles providing they are laid correctly between the LEGO® studs. Do NOT forcefully join LEGO® together around cables; instead ensure they are laying comfortably in between each stud.
Connecting cable connectors to Expansion Boards
Take extra care when inserting connectors to ports of Expansion Boards. Connectors can be inserted only one way. With the expansion board facing up, look for the soldered “=” symbol on the left side of the port. The connector side with the wires exposed should be facing toward the soldered “=” symbol as you insert into the port. If a plug won’t fit easily into a port connector, do not force it.
Connecting cable connectors to Strip Lights
Take extra care when inserting connectors to ports on the Strip Lights. Connectors can be inserted only one way. With the Strip Light facing up, ensure the side of the connector with the wires exposed is facing down. If a plug won’t fit easily into a port connector, don’t force it. Doing so will damage the plug and the connector.
Connecting Micro Cable connectors to Micro Expansion Board Ports
Take extra care when inserting the micro connectors to micro ports of Micro Expansion Boards. Connecting Micro Bit Lights to Micro Expansion Boards is similar to connecting lights and cables to Strip Lights. With the expansion board facing up, ensure the side of the connector with the wires exposed is facing down. If a plug won’t fit easily into a port connector, do not force it. Use your fingernail to push the plastic part of the connector to the micro port.Installing Bit Lights under LEGO® bricks and plates.
When installing Bit Lights under LEGO® pieces, ensure they are placed the correct way up (Yellow LED component exposed). You can either place them directly on top of LEGO® studs or in between.
OK, Let’s Begin!
1.) 2.) 3.)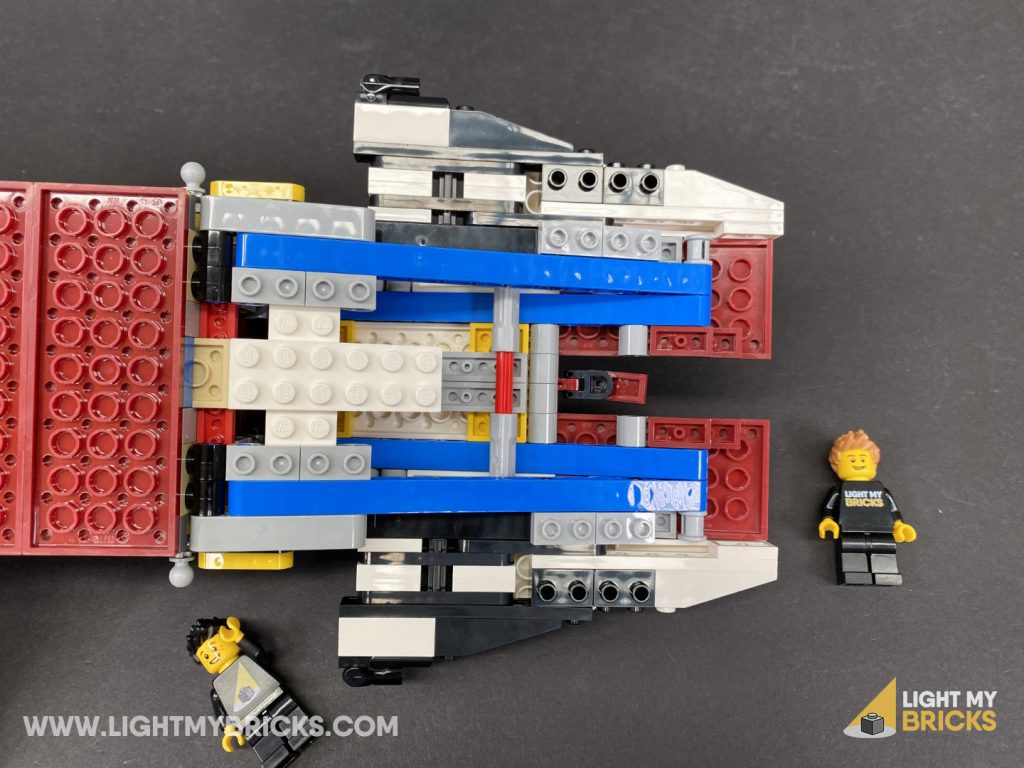 4.)
5.)
6.)
Note: If you experience any issues with the lights not working and suspect an issue with a component, please try a different port on the expansion board to verify where the fault lies (with the light or expansion board). To correct any issues with expansion board ports, please view the section addressing expansion board issues on our online troubleshooting guide.Power Bank Note – If your are using the Light My Bricks USB Power Bank, it is normal for the strip light to turn off automatically after a few minutes. This is due to very low power being consumed from the power bank. You won’t have this issue later on when you connect up more lights. 7.) 8.) 9.) 10.) 11.) 12.)
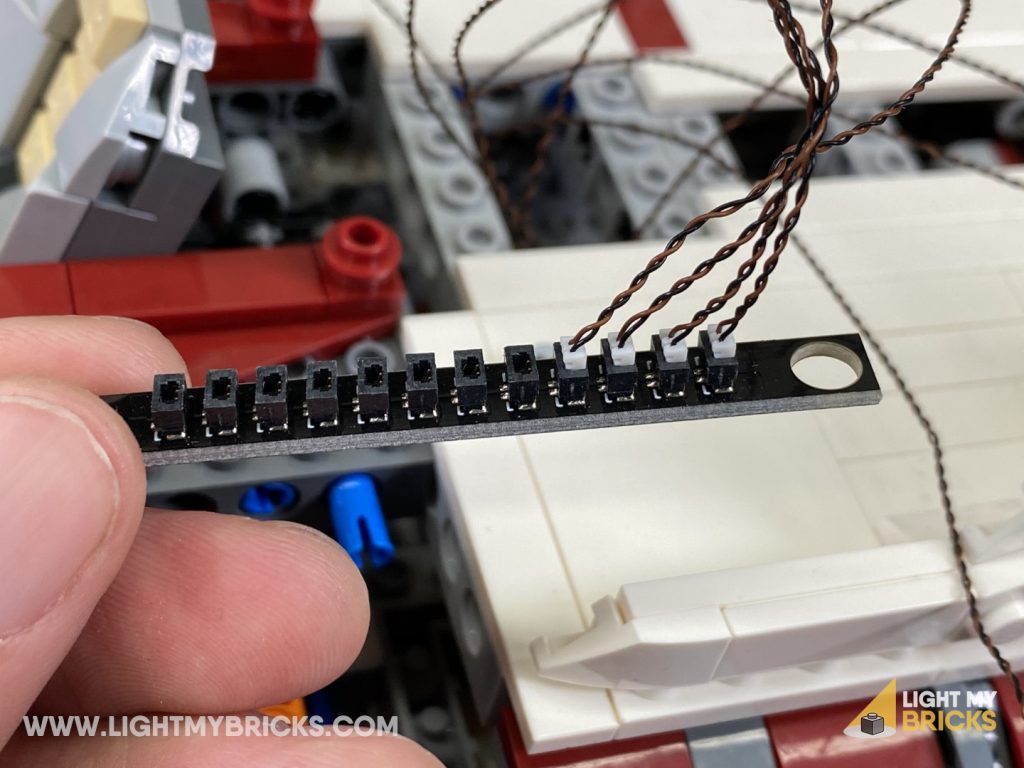 13.)
14.)
15.)
Note: If you experience any issues with the lights not working and suspect an issue with a component, please try a different port on the expansion board to verify where the fault lies (with the light or expansion board). To correct any issues with expansion board ports, please view the section addressing expansion board issues on our online troubleshooting guide.
16.)
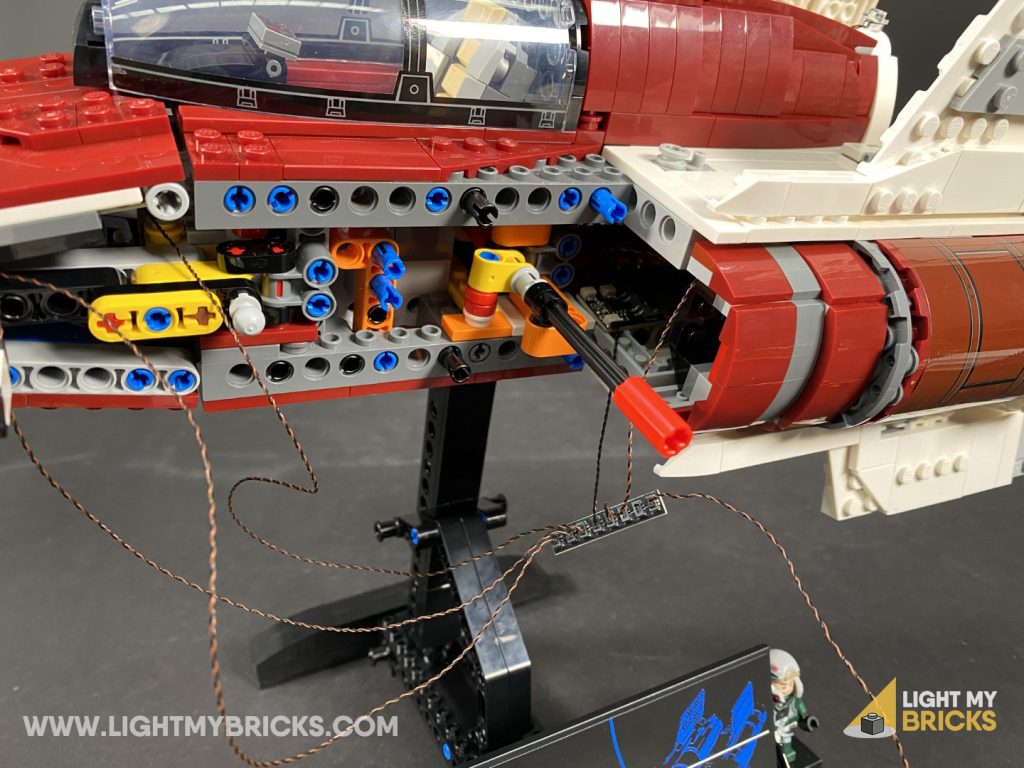 17.)
18.)
19.)
20.)
21.)

 22.)
22.)
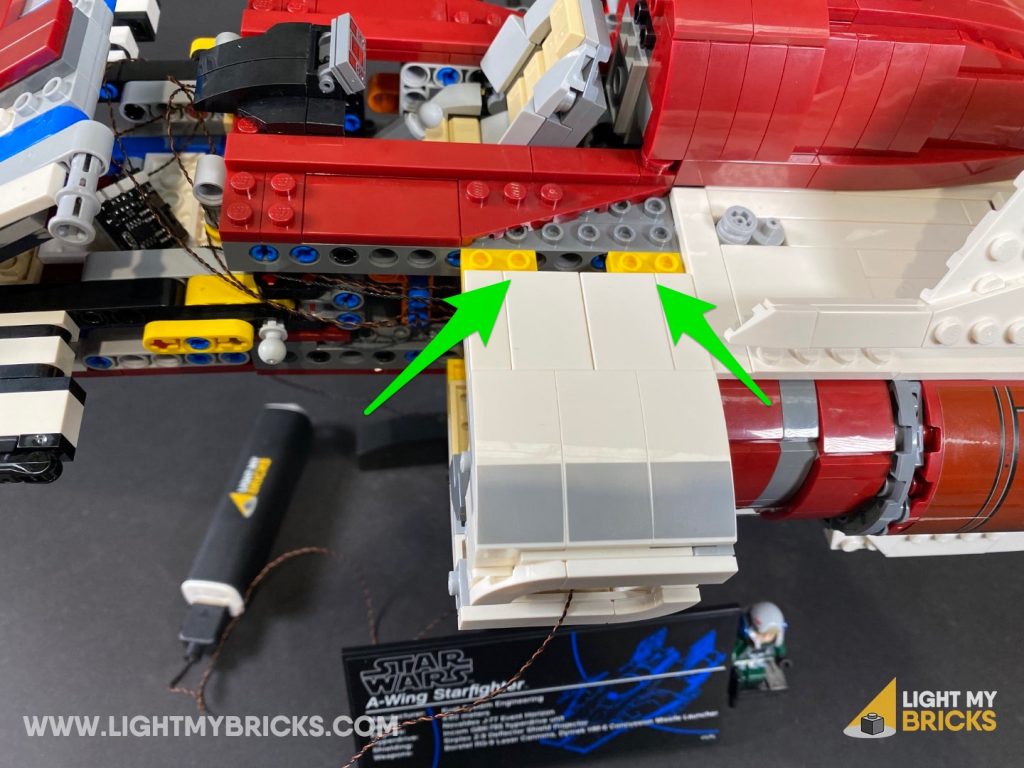
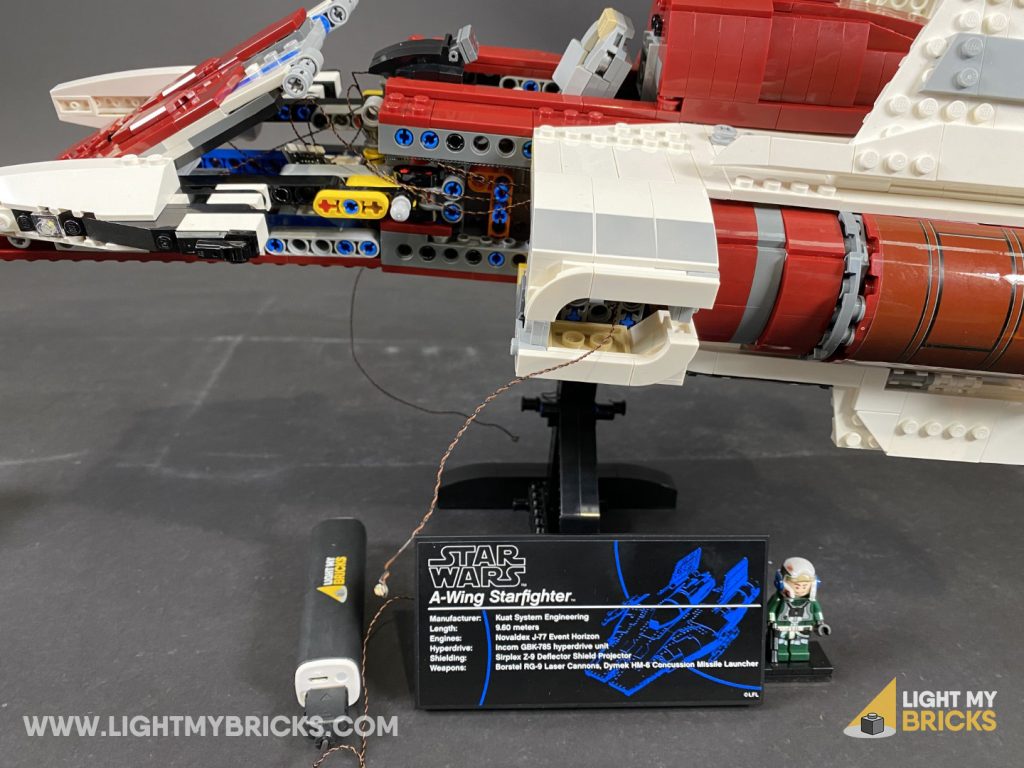 23.)
23.)
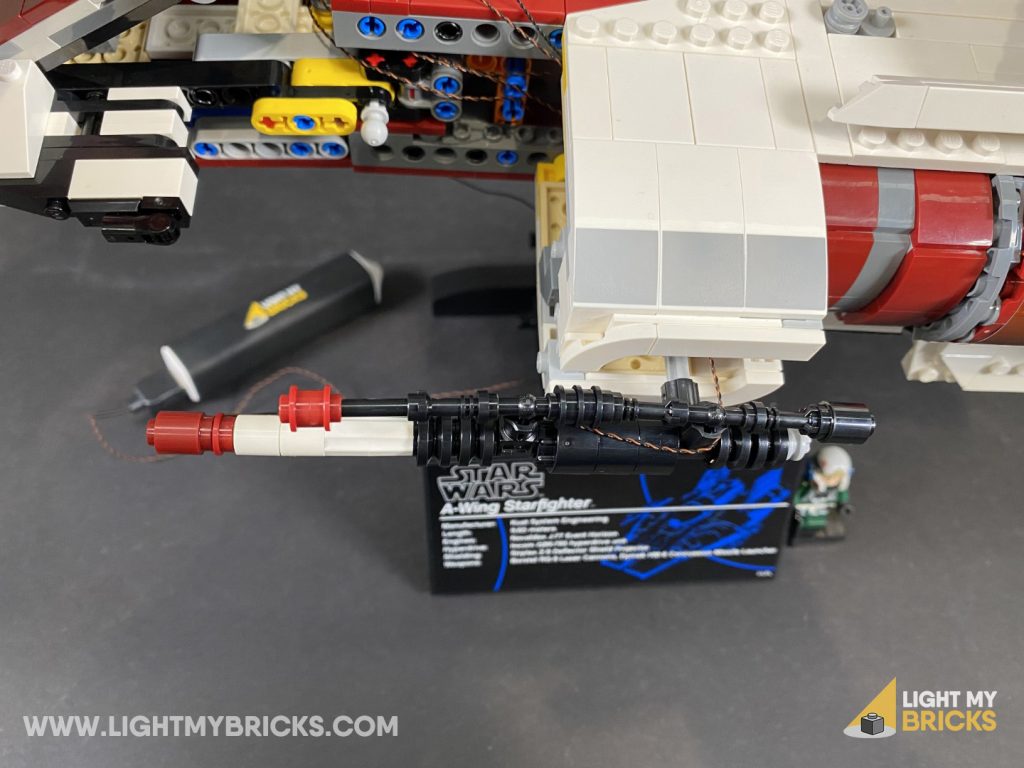 24.)
24.)
 25.)
25.)
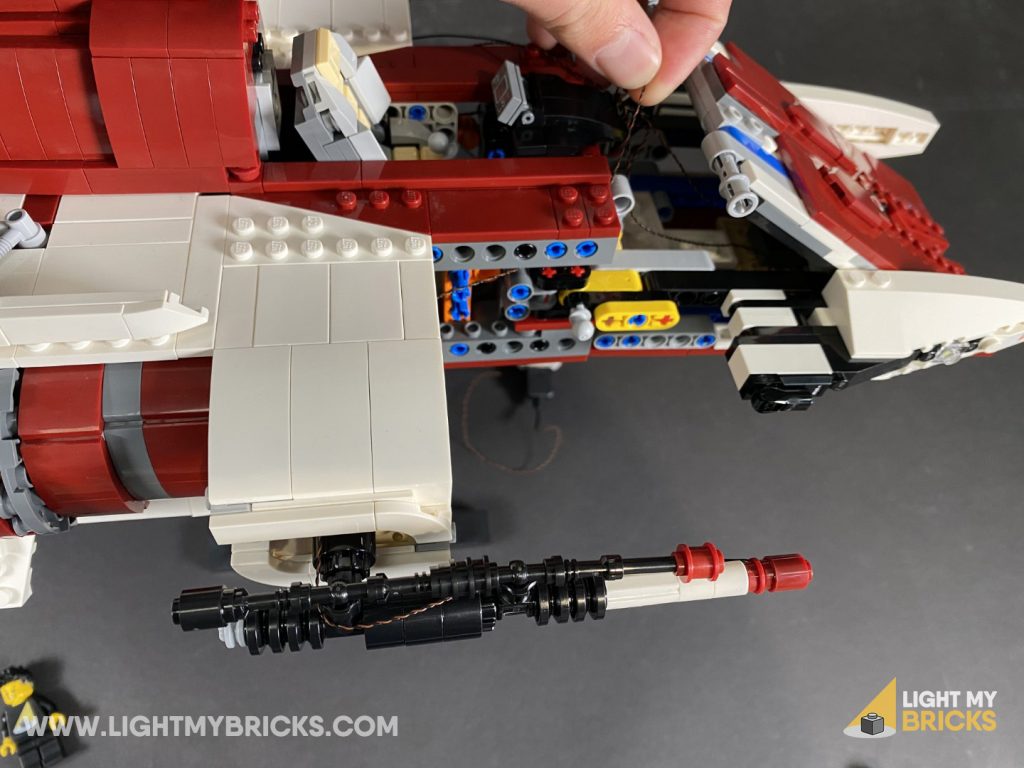 26.)
27.)
Note: If you experience any issues with the lights not working and suspect an issue with a component, please try a different port on the expansion board to verify where the fault lies (with the light or expansion board). To correct any issues with expansion board ports, please view the section addressing expansion board issues on our online troubleshooting guide.
This finally completes installation of the Light My Bricks UCS A-Wing Starfighter Light Kit.
We thank you for purchasing this product and hope you ENJOY!
Light My Bricks: LEGO Star Wars Millennium Falcon 75257 Lighting Kit

The following page is the instructions for the Light My Bricks LEGO Star Wars Millennium Falcon (75257) LED light kit.
If you run into any issues, please refer to the online troubleshooting guide.
To ensure a trouble-free installation of your light kit, please read and follow each step carefully. These instructions can be downloaded in PDF format here
Please note: This page lists instructions for the LED light kit only. If you are wishing to purchase the Light My Bricks LEGO Star Wars Millennium Falcon (75257) LED light kit , please click here to view the product page
Package Contents:
- 7x Cool White 30cm Bit Lights
- 6x White Strip Lights
- 1x Rotating White 30cm Bit Light
- 1x 2-Port Expansion Board
- 1x 8-Port Expansion Board
- 1x Gun Effects Board
- 2x 5cm Connecting Cables
- 4x 15cm Connecting Cables
- 1x 30cm Connecting Cable
- 1x 50cm Connecting Cable
- 1x AA Battery Pack
- 4x Bar 4L (Trans Red)
- 2x Plate 1×6 (Any colour)
Important things to note:
Laying cables in between and underneath bricks
Cables can fit in between and underneath LEGO® bricks, plates, and tiles providing they are laid correctly between the LEGO® studs. Do NOT forcefully join LEGO® together around cables; instead ensure they are laying comfortably in between each stud.
Connecting cable connectors to Expansion Boards
Take extra care when inserting connectors to ports of Expansion Boards. Connectors can be inserted only one way. With the expansion board facing up, look for the soldered “=” symbol on the left side of the port. The connector side with the wires exposed should be facing toward the soldered “=” symbol as you insert into the port. If a plug won’t fit easily into a port connector, do not force it.
Connecting cable connectors to Strip Lights
Take extra care when inserting connectors to ports on the Strip Lights. Connectors can be inserted only one way. With the Strip Light facing up, ensure the side of the connector with the wires exposed is facing down. If a plug won’t fit easily into a port connector, don’t force it. Doing so will damage the plug and the connector.
Connecting Micro Cable connectors to Micro Expansion Board Ports
Take extra care when inserting the micro connectors to micro ports of Micro Expansion Boards. Connecting Micro Bit Lights to Micro Expansion Boards is similar to connecting lights and cables to Strip Lights. With the expansion board facing up, ensure the side of the connector with the wires exposed is facing down. If a plug won’t fit easily into a port connector, do not force it. Use your fingernail to push the plastic part of the connector to the micro port.Installing Bit Lights under LEGO® bricks and plates.
When installing Bit Lights under LEGO® pieces, ensure they are placed the correct way up (Yellow LED component exposed). You can either place them directly on top of LEGO® studs or in between.
OK, Let’s Begin!
1.) Disconnect the following pieces from the front of the Millennium Falcon 2.) Install 2x Cool White 30cm Bit Lights underneath the trans red round plates, then fold the cables down underneath the grey tile before reconnecting it to the ship. 3.) Bring both cables underneath the ship and lay them underneath the following sections. Ensure cables are laid in between studs. 4.) Secure the cables underneath the following plate, then connect them to an 8-Port Expansion Board. Insert 3x New AA Batteries to the AA Battery Pack, then connect the battery pack cable to a spare port on the expansion board. Carefully flip the ship over and turn the Battery Pack ON to test the two front lights are working OK. Note: If you experience any issues with the lights not working and suspect an issue with a component, please try a different port on the expansion board to verify where the fault lies (with the light, expansion board or effects board). To correct any issues with expansion board ports, please view the section addressing expansion board issues on our online troubleshooting guide. 5.) Remove sections surrounding the cockpit, to allow us to install a Cool White 30cm Bit Light. Install the Bit Light LED facing down, then push it slightly up. 6.) Thread the cable through the following hole to lead underneath the ship. Continue threading the cable through the following holes.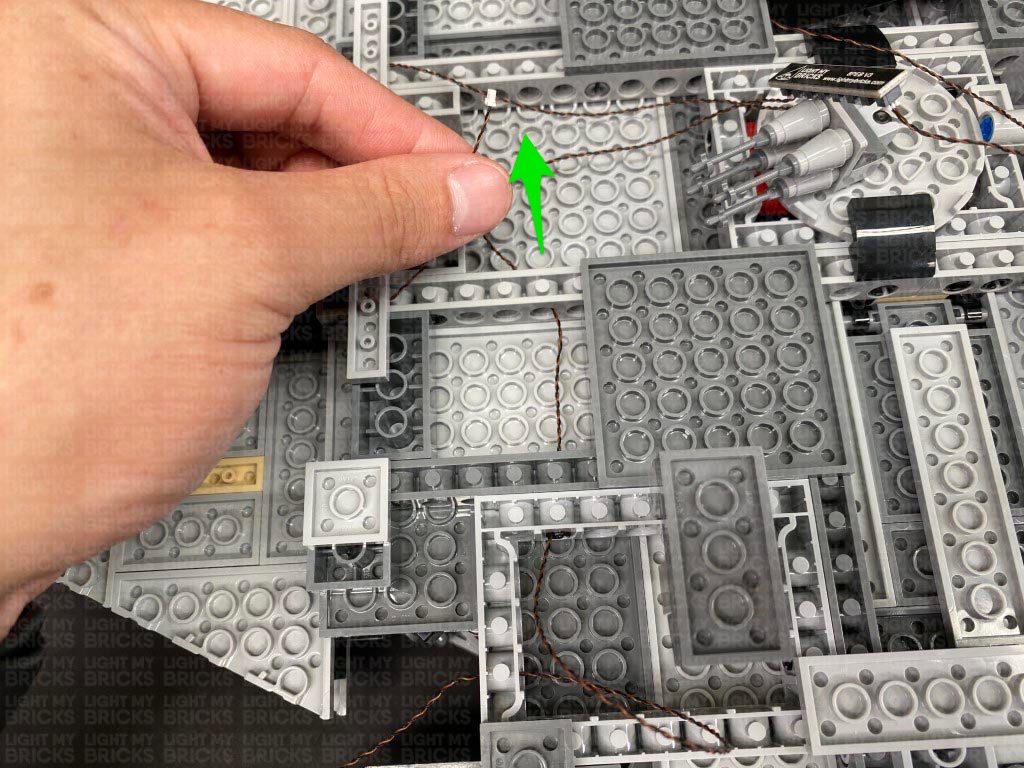 Disconnect the two Cool White Bit Lights from the expansion board, then thread them through the following holes. Take the Cool White Bit Light cable from the cockpit and thread it through the same hole, then connect all three cables to the 8-port expansion board.
7.) Carefully flip the ship back over and reconnect the minifigs and wind shield, ensuring the bit light cable is carefully tucked under.
Turn the Battery Pack ON to test all lights are working OK.
Note: If you experience any issues with the lights not working and suspect an issue with a component, please try a different port on the expansion board to verify where the fault lies (with the light, expansion board or effects board). To correct any issues with expansion board ports, please view the section addressing expansion board issues on our online troubleshooting guide.
8.) Disconnect the AA Battery Pack from the expansion board, then lift up the following roof panel and disconnect the following roof section behind. Connect a 30cm Connecting Cable to a White Strip Light and stick it underneath this roof section. Reconnect this section to the ship.
Tuck the cable in, then bring it underneath the ship and thread it through the following holes to lead towards to where the 8-port expansion board is situated.
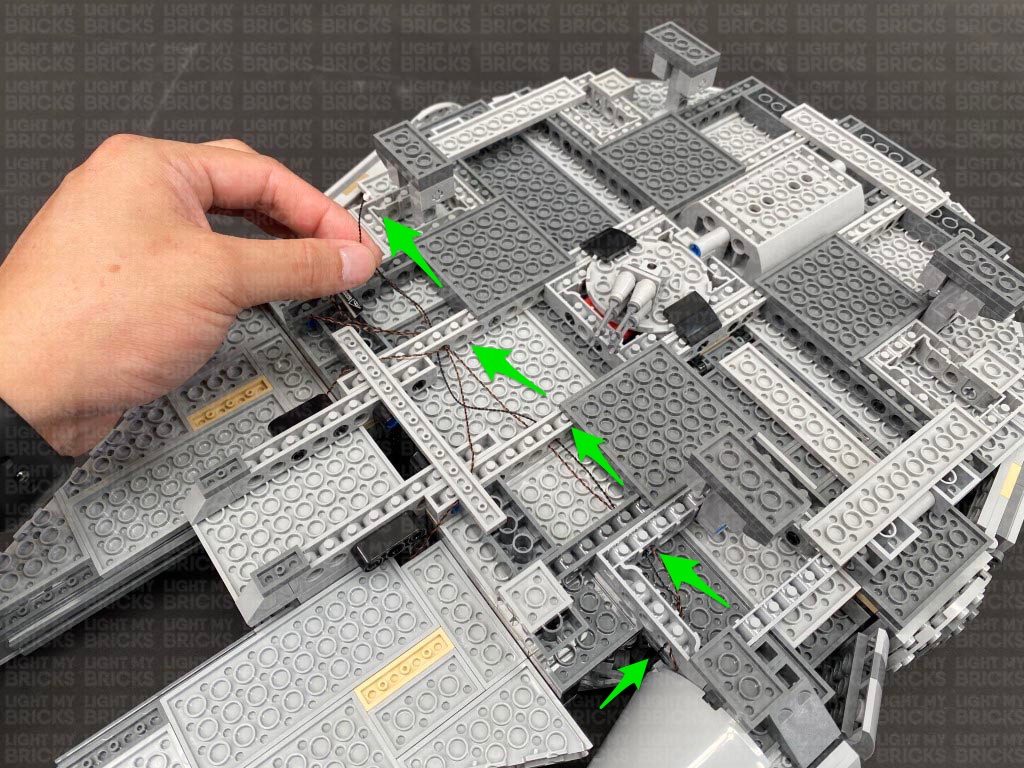 Connect the cable to a spare port on the expansion board, then connect the AA Battery Pack again and turn it ON to test the strip light is working OK.
Note: If you experience any issues with the lights not working and suspect an issue with a component, please try a different port on the expansion board to verify where the fault lies (with the light, expansion board or effects board). To correct any issues with expansion board ports, please view the section addressing expansion board issues on our online troubleshooting guide.
9.) Lift up the following roof panels, then connect a 15cm Connecting Cable to another White Strip Light. Stick the strip light to a provided LEGO Plate 1×6 then mount it underneath the roof panel as shown below.
Close the panel and thread the cable down underneath the ship through the following gaps and holes to connect to the 8-Port Expansion Board, then turn ON the battery pack to test the lights are working OK.
10.) Secure the connecting cable underneath the panel clips by disconnecting the panel, feeding the cable in between clips and reconnecting the panel over the cable.
Disconnect the AA Battery Pack from the expansion board, then twist the cables connected to the expansion board into a neat bunch.
11.) Lift up the following roof panel. Connect a 50cm Connecting Cable to another White Strip Light, then connect a 15cm Connecting Cable to the other port. Using it’s adhesive backing, stick the strip light to a provided LEGO Plate 1×6.
Mount the strip light underneath the roof panel (with the 50cm cable on the right side), then secure both cables underneath the panel in between the clips.
12.) Disconnect the rear horizontal panels via the clips on the right, then bring the 50cm Connecting Cable behind and loop it around the clips on the left twice to eliminate excess cable.
Reconnect the panel, then bring the cable underneath and thread it down the following space. Pull the cable down securely, then bring the cable underneath the ship. Flip the ship over and thread the cable through the following holes to connect it to a spare port on the 8-Port Expansion Board.
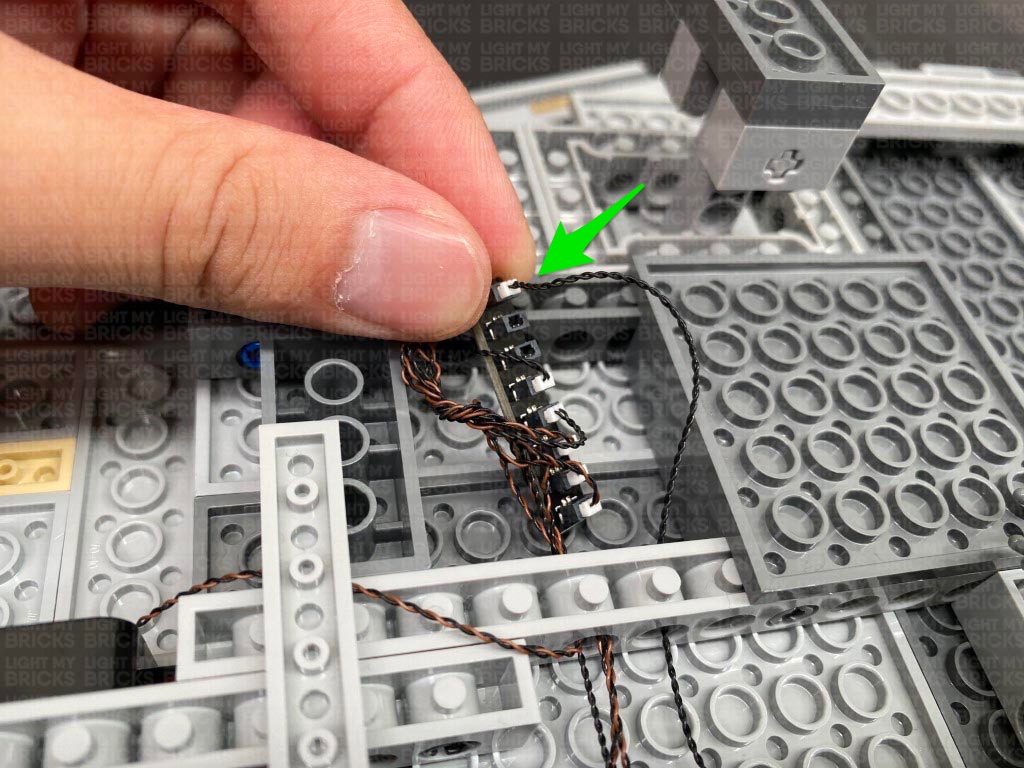 Disconnect the following dark grey plate and lay the 50cm cable underneath in between studs. Reconnect the plate over the top.
13.) Lift up the back roof panels and thread the AA Battery Pack cable down the following hole. Disconnect the beige coloured plate, then position the battery pack inside ensuring the switch is facing up. Secure the Battery Pack from moving around by repositioning the following crate above.
Close the rear roof panels to securely hold the AA Battery Pack, then carefully flip the ship over (to prevent the AA Battery pack from falling out) and pull the battery pack cable out from underneath.
14.) Connect a 15cm Connecting Cable to a 2-Port Expansion Board, then connect the Battery Pack cable underneath the ship to the other port.
Connect the other end of the 15cm Connecting Cable to a spare port on the 8-port expansion board, then secure the cable underneath the following dark grey plate as well as the black curved plate toward the right.
Turn ON the Battery Pack to test the lights installed so far are working OK.
Note: If you experience any issues with the lights not working and suspect an issue with a component, please try a different port on the expansion board to verify where the fault lies (with the light, expansion board or effects board). To correct any issues with expansion board ports, please view the section addressing expansion board issues on our online troubleshooting guide.
15.) Take the other end of the 15cm cable from the back of the ship and thread it down the space behind the clips, then disconnect the long grey horizontal bar from the top.
Disconnect the right side of the bottom horizontal bar and bring the 15cm cable up underneath before reconnecting the bar.
16.) Connect the 15cm Cable to a White Strip Light. Connect another 2x White Strip Lights to the first strip light using 2x 5cm Connecting Cables.
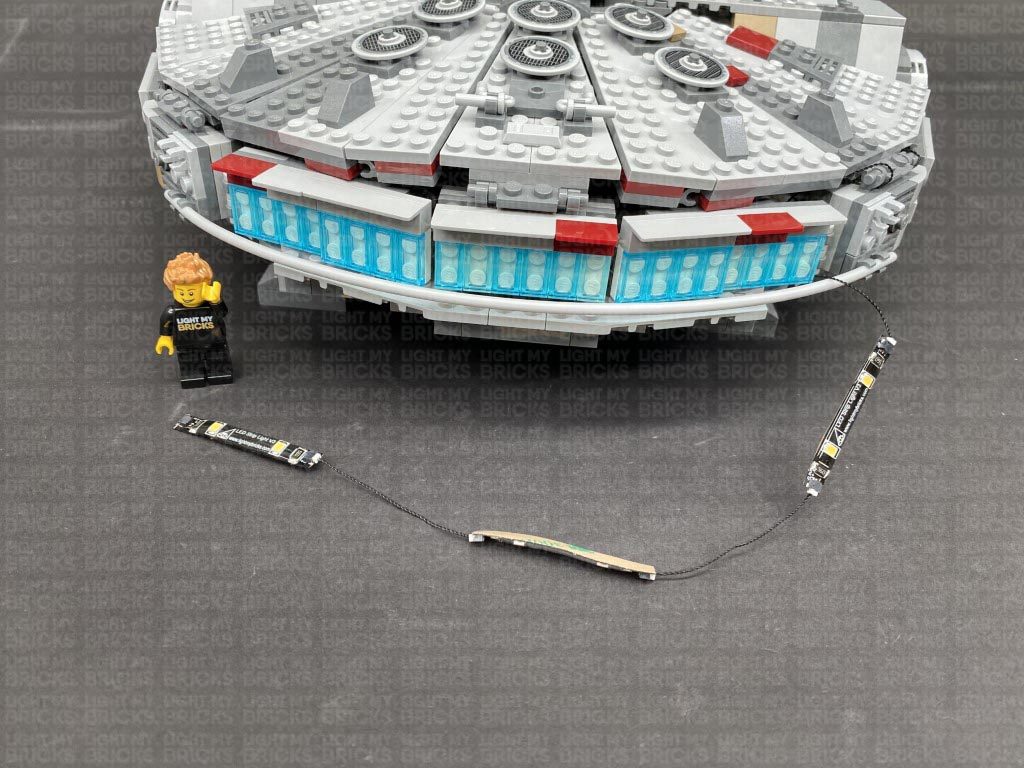 17.) Stick the first two Strip Lights underneath the angled tiles above the jet lights, then tuck in any excess cable to the right and left gaps as shown below.
18.) Lift up the following roof panel, then disconnect the hyperdrive unit and disassemble it as per below.
Place the Rotating White 30cm Bit Light inside and secure it in place by reconnecting the trans blue wheel. Wind the excess cable around the wheel several times until you have about 8-10cm of cable left.
19.) Reconnect the hyperdrive unit to the ship and thread the cable down underneath the panel clips, pulling it down from the outside. Disconnect the left clips from the bottom horizontal bar, then connect the rotating bit light cable to the third Strip Light.
Stick the strip light underneath the tiles above the jet lights. Tuck in the excess cables on each side, then reconnect the left side of the horizontal bar.
Reconnect the horizontal bar on the top of the jet lights, then turn ON the AA Battery Pack to test all the lights are working OK.
Note: If you experience any issues with the lights not working and suspect an issue with a component, please try a different port on the expansion board to verify where the fault lies (with the light, expansion board or effects board). To correct any issues with expansion board ports, please view the section addressing expansion board issues on our online troubleshooting guide.
20.) Disconnect the upper cannon section, then disassemble it as shown below.
21.) Install 4x Cool White 30cm Bit Lights to the 2×2 plate ensuring all the cables are laid as shown below.
Insert 4x Provided Bar 4L Trans Red, then reconnect this section to the cannon base.
22.) Twist the cables around each other to braid the 4 cables together about 10cm down from the top. Reconnect sections, then reconnect this section to the top of the ship while bringing the cables around the right side.
Connect the four bit light cables to the 4 OUT ports on the Gun Effects Board. Set the effect switch to the far right setting for the “Laser Gun” effect. Alternatively, you can choose from the 2 other programmed effects (cannon, machine gun)
23.) Connect a 15cm Connecting Cable to the IN port (+5V), then remove the control chair from inside. Thread the cable all the way down the following hole inside, then close the panel and carefully place the ship onto it’s right side so we can access underneath. Pull the cable out from underneath and connect it to the remaining port on the 8-Port Expansion Board.
Secure the connecting cable underneath the following dark grey plate.
Turn ON the Battery Pack to test the upper cannon lights and effects are working OK. Each cannon light should be firing individually at a time in sequence.
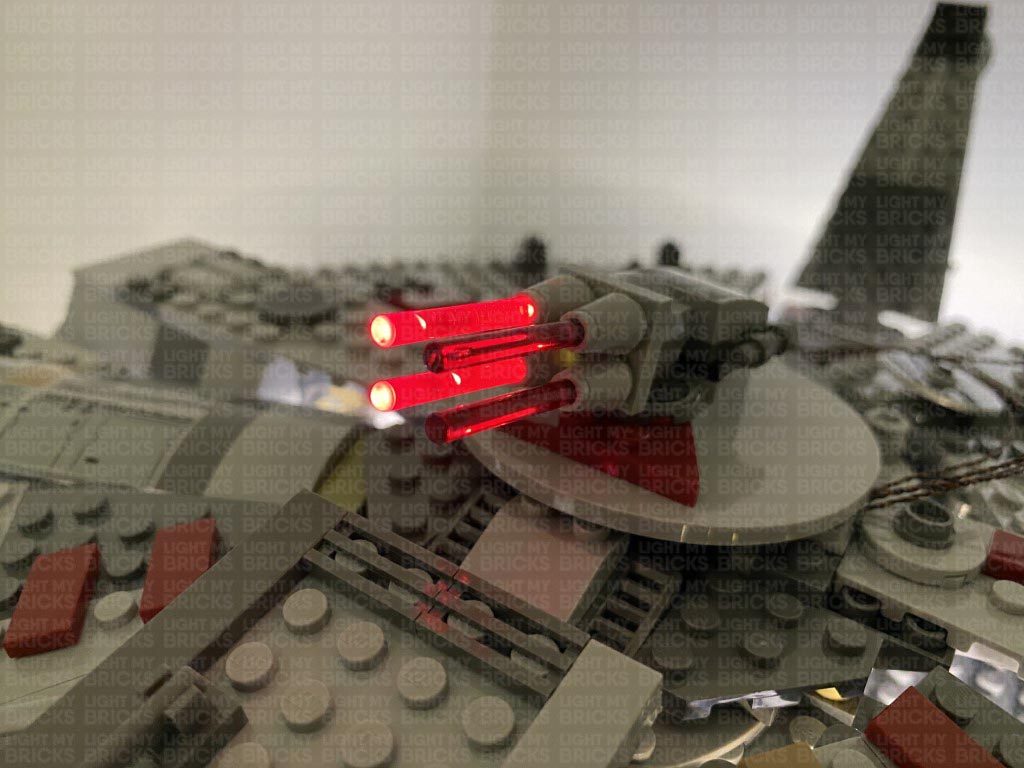 24.) Eliminate excess cables from the cannon lights by twisting and folding them together into a neat bunch. Ensure you leave enough cable slack for the cannon to move from side to side. Reconnect the control chair inside, then neatly place all the components inside before closing the panel.
This finally completes installation of the Light My Bricks Star Wars Millennium Falcon 75257 Light Kit.
We thank you for purchasing this product and hope you ENJOY!
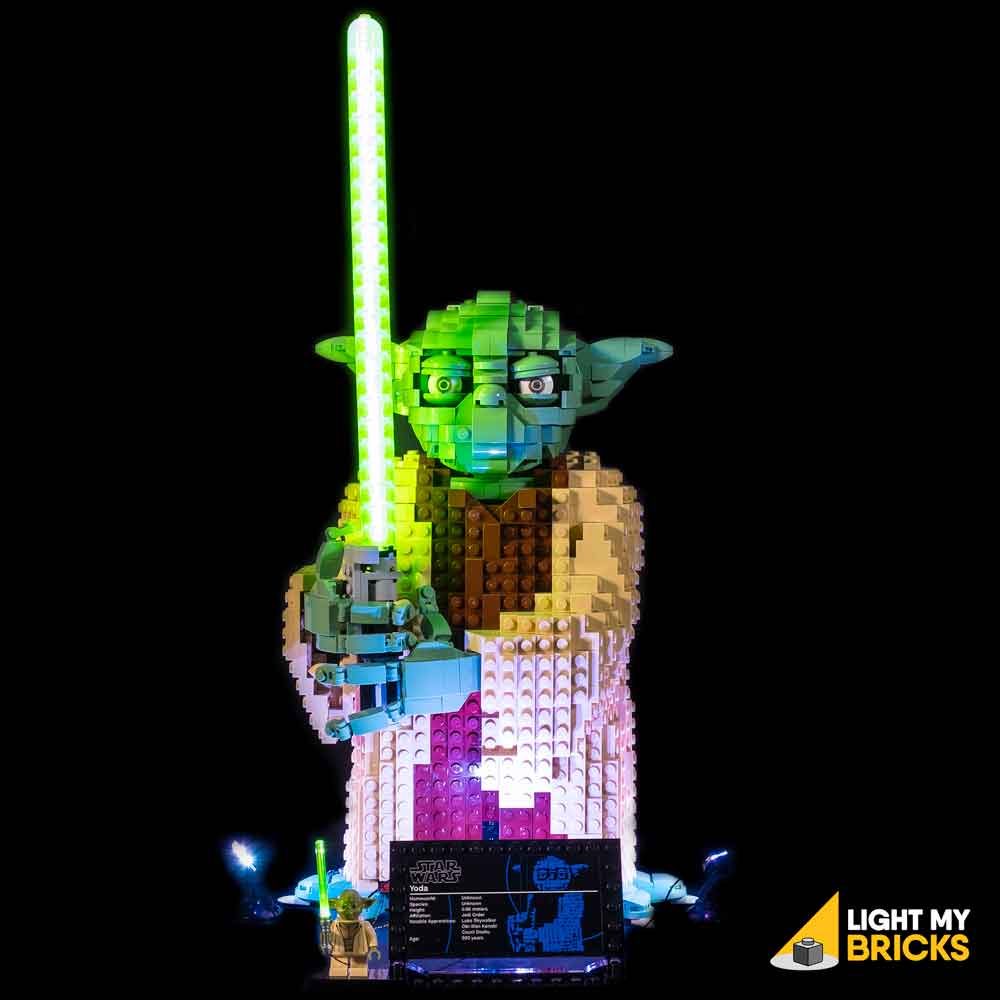
Light My Bricks: LEGO Star Wars Yoda 75255 Lighting Kit

The following page is the instructions for the Light My Bricks LEGO Star Wars Yoda (75255) LED light kit.
If you run into any issues, please refer to the online troubleshooting guide.
To ensure a trouble-free installation of your light kit, please read and follow each step carefully. These instructions can be downloaded in PDF format here
Please note: This page lists instructions for the LED light kit only. If you are wishing to purchase the Light My Bricks LEGO Star Wars Yoda (75255) LED light kit , please click here to view the product page
Package Contents:
- 2x LED Light Bar 12cm (76 LEDs)
- 1x Light My Bricks Lightsaber – Green
- 1x Pulse Effects Board
- 2x 6-Port Expansion Board
- 2x 5cm Connecting Cables
- 1x 15cm Connecting Cables
- 1x USB Power Cable
- 1x RGB Control Board and Remote Control
- 3x RGB Strip Lights
- 3x RGB Connecting Cable 15cm
- 1x Bar 3L (any colour)
- 3x Black Plate 1×6
- 3x Black Plate 1×2 modified w Handle on End
- 3x Black Tile 1×1 w Clip
- 2x Black Dish Inverted 3×3
Important things to note:
Laying cables in between and underneath bricks
Cables can fit in between and underneath LEGO® bricks, plates, and tiles providing they are laid correctly between the LEGO® studs. Do NOT forcefully join LEGO® together around cables; instead ensure they are laying comfortably in between each stud.
Connecting cable connectors to Expansion Boards
Take extra care when inserting connectors to ports of Expansion Boards. Connectors can be inserted only one way. With the expansion board facing up, look for the soldered “=” symbol on the left side of the port. The connector side with the wires exposed should be facing toward the soldered “=” symbol as you insert into the port. If a plug won’t fit easily into a port connector, do not force it.
Connecting cable connectors to Strip Lights
Take extra care when inserting connectors to ports on the Strip Lights. Connectors can be inserted only one way. With the Strip Light facing up, ensure the side of the connector with the wires exposed is facing down. If a plug won’t fit easily into a port connector, don’t force it. Doing so will damage the plug and the connector.
Connecting Micro Cable connectors to Micro Expansion Board Ports
Take extra care when inserting the micro connectors to micro ports of Micro Expansion Boards. Connecting Micro Bit Lights to Micro Expansion Boards is similar to connecting lights and cables to Strip Lights. With the expansion board facing up, ensure the side of the connector with the wires exposed is facing down. If a plug won’t fit easily into a port connector, do not force it. Use your fingernail to push the plastic part of the connector to the micro port.Installing Bit Lights under LEGO® bricks and plates.
When installing Bit Lights under LEGO® pieces, ensure they are placed the correct way up (Yellow LED component exposed). You can either place them directly on top of LEGO® studs or in between.
OK, Let’s Begin!
1.) We will first install the LED light bars inside the lightsaber blade. Disconnect the lightsaber from Yoda, then carefully detach the left side section as show below: Disassemble the lightsaber, then disconnect half of the trans green round bricks to allow us to fully remove the white technic axle bar. 2.) Organise the lightsaber blade into two equally long sections, then take out an LED Light Bar 12cm. Thread the top of the bar through the bottom half of the blade (through the technic hole). Thread the bar all the way through, then pull it out from the top. Continue to thread the entire bar through the bottom of the top half of the blade as shown below. Bring the bottom half of the blade up and reconnect it to the top half. Take the second LED Light Bar 12cm and thread the top of the bar all the way through the bottom of the blade until it meets the bottom of the first led light bar. The cable from the first light bar should be kept inside one of the four grooves from the Technic axle. Note: The two LED Light Bars have been designed to allow you to cut them to size, in case you have a slightly shorter lightsaber blade due to display reasons (less trans bright green bricks in the blade). If you find the LED Bars are too long, simply cut them to size at the top end of the bar (not the cable end). Ensure that you cut the bar in between the LEDs and the cut is above the circuit board resister. It is completely safe to cut the board. The bottom of the second LED Bar should end just before the base of the last trans bright green round brick.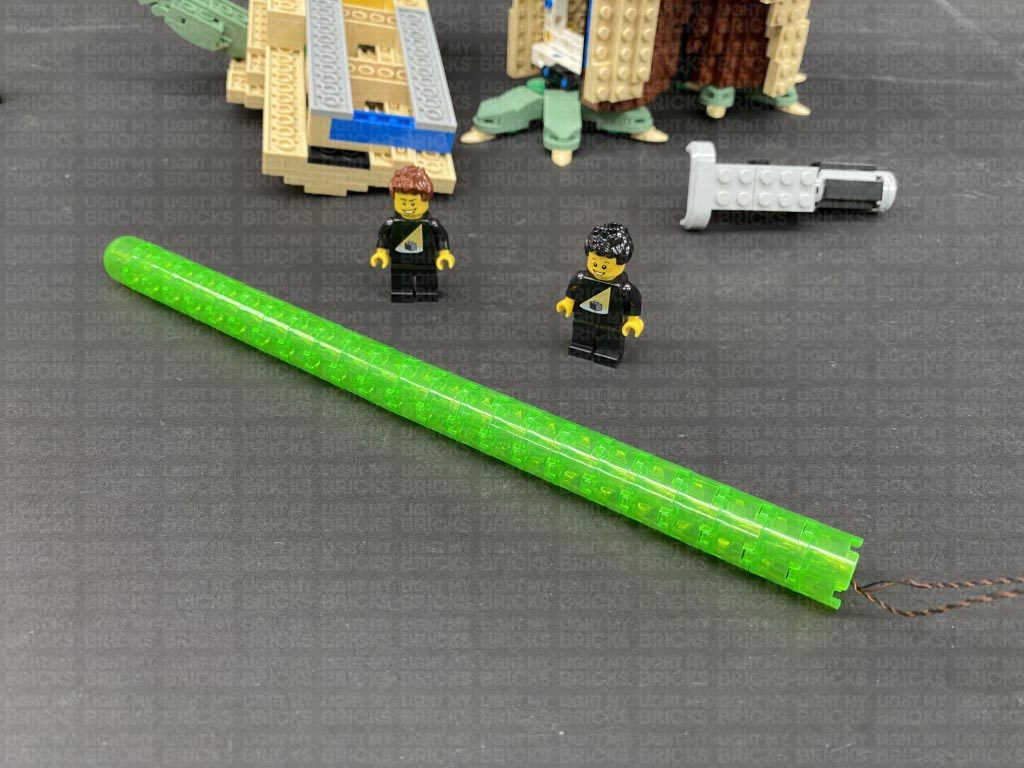 3.) Group the ends of the two light bar cables together and thread them through the top of the three 2×2 round plates. Pull the cables all the way out from underneath the plates, then reconnect them to the bottom of the blade.
Ensure the two cables are laid together inside one of the axle hole grooves, then take the provided LEGO Bar 3L (any colour) and connect it to the axle hole. The provided LEGO bar will be used to hold the blade to the handle section. The cables should be secured neatly inside the axle groove as shown below:
Ensure the two cables are laid through the gap of the bottom of the light grey 2×2 round plate, then reconnect this entire section to the handle section via the provided LEGO bar. Ensure the cables are laid out the opposite side of the lightsaber button, then reconnect the upper part of the handle.
4.) Connect the two LED light bar cables to a 6-Port Expansion Board. Take a 5cm Connecting Cable and connect it to the end port on the expansion board, then connect the other end of the cable to one of the OUT ports on the Pulse Effects Board (PFX).
Take a 15cm Connecting Cable and connect it to the IN port on the Pulse Effects Board, then connect the other end of the cable to a new 6-Port Expansion Board.
Take a USB Power Cable and connect it to the end port on the 6-port Expansion Board from previous step, then connect the USB connection end to your USB Power Bank or wall adaptor (sold separately). Turn it ON to test the LED light bars in the blade are working OK. Take this time to configure your desired pulse effect by choosing from one of the three settings via the switch. Fast Pulse, Medium Pulse, Slow Pulse.
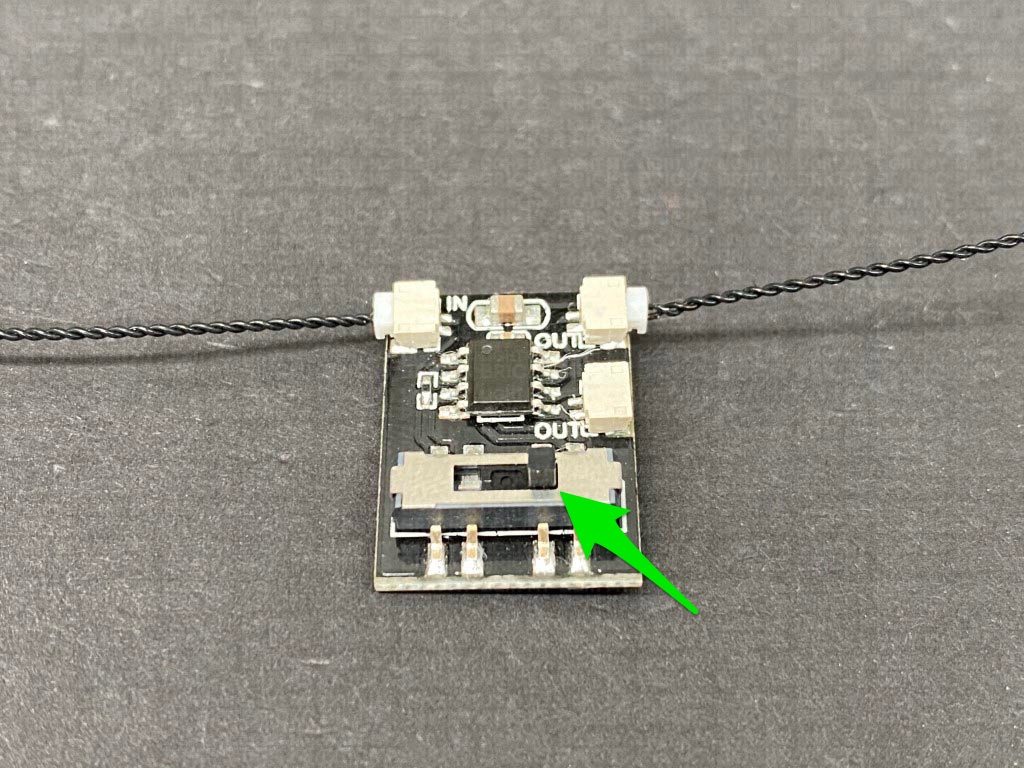
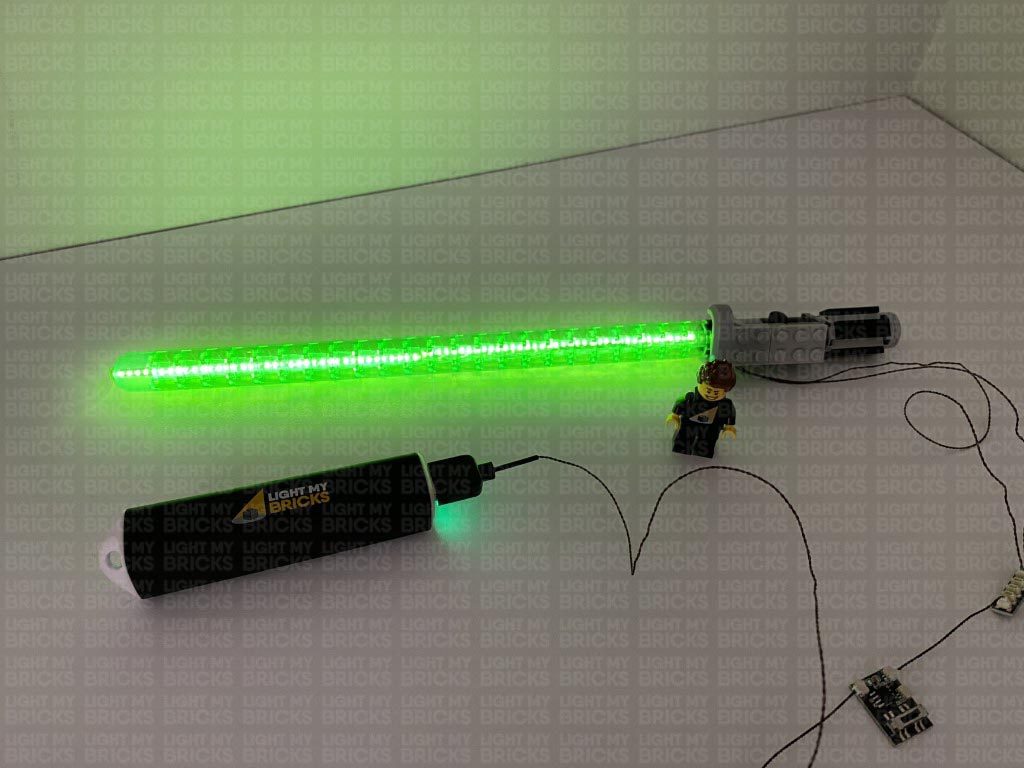 Note: If you experience any issues with the lights not working and suspect an issue with a component, please try a different port on the expansion board to verify where the fault lies (with the light, expansion board or effects board). To correct any issues with expansion board ports, please view the section addressing expansion board issues on our online troubleshooting guide.
5.) Take out the Light My Bricks Lightsaber Green and connect it to a spare port on the first 6-port expansion board (the same board the light bars are connected to).
Bring the Yoda left side section we disconnected at the start, then disconnect the following light grey 2×12 plate from the inside of it.
6.) Reconnect the lightsaber to Yoda’s hand ensuring the cables are laid behind. Bring the two cables down the inside of the left section and lay them inside as shown below. Reconnect the 2×12 plate with the cables laid underneath.
Fold the two cables into a neat bunch as shown below, then tuck it inside the following space, along with the 6-port expansion board and pulse effects board.
Carefully reconnect the entire left side section ensuring the cables are neatly laid out underneath.
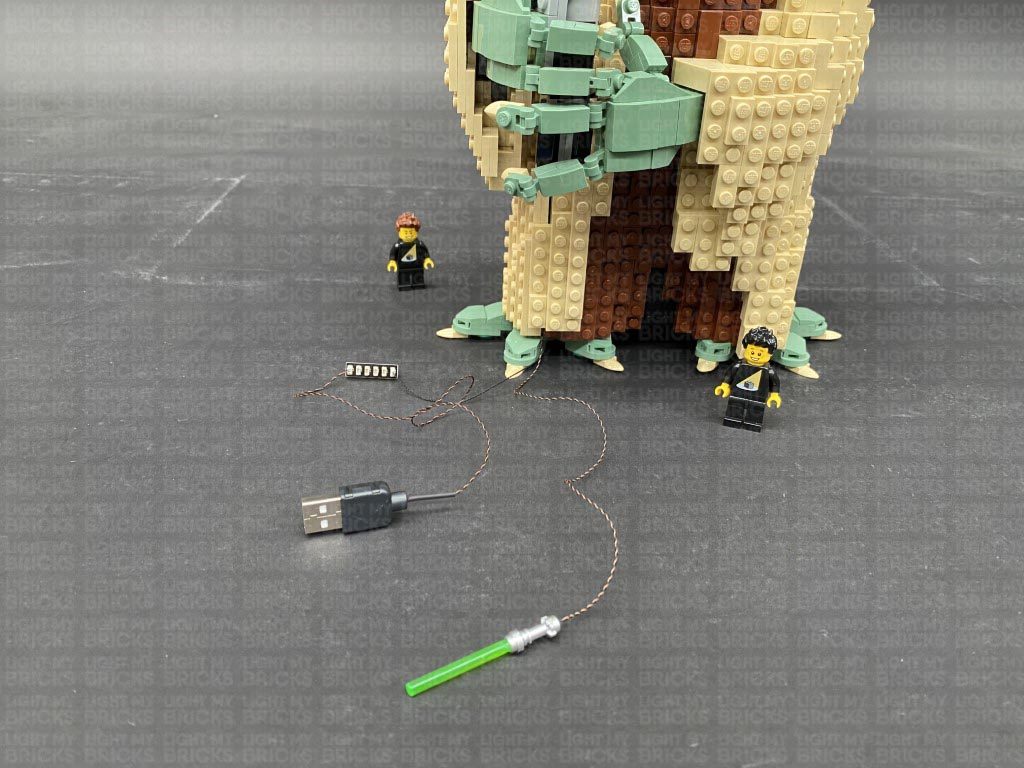 7.) Take the RGB Control Board and connect a 5cm Connecting Cable to the IN port (+5V). Connect the other end of the connecting cable to a spare port on the 6-port expansion board near Yoda’s feet. Ensure the IR sensor from the RGB control board is facing up.
Take the Yoda display stand and turn it around, then take the following provided Black LEGO pieces:
- Black Plate 1×6
- Black Plate 1×2 modified w Handle on End
- Black Tile 1×1 w Clip
- 2x Black Plate 1×6
- 2x Black Plate 1×2 modified w Handle on End
- 2x Black Tile 1×1 w Clip
- 2x Black Dish Inverted 3×3
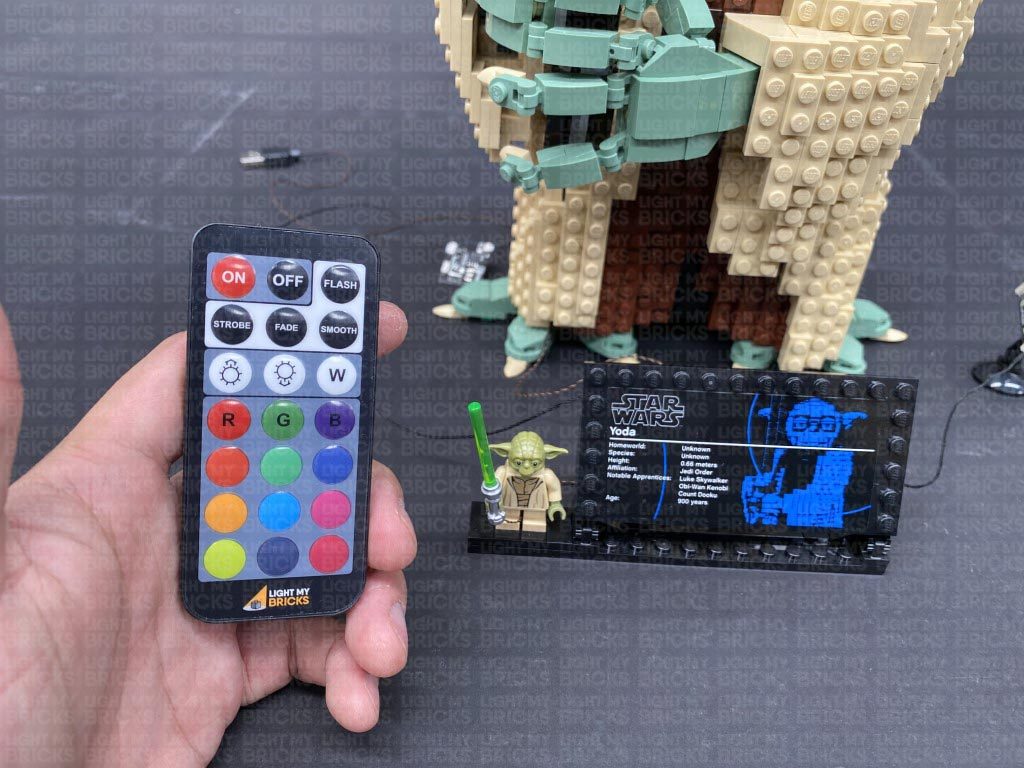
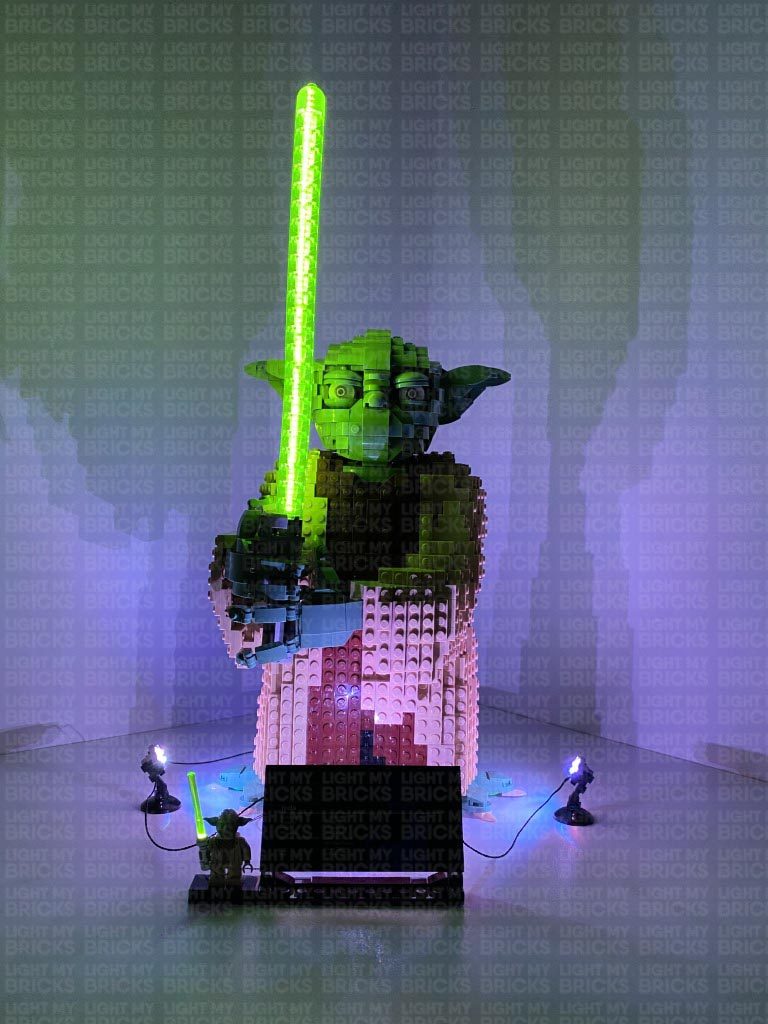
This finally completes installation of the Light My Bricks Star Wars Yoda 75255 Light Kit.
We thank you for purchasing this product and hope you ENJOY!
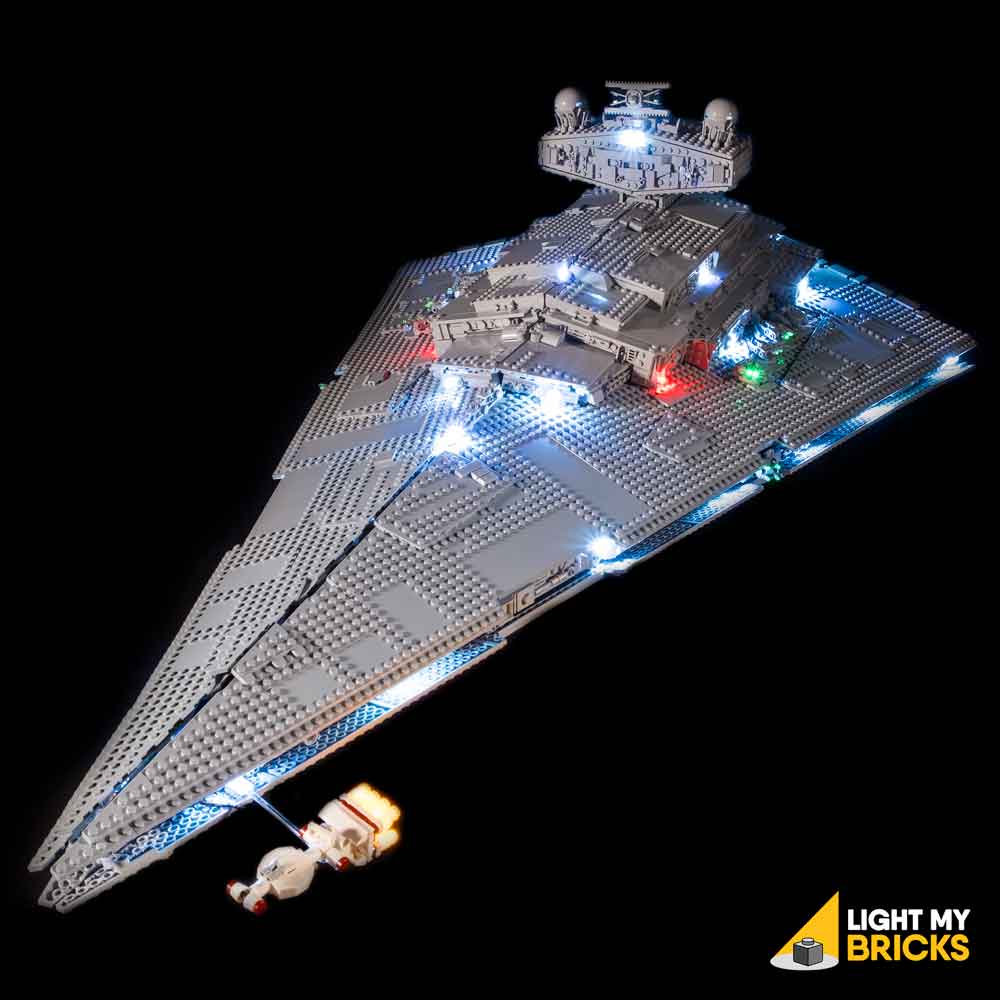
Light My Bricks: LEGO Star Wars UCS Imperial Star Destroyer 75252 Lighting Kit (Part 2)

The following page is the instructions for Part 2 of the Light My Bricks LEGO Star Wars UCS Imperial Star Destroyer (75252) LED light kit.
Click here for Part 1 of the instructions
If you run into any issues, please refer to the online troubleshooting guide.
To ensure a trouble-free installation of your light kit, please read and follow each step carefully. These instructions can be downloaded in PDF format here
Please note: This page lists instructions for the LED light kit only. If you are wishing to purchase the Light My Bricks LEGO Star Wars UCS Imperial Star Destroyer (75252) LED light kit , please click here to view the product page
OK, Let’s begin Part 2!
47.) We will now install lights to the back jets. First disconnect the three larger jet sections, then follow the images below to disassemble one of them. 48.) Take a Cool White 30cm Large Bit Light and with the LED facing up, place it in the centre of the bottom of the rigid 2×2 round brick. Secure the Bit Light in place by reconnecting the trans light blue dishes over the top. You should be able to clearly see the LED peaking through the centre of the dishes. Flip this section over and fold the cable down against the outside of the rigid brick, then thread the connector end of the cable through the inside of the Jet pieces, pulling the cable all the way out from the other side. Reconnect the round technic pieces back on top, ensuring the yellow technic pin is connecting to the rigid brick on the inside of the jet. Push down the yellow technic pin so that the dark grey brick is flat and can easily reconnect to the back of the ship later.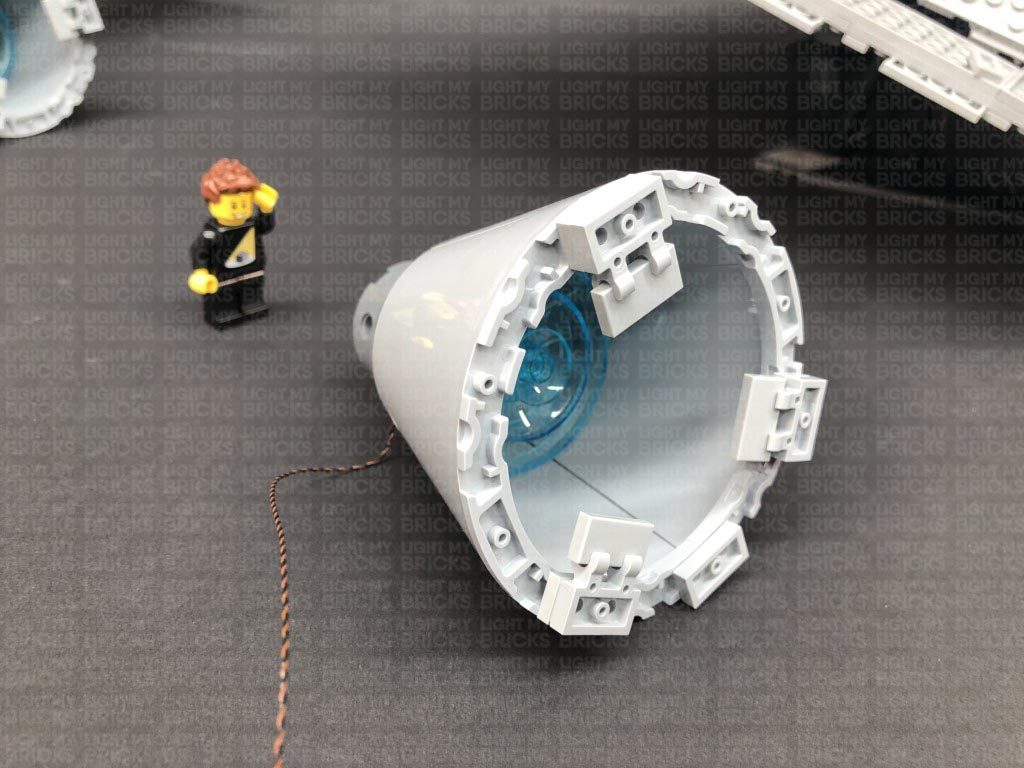 Thread the jet light cable through the space just underneath where the left jet reconnects to, then from the inside of the ship, pull the cable all the way out. Securely reconnect the Jet to the back of the ship.
Connect the Large Bit Light to a new 6-Port Expansion Board.
48.) Follow the previous step to install another Cool White 30cm Large Bit Light to the middle Jet section.
Thread the Bit Light cable through the gap on the top right of where the middle Jet reconnects to. Pull the cable all the way out from the inside of the ship, then securely reconnect the middle Jet to the back of the ship.
From the back of the ship, thread the cable through the following space that leads to the inside, then from the the inside (turn the ship around to the right side), pull the cable all the way out. Locate the same 6-Port Expansion Board we connected the other Jet light to and pull it over to this side, then connect the bit light cable to it.
49.) Install another Cool White 30cm Large Bit Light to the right large Jet (using the same method used in previous steps), then thread the cable through the following gap just underneath where the right jet reconnects to. Pull the cable all the way out from the inside of the ship, then securely reconnect the right Jet to the back of the ship.
Connect the Bit Light cable to the same 6-port Expansion board as per previous steps, then connect a new 5cm Connecting Cable to a spare port. Connect the other end of the 5cm cable to one of the OUT ports on the Pulse Effects Board (PFX)
Take another 5cm Connecting Cable and connect it to the IN port on the Pulse Effects Board, then connect the other end of the cable to a spare port on the 12-Port Expansion Board on the right side of the ship.
Turn ON the power to test the large jet lights are working OK. They should also be pulsing via the effects board. We can configure the desired effect later on when we connect up the other jet lights.
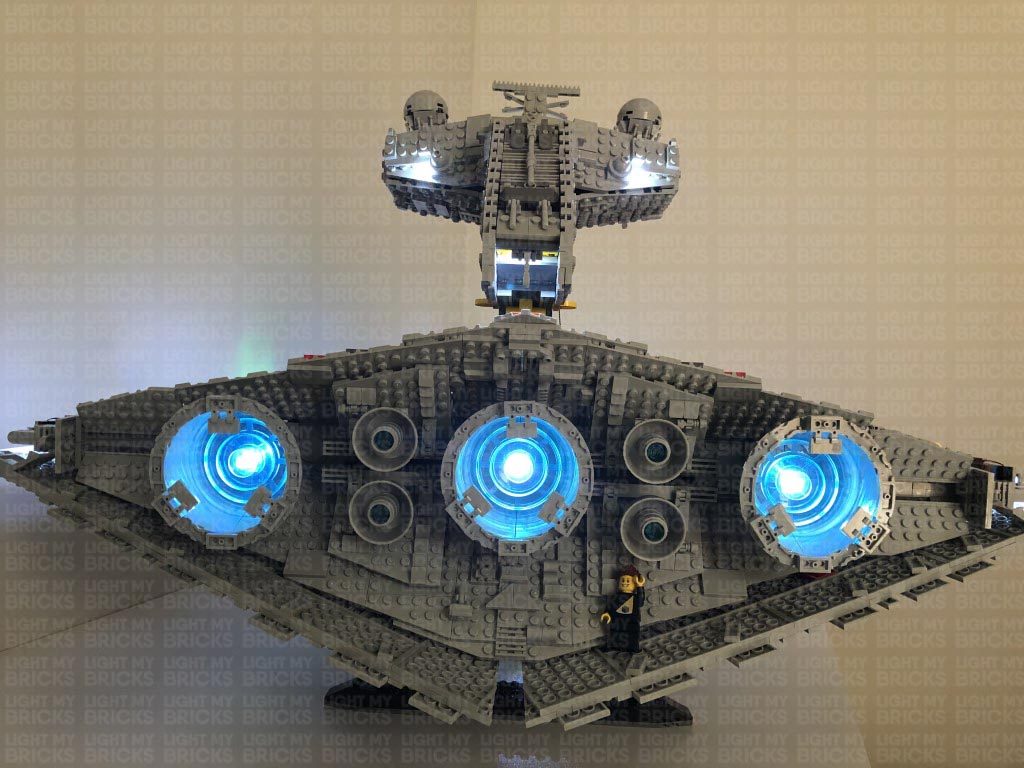 Note: If you experience any issues with the lights not working and suspect an issue with a component, please try a different port on the expansion board to verify where the fault lies (with the light, expansion board, or effects board). To correct any issues with expansion board ports, please view the section addressing expansion board issues on our online troubleshooting guide.
50.) We will now light up the four smaller jet sections. First disconnect all four jets by pulling each one out as shown below:
51.) Take one of the jet sections and disassemble it as shown below, then take a Cool White 30cm Bit Light and thread the connector end of the cable through the top of the the trans light blue round brick. Pull the cable all the way out from the other side, then carefully bend the LED so that it sits flat against the top of the brick. Secure the Bit Light in place by connecting a provided Trans Light Blue Round Plate 1×1 over the top.
Carefully reconnect the black bar inside the round brick, then thread the connector end of the cable along with the black bar through the top of the jet section.
The cable should be laid inside space between the bar and corner axis.
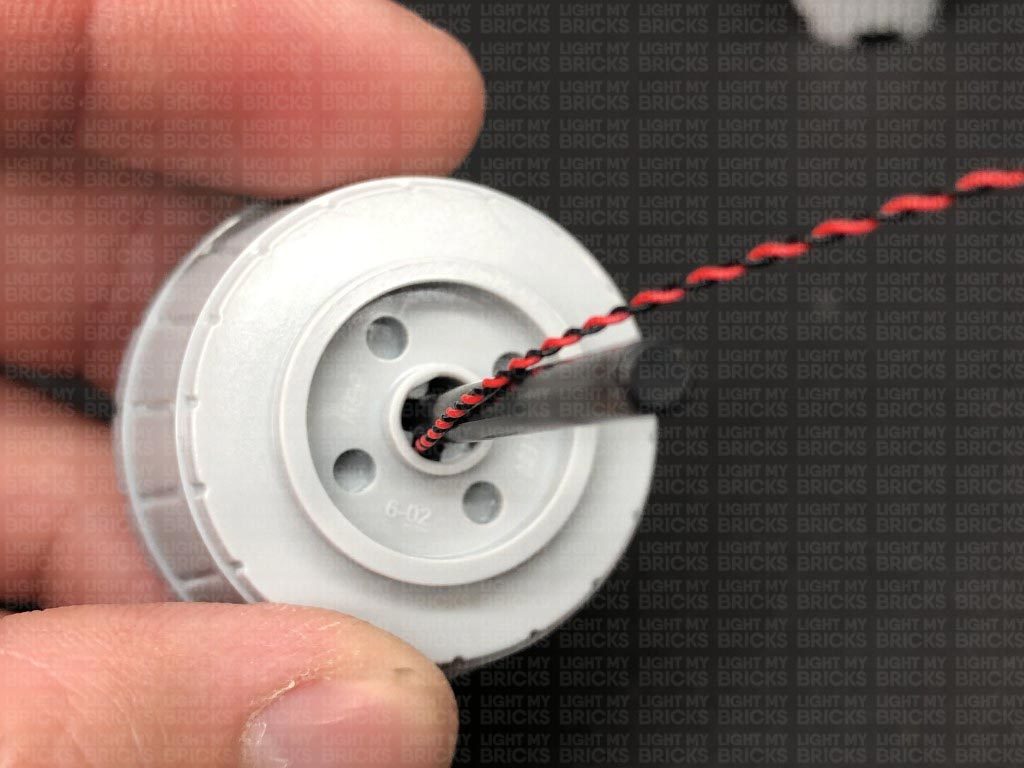 Thread the connector end of the cable along with the black bar through the top of the two rigid 2×2 bricks, then securely reconnect everything together.
Ensure the cable is laid in the space in between black bar and axis.
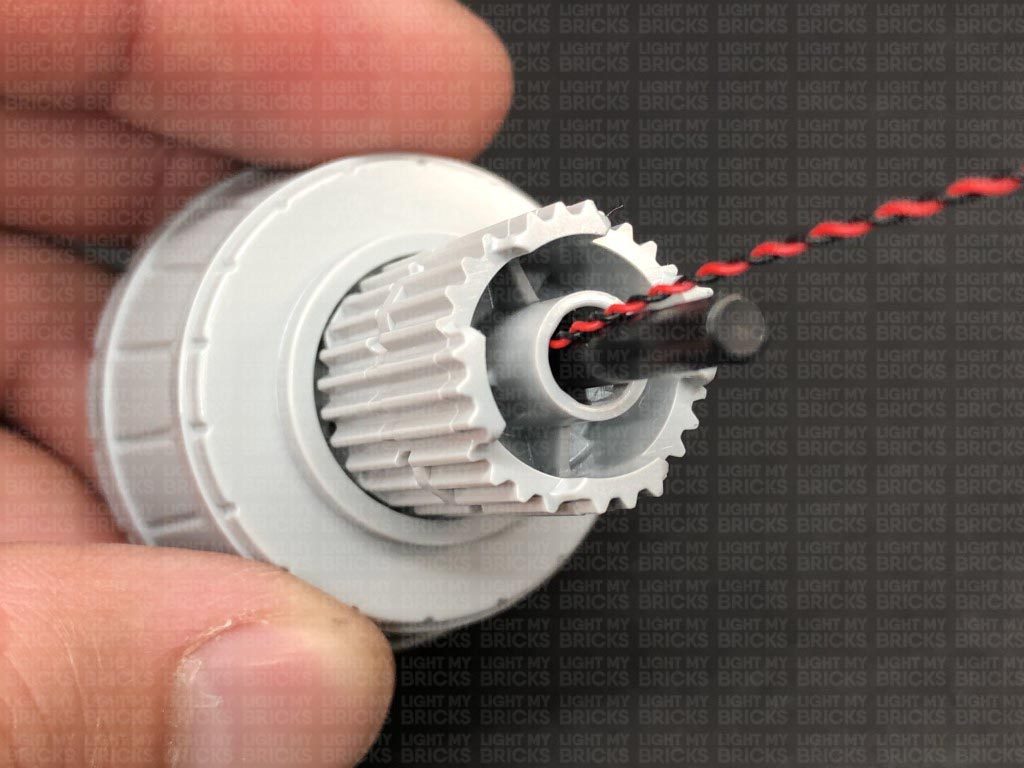 52.) Bring this jet section close to the back of the ship and thread the bit light cable through the following space that leads to the inside of the ship. Pull the cable all the way out from the inside of the ship, then securely reconnect the jet section to the back as shown below.
From the inside of the ship, find the bit light cable and connect it to a new 6-Port Expansion Board.
53.) Using the same method we used to install the first smaller jet light, install another Cool White 30cm Bit Light to another Jet.
Thread the cable through the space just above the bottom jet at the back of the ship before securely reconnecting the jet. From the inside of the ship, pull the bit light cable out and connect it to the same 6-port expansion board we connected the first smaller jet light to.
Thread the 6-Port Expansion Board through the middle space into the right side of the ship. This will make it easier to locate the expansion board when we need to connect the other two smaller jets on the right side.
54.) Install another 2x Cool White 30cm Bit Lights to the two remaining smaller jets, then thread the cables through the following spaces before securely reconnecting them to the back of the ship. Pull each bit light cable out from the inside of the right side of the ship, then connect both bit lights to the 6-port Expansion board from previous step.
55.) Take a 5cm Connecting Cable and connect one end to a spare port on the 6-port expansion board we connected the smaller jet lights to. Connect the other end of the cable to the second OUT port on the Pulse Effects Board.
We can now configure the pulse effects board to your desired effect. This effects board has 3 different effects, which can be set using the 3-way switch on the board. Fast Pulse, Medium Pulse, Slow Pulse.
Turn ON the power to test all the jet lights are working and configure your desired effect.
Note: If you experience any issues with the lights not working and suspect an issue with a component, please try a different port on the expansion board to verify where the fault lies (with the light, expansion board, or effects board). To correct any issues with expansion board ports, please view the section addressing expansion board issues on our online troubleshooting guide.
56.) Reconnect the front right panel to the ship by clicking in the technic ball joints, then flip the set over and reconnect the front left panel.
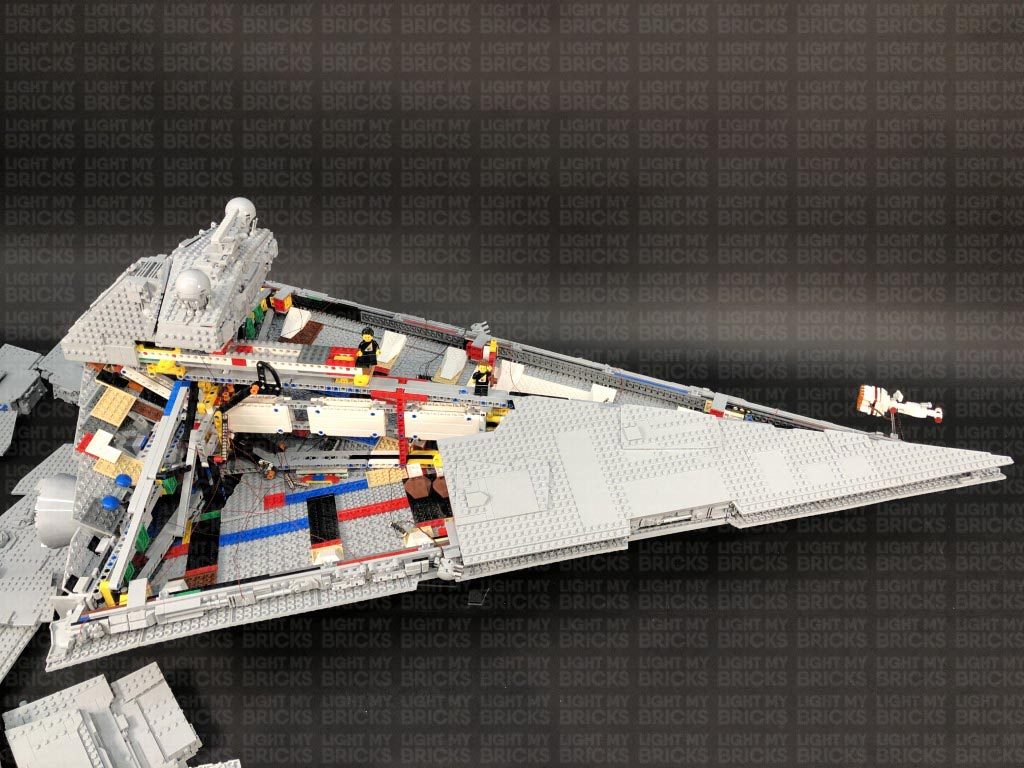
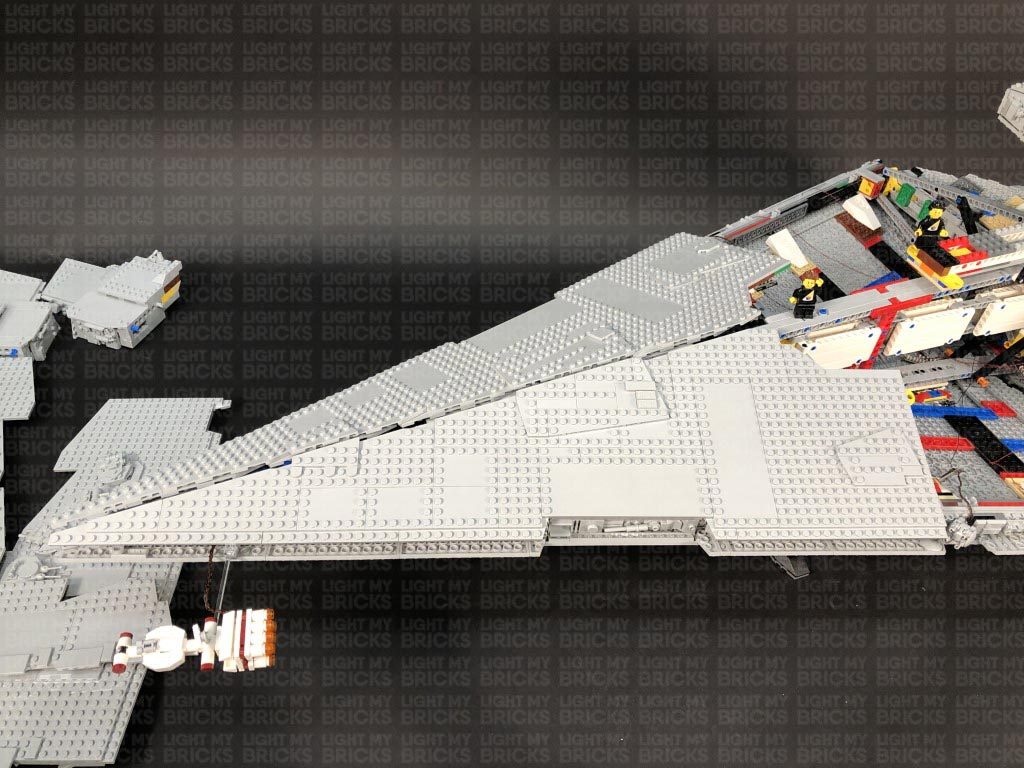 57.) Take the following middle section we removed earlier and remove the first half of this section. Disconnect the light grey slope tile at the front, then take a Cool White 30cm Bit Light and with the cable facing down, place it over the front stud. Secure the light in place by connecting a provided Trans Clear Slope 30 1x1x2/3 over the top, then reconnect the two halves together.
Reconnect this section to the top of the ship, ensuring the bit light cable is laid underneath but is still accessible for us to connect it up later on.
58.) Turn the ship around again to the right side, then take the back right panel and disconnect the three laser cannon sections from it as shown below.
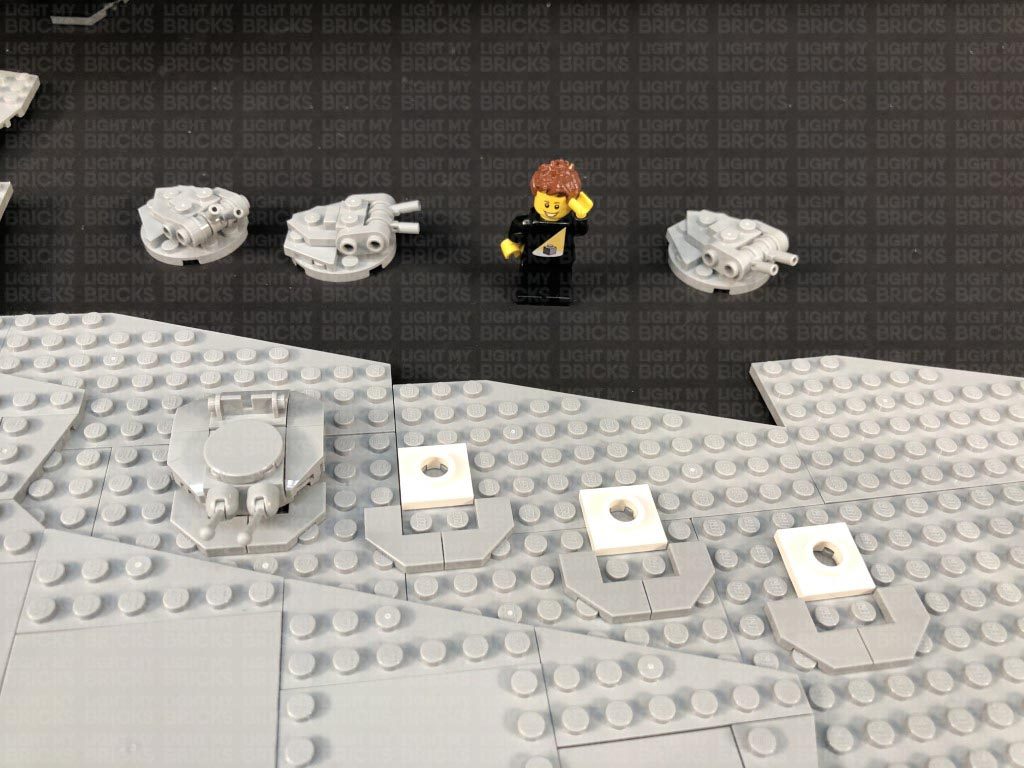 Take one of the laser cannons and disassemble as per below.
59.) This next process will be very similar to the process used to install the lights to the previous laser cannons.
Take a Green 15cm Micro Bit Light and carefully bend the LED so that it is facing longways up. Thread the Bit Light inside the hole of one of the cannon pieces, then fold the cable down the side of the canon. Ensuring the cable is laid directly on the side of the stud, reconnect the 1×1 round plate over the top. The cable should be secured in between the plates.
Reconnect this section to the left cannon base, then reconnect it to the large plate ensuring the cable is laid underneath and in between the middle studs.
Install another Green 15cm Micro Bit Light to the right cannon, then reconnect it to the large plate ensuring the cable is laid underneath and in between studs.
Ensuring both micro bit light cables are laid in between studs, reconnect the angled plate behind the cannons, then reconnect the section to the right panel.
60.) Repeat the previous step to install lights to the two other cannon sections using 4x Green 15cm Micro Bit Lights. Reconnect each section to the right panel.
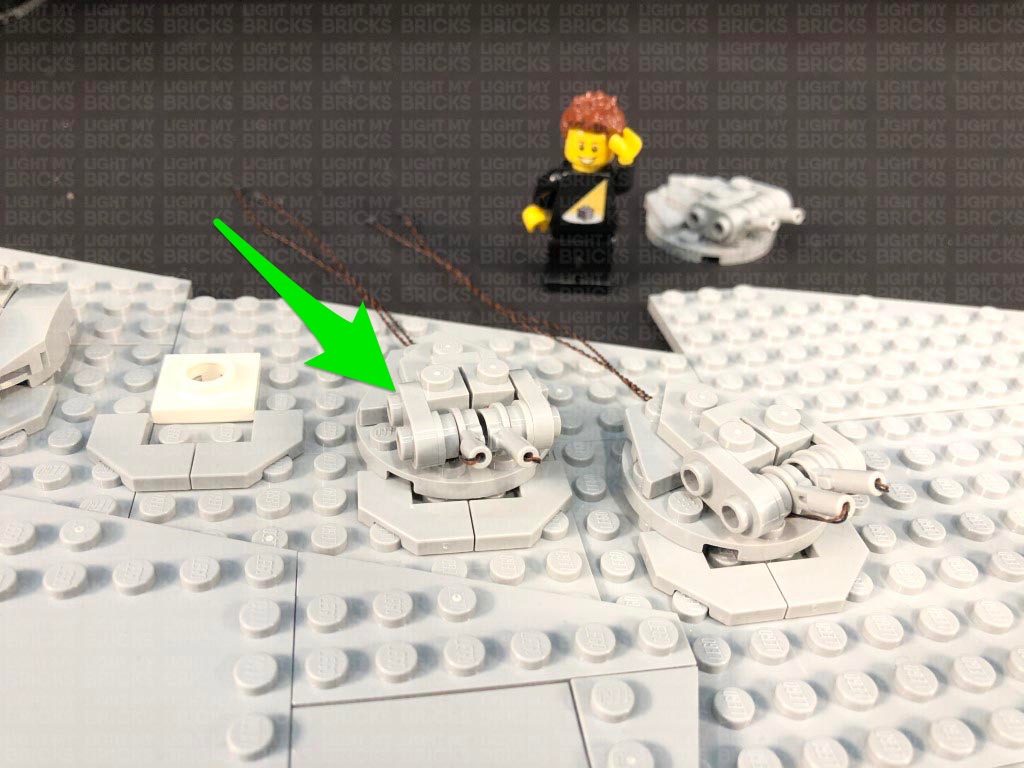
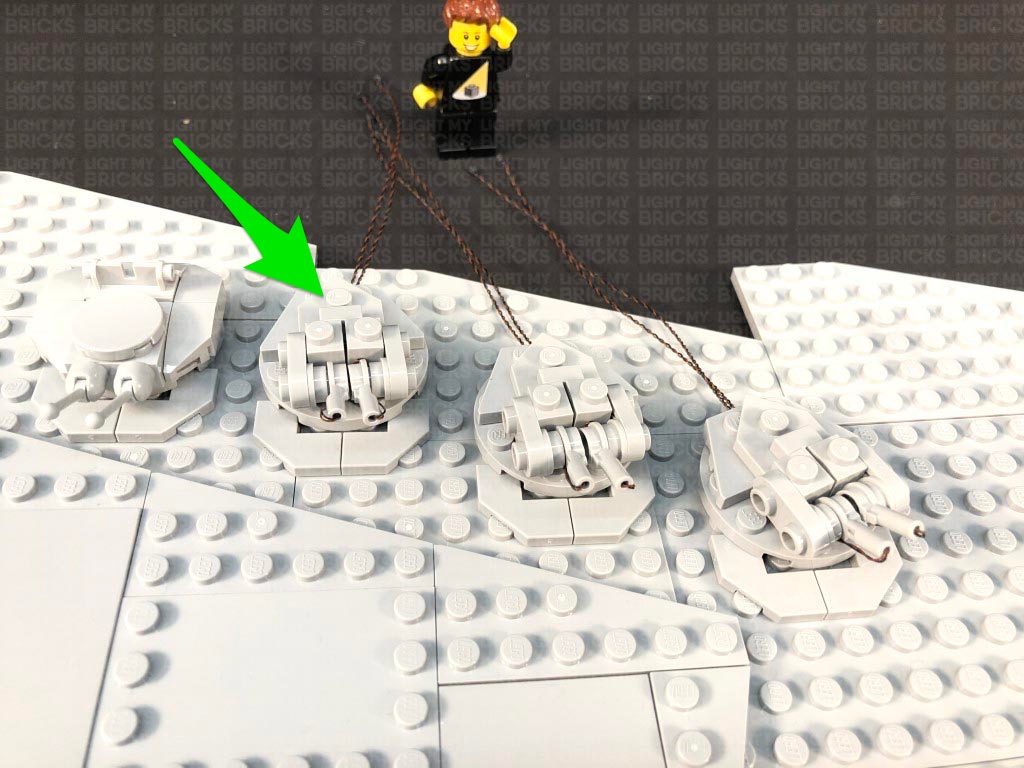 61.) Flip the entire right panel over, then connect the cables from the two outer cannons to a Micro 4-Port Expansion Board. Take the cables from the centre cannon and connect them to a different Micro 4-Port Expansion Board.
Take 2x 15cm Connecting Cables and each one to the two micro expansion boards’ large port.
Take 2x 30cm Connecting Cables and connect each one to the two micro expansion boards’ other large port.
Bring the entire panel up towards the ship and place the expansion boards and cables inside, then securely reconnect this panel using the technic ball joints. Reconnect the 2×4 tile and 2×2 rounded bottom plate to secure the front and back panels together.
62.) Bring the 4 connecting cables from the micro expansion boards inside the ship together and thread them underneath the middle section to the left side. Turn the ship over to the left side, then pull the four cables out.
Take the two 15cm connecting cables we pulled through from the other side and connect each one to a different OUT port (port 2 and 3) on the Gun Effects Board.
Turn the power ON to test all the cannons and blasters on the right side of the ship are working and firing in seperate sequences.
63.) We will now light up the cannons on the back left panel. First disconnect the three cannon sections, then repeat steps 58 to 59 to install 6x Green 15cm Micro Bit Lights to the three cannon sections
64.) Turn the panel around, then connect the bit light cables from the two outer cannons to a Micro 4-Port Expansion Board. Connect the bit light cables from the centre cannon to a new Micro 4-Port Expansion Board.
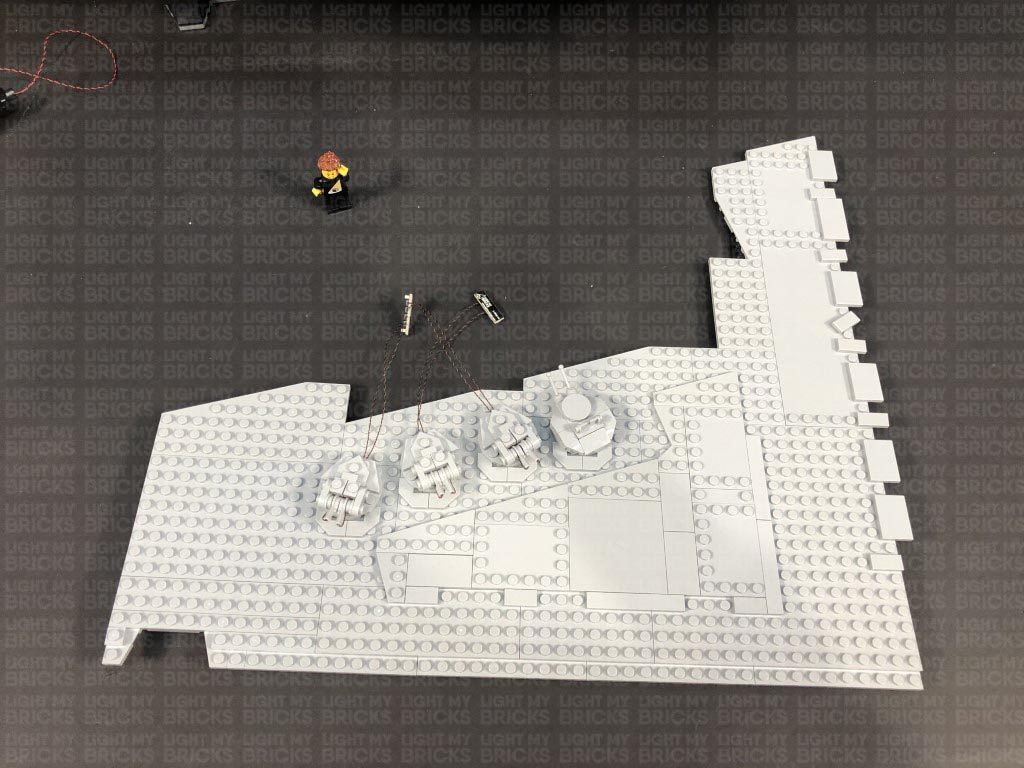 Bring the entire panel up and reconnect it to the top of the ship via the black technic ball joints, then secure the front and back panels by reconnecting the 2×4 tile and 2×2 rounded bottom stud.
Locate the other end of the two 30cm Connecting Cables we pulled through from the other side (step 62) and connect one to each of the micro expansion board’s large ports.
Turn ON the power to test all the cannon lights on each side are working OK and firing at different rates.
65.) Take a new 30cm Connecting Cable and connect it to the 12-Port Expansion Board on the left side of the ship toward the back. Bring the other end of the cable out toward the front, then secure it somewhere so that we can easily locate it later on.
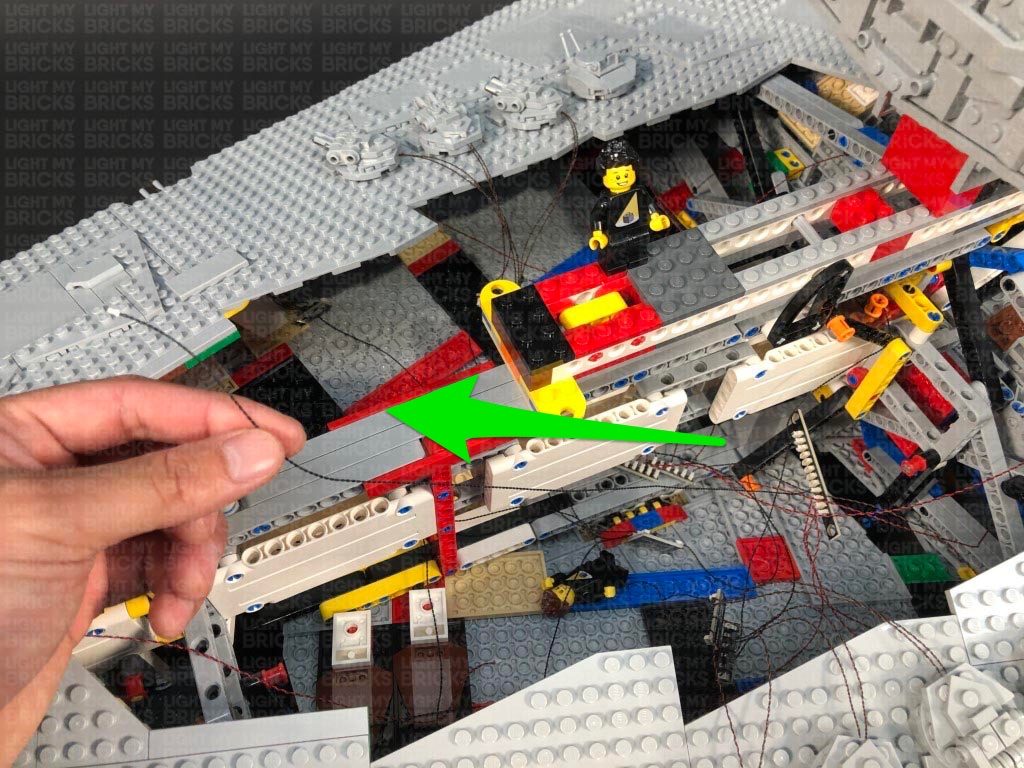 66.) We will now install lights to the upper floor sections of the star destroyer. First take the upper left floor section and disconnect the following roof plate by pushing your finger up underneath.
Disconnect the following pieces on the side, then take a Flashing White 30cm Bit Light and with the cable facing down, place it over the right stud on the right plate. Secure the light in place by connecting a provided Trans Clear Round Plate 1×1 over the top.
Reconnect these two pieces together, then thread the bit light cable through the top of the floor before reconnecting all the pieces together ensuring the cable is laid underneath.
67.) We will now install a couple of lights to the lower part and to the back of this section. Lift this section up so we can better access the lower section. Take a Cool White 30cm Bit Light and with the cable facing down, place it over the following stud. Secure the light place using another provided Trans Clear Round Plate 1×1. Fold the cable underneath this section.
Take another Cool White 30cm Bit Light and with the cable facing down, place it over the following stud on the right of this section. Secure the light place using another provided Trans Clear Round Plate 1×1. Fold the cable underneath this section.
68.) Turn this section around to the back and disconnect the following pieces from the left side.
Take a Cool White 30cm Bit Light and with the cable facing down, place it over the stud on the top of the angled plate. Secure the light in place using another provided Trans Clear Round Plate 1×1. Place the angled plate back the section and while ensuring the cable is laid down in between studs, reconnect the 2×3 tile over the top, followed by the mechanical piece.
Fold the cable underneath this section, then place this section on top of the ship. Connect all four light cables from this section to the 12-Port Expansion Board on the left side of the ship.
Securely reconnect this upper level section by threading the white bars down through the yellow plate holes, then turn ON the power to test all the upper lights on the left side are working OK.
Note: If you experience any issues with the lights not working and suspect an issue with a component, please try a different port on the expansion board to verify where the fault lies (with the light, expansion board, or effects board). To correct any issues with expansion board ports, please view the section addressing expansion board issues on our online troubleshooting guide.
69.) We will now light up the upper floor section on the right side. Carefully turn the set around to the right side, then take the upper floor floor section and disconnect the following roof plate by pushing your finger up underneath.
Disconnect the following pieces, then take a Flashing White 30cm Bit Light and with the cable facing down, place it over the right stud on the right plate. Secure the light in place by connecting a provided Trans Clear Round Plate 1×1 over the top.
Fold the cable underneath the plate, then thread the bit light cable through the top of the floor before reconnecting all the pieces together.
70.) We will now install a couple of lights to the lower part and to the back of this section. Lift this section up so we can better access the lower section. Take a Cool White 30cm Bit Light and with the cable facing down, place it over the following stud. Secure the light place using another provided Trans Clear Round Plate 1×1. Fold the cable underneath this section.
Take another Cool White 30cm Bit Light and with the cable facing down, place it over the following stud on the right of this section. Secure the light place using another provided Trans Clear Round Plate 1×1. Fold the cable underneath this section.
71.) Turn this section around to the back and disconnect the following pieces from the right side.
Take a Cool White 30cm Bit Light and with the cable facing down, place it over the stud on the top of the angled plate. Secure the light in place using another provided Trans Clear Round Plate 1×1. Place the angled plate back to this section and while ensuring the cable is laid down in between studs, reconnect the 2×3 tile over the top, followed by the mechanical piece.
Fold the cable underneath this section, then place this section on top of the ship. Connect all four light cables from this section to the 12-Port Expansion Board on the right side of the ship.
Securely reconnect this upper level section by threading the white bars down through the yellow plate holes, then turn ON the power to test all the upper lights on both sides are working OK.
Note: If you experience any issues with the lights not working and suspect an issue with a component, please try a different port on the expansion board to verify where the fault lies (with the light, expansion board, or effects board). To correct any issues with expansion board ports, please view the section addressing expansion board issues on our online troubleshooting guide.
72.) Take the front left floor section and lift it up so we can better access the front of the lower part. Take a Cool White 30cm Bit Light and with the cable facing down, place it over the following stud on the right side. Secure it in place using a provided Trans Clear Round Plate 1×1, then fold the cable down underneath this section.
Turn this section over to the left side, then take a Flashing Red 30cm Bit Light and with the cable facing down, place it over the following stud. Secure it in place using another provided Trans Clear Round Plate 1×1, then fold the cable down underneath this section.
73.) Disconnect the cone piece from the top of this section, then take a Flashing White 30cm Bit Light and with the cable facing the outside, place it directly over the stud where we disconnected the cone piece from. Secure the light in place using a provided Trans Black Cone 1×1 with Top Groove.
Turn this section around so that we are facing the inside of it, then tuck the flashing white bit light cable in behind the following piece. Group the three Bit Light cables and connect them to an 8-Port Expansion Board. Flip the set over onto it’s side and eliminate excess cable by twisting and winding them around each other to form a neat bunch.
74.) Bring this section up on top of the ship and locate the other end of the 30cm Connecting Cable we left spare from step 65. Connect this cable to the 8-Port Expansion board
Locate the other end of the Bit Light cable from the front (step 57) and connect this to the 8-port expansion board as well.
Securely reconnect this front level section to the left side, ensuring the 8-port expansion board is still accessible from the right side of the ship.
75.) Take the remaining front section and using your LEGO removal tool, disconnect the following piece from the front of it. Take a Cool White 30cm Bit Light and with the cable facing down, place it over the following stud. Secure the light in place by reconnecting the piece we removed earlier over the top of it, then connect a provided Trans Clear Round Plate 1×1 on top. Fold the cable down underneath this section.
Turn this section over to the right side, then take a Flashing Red 30cm Bit Light and with the cable facing down, place it over the following stud. Secure it in place using the remaining provided Trans Clear Round Plate 1×1, then fold the cable down underneath.
76.) Place this section on top of the star destroyer and connect the two bit light cables to the 8-Port Expansion Board. Neatly place all the components inside the ship before securely reconnecting everything back together.
Turn ON the power to test all the lights are working OK.
Note: If you experience any issues with the lights not working and suspect an issue with a component, please try a different port on the expansion board to verify where the fault lies (with the light, expansion board, or effects board). To correct any issues with expansion board ports, please view the section addressing expansion board issues on our online troubleshooting guide.
77.) Lastly, we need to neaten up the cables underneath this set. First disconnect the USB power cable from the 2-port expansion board, then wind the 50cm Cable around the top of the stand pole a few times to tighten and secure cable. Thread the cable through the lower part of stand a few times, then wind any remaining excess cable around the lower part of the pole. Reconnect the USB Power Cable to the 2-port expansion board.
Transporting your Imperial Star Destroyer.
Take extra caution when moving your LEGO Imperial Star Destroyer. If you need access to the handle, first disconnect the two front sections, then disconnect the 30cm connecting cable from the 8-port expansion board as well as the Bit light cable from the front middle light.This finally completes installation of the Light My Bricks Star Wars UCS Imperial Star Destroyer Light Kit.
We thank you for purchasing this product and hope you ENJOY!
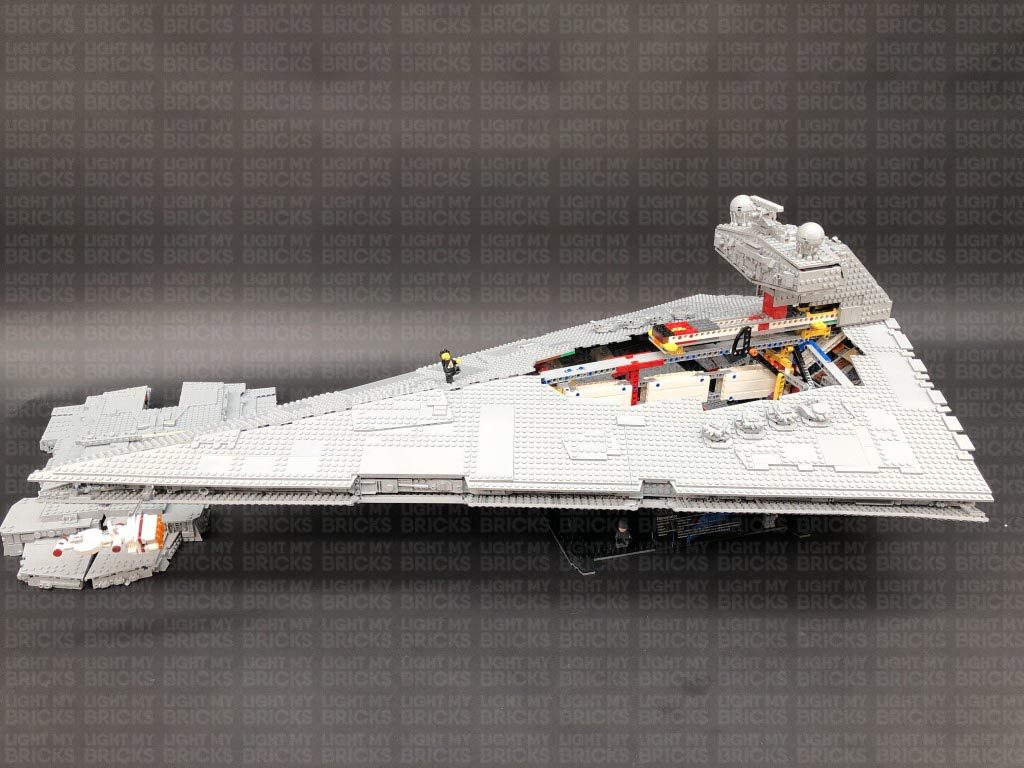
Light My Bricks: LEGO Star Wars UCS Imperial Star Destroyer 75252 Lighting Kit (Part 1)

The following page is the instructions for Part 1 of the Light My Bricks LEGO Star Wars UCS Imperial Star Destroyer (75252) LED light kit.
Click here for Part 2 of the instructions
If you run into any issues, please refer to the online troubleshooting guide.
To ensure a trouble-free installation of your light kit, please read and follow each step carefully. These instructions can be downloaded in PDF format here
Please note: This page lists instructions for the LED light kit only. If you are wishing to purchase the Light My Bricks LEGO Star Wars UCS Imperial Star Destroyer (75252) LED light kit , please click here to view the product page
Package Contents:
- 36x Cool White 30cm Bit Lights (34 required, includes 2 extra)
- 3x Flashing White 30cm Bit Light
- 4x Flashing Red 30cm Bit Light
- 5x Cool White 30cm Large Bit Lights
- 22x Green 15cm Micro Bit Lights (20 required, includes 2 extra)
- 11x White 30cm Micro Bit Lights
Effects and Expansion Boards
- 1x Pulse Effects Board
- 1x Gun Effects Board
- 1x Multi Effects Board
- 1x Flicker Effects Board
- 7x Micro 4-Port Expansion Boards
- 1x Micro 8-Port Expansion Boards
- 1x 2-Port Expansion Board
- 6x 6-Port Expansion Boards
- 1x 8-Port Expansion Boards
- 3x 12-Port Expansion Boards
Connecting Cables:
- 9x 5cm Connecting Cables
- 6x 15cm Connecting Cables
- 5x 30cm Connecting Cables
- 2x 50cm Connecting Cable
- 1x USB Power Cable
LEGO Pieces:
- 29x Trans Clear Round Plate 1×1 (28 required, includes 1 extra)
- 4x Trans Light Blue Round Plate 1×1
- 1x Trans Clear Tile 1×2
- 1x Trans Black Cone 1×1 with Top Groove
- 1x Trans Clear Slope 30 1x1x2/3
Important things to note:
Laying cables in between and underneath bricks
Cables can fit in between and underneath LEGO® bricks, plates, and tiles providing they are laid correctly between the LEGO® studs. Do NOT forcefully join LEGO® together around cables; instead ensure they are laying comfortably in between each stud.
Connecting cable connectors to Expansion Boards
Take extra care when inserting connectors to ports of Expansion Boards. Connectors can be inserted only one way. With the expansion board facing up, look for the soldered “=” symbol on the left side of the port. The connector side with the wires exposed should be facing toward the soldered “=” symbol as you insert into the port. If a plug won’t fit easily into a port connector, do not force it.
Connecting cable connectors to Strip Lights
Take extra care when inserting connectors to ports on the Strip Lights. Connectors can be inserted only one way. With the Strip Light facing up, ensure the side of the connector with the wires exposed is facing down. If a plug won’t fit easily into a port connector, don’t force it. Doing so will damage the plug and the connector.
Connecting Micro Cable connectors to Micro Expansion Board Ports
Take extra care when inserting the micro connectors to micro ports of Micro Expansion Boards. Connecting Micro Bit Lights to Micro Expansion Boards is similar to connecting lights and cables to Strip Lights. With the expansion board facing up, ensure the side of the connector with the wires exposed is facing down. If a plug won’t fit easily into a port connector, do not force it. Use your fingernail to push the plastic part of the connector to the micro port.Installing Bit Lights under LEGO® bricks and plates.
When installing Bit Lights under LEGO® pieces, ensure they are placed the correct way up (Yellow LED component exposed). You can either place them directly on top of LEGO® studs or in between.
OK, Let’s Begin!
1.) Start by disconnecting the following sections from the top of the ship.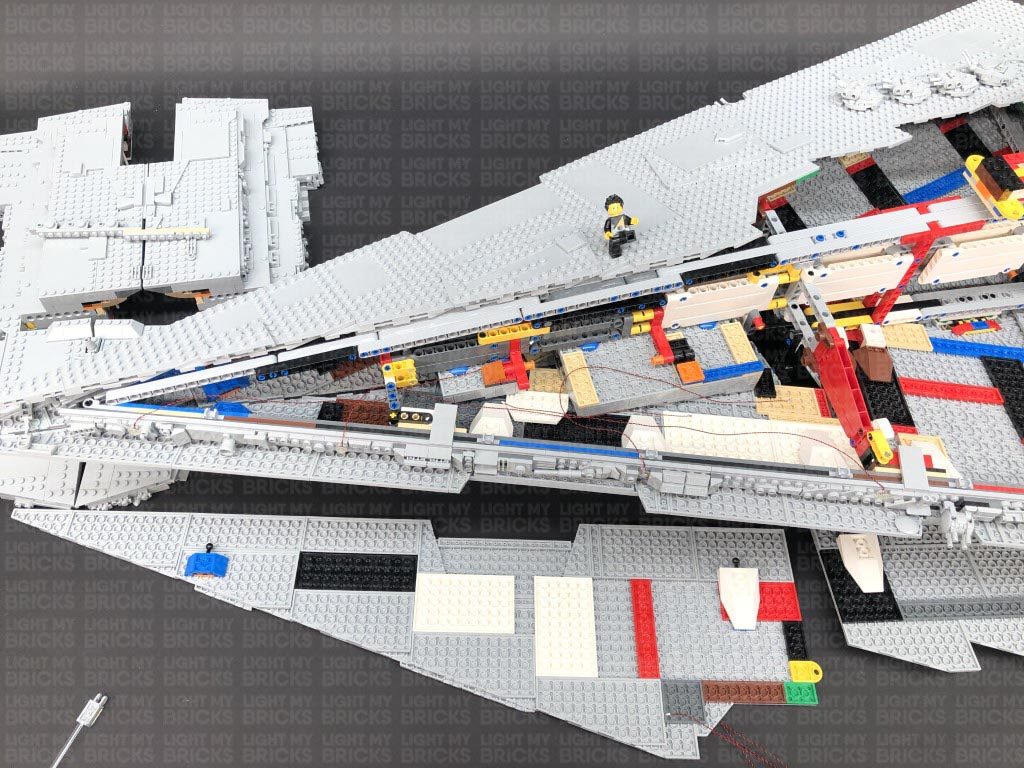 5.) Take a 12-Port Expansion Board and connect the four Bit Light Cables, then take a 50cm Connecting Cable connect it to another spare port on the 12-Port Expansion Board.
Bring the other end of the 50cm connecting cable toward the back of the ship and feed it underneath the large red technic plate sections going across the centre. Pull the cable out from the other side and connect it to a new 12-Port Expansion Board.
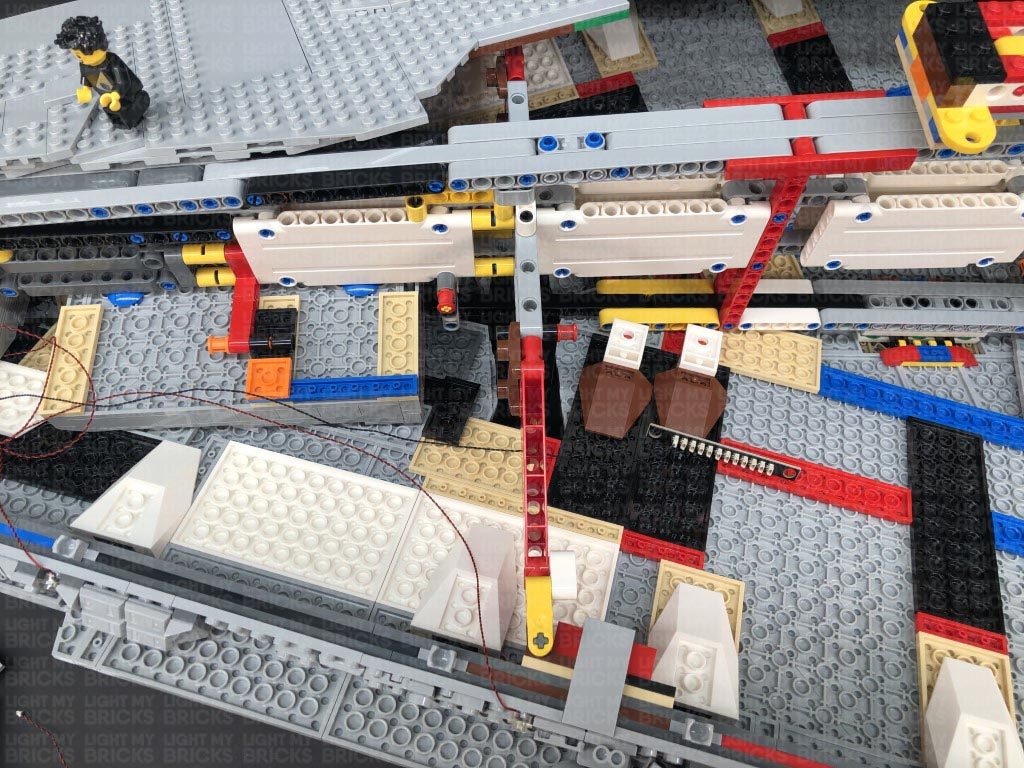 6.) We will now install another three lights to the side of the ship to the following positions.
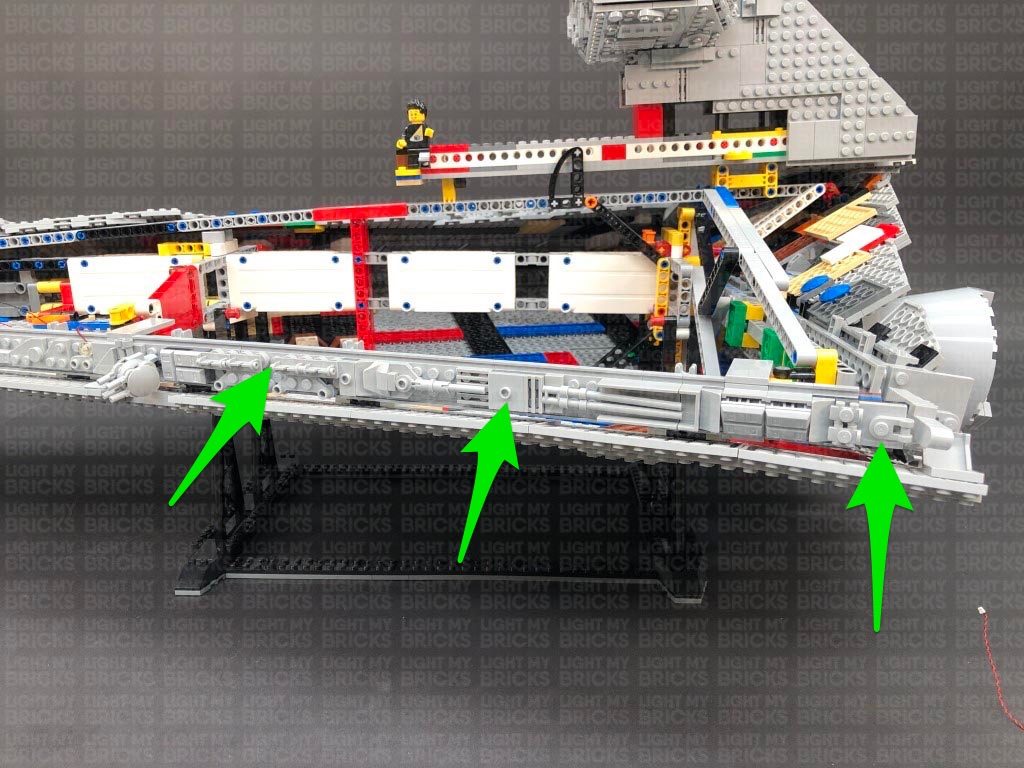 First disconnect the following pieces, then install a Cool White 30cm Bit Light to the following stud, securing it in place using a provided Trans Clear Round Plate 1×1. Once installed, reconnect the pieces we removed earlier.
Connect the Bit Light to the second 12-Port Expansion Board towards the back of the ship.
7.) Install another 2x Cool White 30cm Bit Lights to the following positions, securing them in place using 2x Trans Clear Round Plates 1×1. Ensure you following the below images to correctly lay the cables underneath pieces, then connect both lights to the 12-Port Expansion Board in previous step.
Secure the last Bit Light cable underneath the following 2×4 tile. Disconnect it, lay the cable in between studs, then reconnect the tile over the top.
8.) Take a new 50cm Connecting Cable and connect it to a spare port on the first 12-Port Expansion Board toward the front of the ship. Thread the other end of the cable down the space behind the docking bay that leads down underneath the ship.
From underneath of the ship, pull the cable down and connect it to a 2-Port Expansion Board. Take your USB Power Cable and connect it to the other port. Connect the USB Connector side to a USB Power Bank or wall adaptor (sold separately) and turn it ON to test all the lights installed to the left side of the ship are working OK.
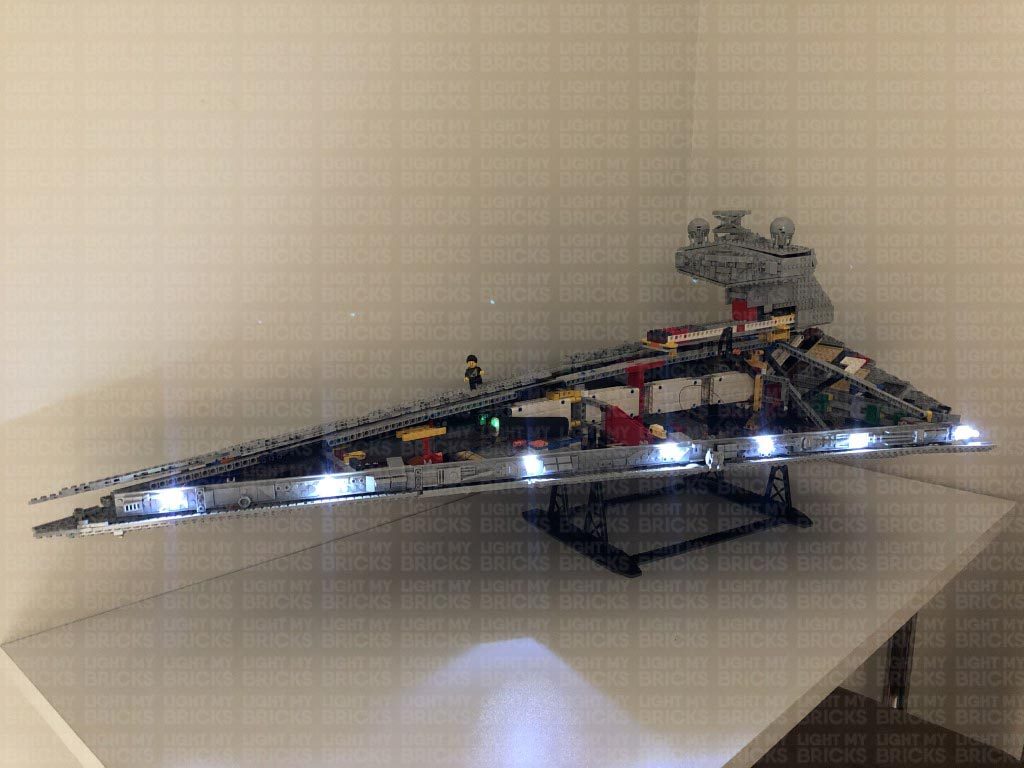 Note: If you experience any issues with the lights not working and suspect an issue with a component, please try a different port on the expansion board to verify where the fault lies (with the light or expansion board). To correct any issues with expansion board ports, please view the section addressing expansion board issues on our online troubleshooting guide.
9.) We will now install lights to the 4 laser cannon section on the left side. First disconnect and disassemble this section as shown below:
Take out a Green 15cm Micro Bit Light and carefully bend the LED component so that the side is facing the top. This will allow the LED to fit easily inside the canon hole.
Take one of the cannon pieces and carefully thread the Micro Bit Light’s LED all the way inside the hole.
Bend the cable down the outside of the cannon, then lay the cable directly over the the top of the stud as shown below. Reconnect this cannon to the inside of the 2×2 round tile. The cable should be secured underneath the stud. 10.) Using the same method used in previous step, install another Green 15cm Micro Bit Lights to another cannon piece, then secure the cable underneath the stud and reconnect it to the 2×2 round plate.
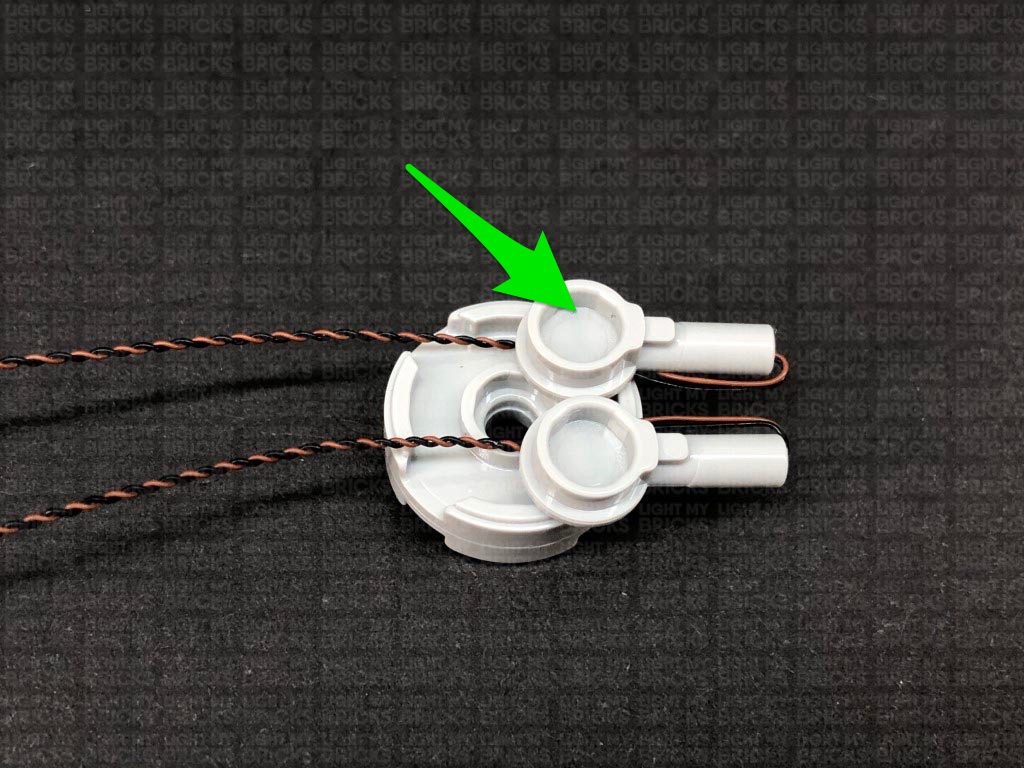 Ensure both cables are laid in between the spaces of the plate, then reconnect the 2×2 rounded bottom plate.
11.) Turn this section around then install another 2x Green 15cm Micro Bit Lights to the cannons on this side. Secure the cables underneath studs of the cannon pieces, then reconnect both of them as shown below.
Lay both cables in between the spaces towards the back of the round 2×2 plate, then reconnect the hinge ball section followed by the 2×2 rounded bottom plate.
12.) Tuck the four cables underneath the base of the cannon, then twist the four cables around each other all the way to the ends to form one larger cable.
Reconnect the cannon section back to to the side of the ship, then bring the cables inside the ship and connect them to a Micro 4-Port Expansion Board.
13.) Take a 15cm Connecting Cable and connect it to one of the larger ports on the Micro 4-Port Expansion Board. Connect the other end of the cable to the OUT port 1 on the Gun Effects Board.
Take another 15cm Connecting Cable and connect it to the IN port (+5V) on the Gun Effects Board. Connect the other end of this 15cm cable to a spare port on the 12-Port Expansion Board toward the back of the ship.
Turn your power ON to test the lights installed so far and to configure the Gun Effects Board. You can choose between 3 different shooting effects via the 3 way switch on the effects board.
1. Canon – 2 Fires – each channel firing at random rate
2. Machine Gun – Multiple fires simulating a machine gun – each channel firing at random rate
3. Laser Canon – 3 fires – each channel firing at random rate.
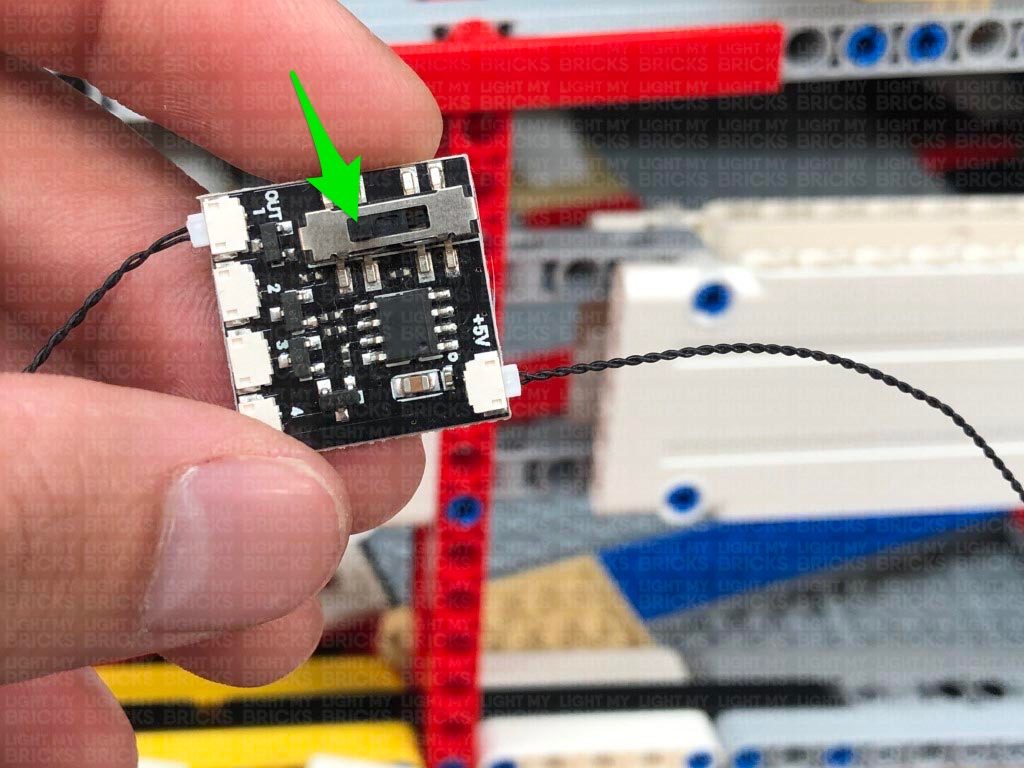 Note: If you experience any issues with the lights not working and suspect an issue with a component, please try a different port on the expansion board to verify where the fault lies (with the light, expansion board, or effects board). To correct any issues with expansion board ports, please view the section addressing expansion board issues on our online troubleshooting guide.
14.) Take a 30cm Connecting Cable and connect it to the other large port on the Micro 4-Port Expansion Board. Connect the other end of the cable to a large port on a new Micro 4-Port Expansion Board, then feed this micro expansion board underneath the technic pieces in the middle to bring it through to the other side.
Take a 15cm Connecting Cable and connect it to a spare port on the 12-Port Expansion Board on the back of the ship. Connect the other end of the cable to a new 12-Port Expansion Board, then feed the board underneath the technic pieces in the centre to bring it through to the other side.
15.) Carefully turn the ship around so we can install lights to the right side. First disconnect the 2×4 tile and 2×2 rounded bottom plate to allow us to disconnect the two top panel sections.
16.) We will now install seven lights to the right side of the ship. Use the same method used for the side lights on the left side to install the first 4x Cool White 30cm Bit Lights, securing them in place using the provided 4x Trans Clear Round Plates 1×1.
Follow the below images carefully to modify certain sections and feed the cables underneath the middle to connect to the 12-port expansion board on the other side.
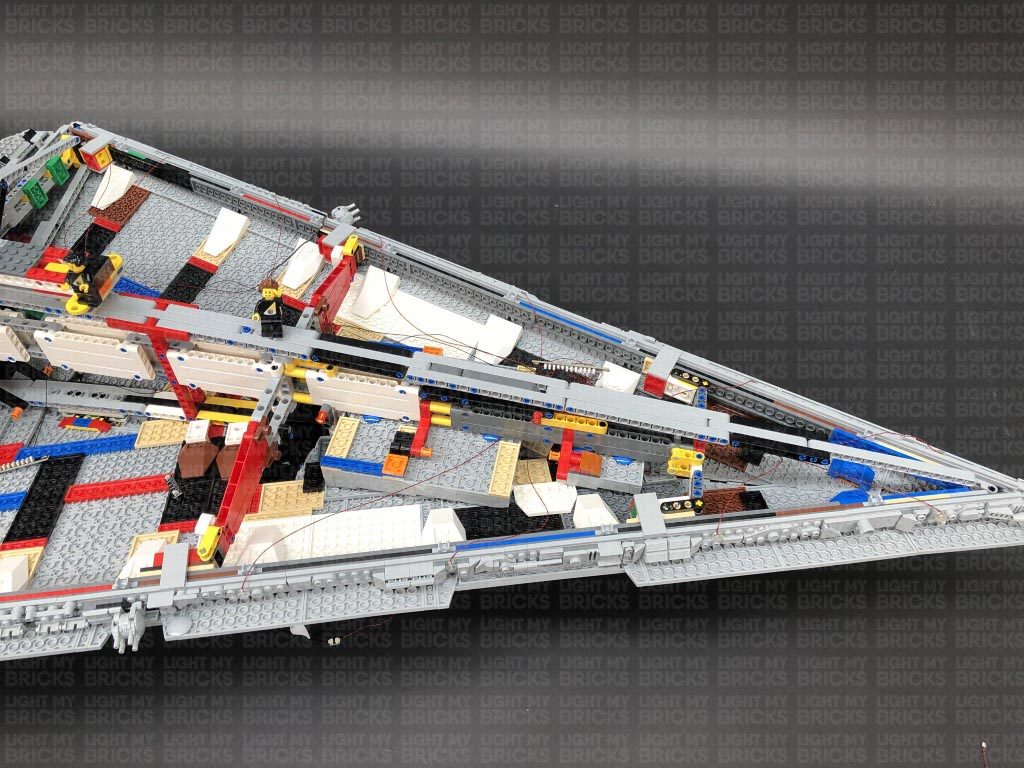 Turn ON the power to test the four lights installed to the right side are working OK.
Note: If you experience any issues with the lights not working and suspect an issue with a component, please try a different port on the expansion board to verify where the fault lies (with the light, expansion board, or effects board). To correct any issues with expansion board ports, please view the section addressing expansion board issues on our online troubleshooting guide.
17.) Use the same method used in the previous step to install the remaining 3x Cool White 30cm Bit Lights to the right side, securing them in place using the provided 3x Trans Clear Round Plates 1×1.
Follow the below images carefully to modify certain sections and connect the bit lights to the 12-port expansion board toward the back of the ship that we brought over from the left side (step 14).
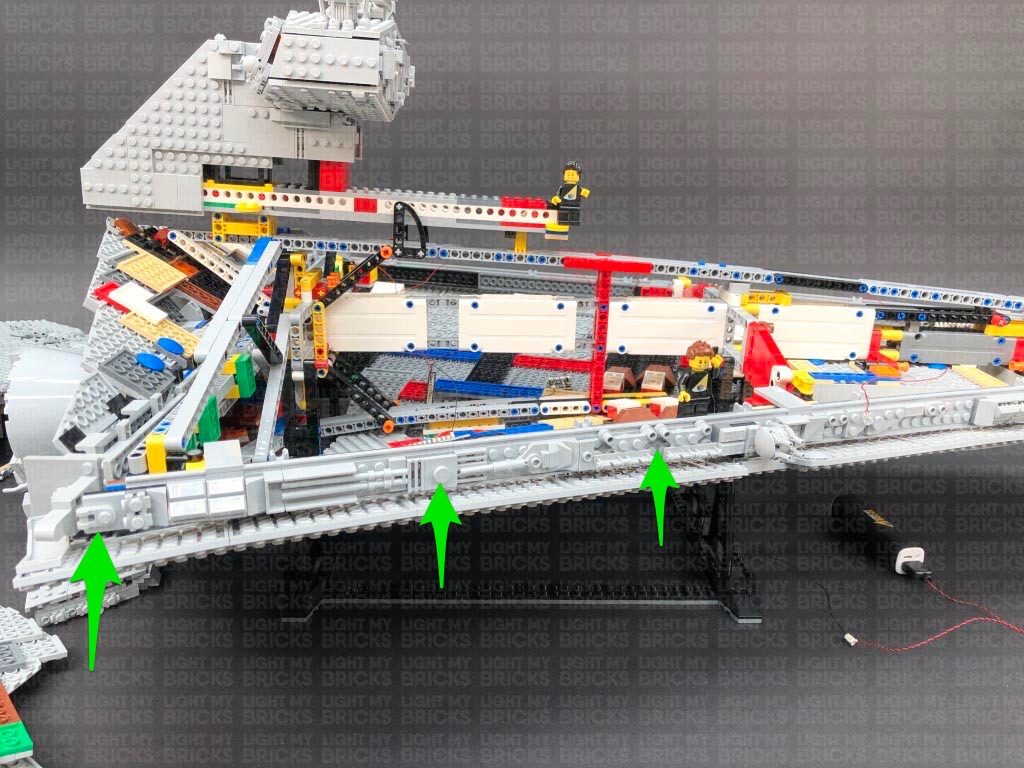 Secure the last Bit Light cable underneath the following 2×4 tile, then turn ON the power to test all the lights installed to the right side are working OK.
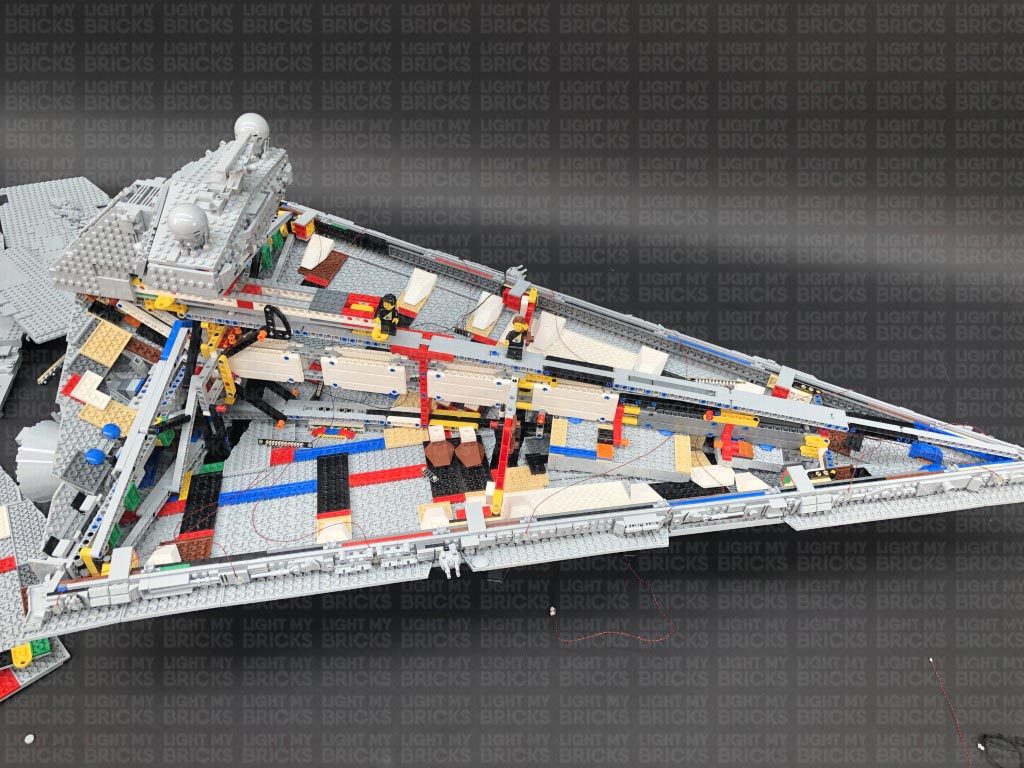 Note: If you experience any issues with the lights not working and suspect an issue with a component, please try a different port on the expansion board to verify where the fault lies (with the light, expansion board, or effects board). To correct any issues with expansion board ports, please view the section addressing expansion board issues on our online troubleshooting guide.
18.) It’s time to light up the laser cannons on the right side! Disconnect and disassemble this section as shown below:
Using the same method used to install the lights to the laser cannons on the left side of the ship, install 4x Green 15cm Micro Bit Lights to this laser cannon.
Tuck the four cables underneath the base of the cannon, then twist the four cables around each other all the way to the ends to form one larger cable.
19.) Reconnect the laser cannon section to the right side of the ship, then connect the Micro Bit Light cables to the spare Micro 4-Port Expansion Board that we brought over from the other side (Step 14.)
Turn the power ON to test the cannons on the right side of the ship are working OK. Because they are connected to the same channel as the cannons on the left side, they should be all firing together in sync.
Note: If you experience any issues with the lights not working and suspect an issue with a component, please try a different port on the expansion board to verify where the fault lies (with the light, expansion board, or effects board). To correct any issues with expansion board ports, please view the section addressing expansion board issues on our online troubleshooting guide.
20.) We will now light up the docking bay underneath the ship. First, we will need to disconnect the front bottom panel section on the right side. Disconnect the plate with handle from the very front of the ship, then disconnect the 2×2 rounded bottom plate securing the front and back panel together. Carefully disconnect the bottom panel via the technic rounded pins.
From the inside of the ship, locate and pull out the two orange technic pins that are securing the docking bay to the ship, then carefully remove the docking bay section by pulling it out from the bottom.
21.) Disconnect the Tie Fighter from the clip, then remove the grey mechanical piece and trans red round plate from it.
Take a Cool White 30cm Bit Light and bend the connector end of the cable into a hook as shown below. The hook will help us then thread the light through the Tie Fighter. Thread the connector side of the cable through the back of the Tie Fighter and out the bottom.
Before you completely pull the cable all the way out, carefully bend the Bit Light LED on a 90 degree angle so that it will face directly up and sit flat against the edge of the inside.
Reconnect the Trans Red round plate, then bring the cable up and secure it in between the right wing and centre brick as shown below:
Reconnect the mechanical clip piece, then reconnect the Tie Fighter to the docking bay.
Caution – Do not forcefully push the mechanical clip piece all the way in or you may damage the Bit Light inside.
22.) Turn the docking bay around to the front and disconnect the following pieces from the middle.
Lay the Bit Light cable down in between studs as shown below, then secure it by reconnecting sections over the top.
23.) Take a Cool White 30cm Bit Light and bend the cable up on a 90 degree angle around 1cm from the LED. Ensuring the LED is facing forward, place it in between studs as shown below. Secure it in place by reconnecting the following wall section. If you look from the other side, you should see the LED peaking out to shine onto the docking bay.
Repeat this step to install another Cool White 30cm Bit Light to the other wall section. Reconnect the remaining section on top.
24.) Turn the docking bay around to the back and disconnect sections from the right corner as shown below:
Take a Flashing Red 30cm Bit Light and bend the cable up on a 90 degree angle around 1cm from the LED. Ensuring the LED is facing forward, place it in between studs as shown below. Secure it in place by reconnecting the corner pieces we removed earlier. If you look from the other side, you should see the LED peaking out in the corner to shine onto the docking bay
Note: If you experience any issues with the lights not working and suspect an issue with a component, please try a different port on the expansion board to verify where the fault lies (with the light, expansion board, or effects board). To correct any issues with expansion board ports, please view the section addressing expansion board issues on our online troubleshooting guide.
18.) It’s time to light up the laser cannons on the right side! Disconnect and disassemble this section as shown below:
Using the same method used to install the lights to the laser cannons on the left side of the ship, install 4x Green 15cm Micro Bit Lights to this laser cannon.
Tuck the four cables underneath the base of the cannon, then twist the four cables around each other all the way to the ends to form one larger cable.
19.) Reconnect the laser cannon section to the right side of the ship, then connect the Micro Bit Light cables to the spare Micro 4-Port Expansion Board that we brought over from the other side (Step 14.)
Turn the power ON to test the cannons on the right side of the ship are working OK. Because they are connected to the same channel as the cannons on the left side, they should be all firing together in sync.
Note: If you experience any issues with the lights not working and suspect an issue with a component, please try a different port on the expansion board to verify where the fault lies (with the light, expansion board, or effects board). To correct any issues with expansion board ports, please view the section addressing expansion board issues on our online troubleshooting guide.
20.) We will now light up the docking bay underneath the ship. First, we will need to disconnect the front bottom panel section on the right side. Disconnect the plate with handle from the very front of the ship, then disconnect the 2×2 rounded bottom plate securing the front and back panel together. Carefully disconnect the bottom panel via the technic rounded pins.
From the inside of the ship, locate and pull out the two orange technic pins that are securing the docking bay to the ship, then carefully remove the docking bay section by pulling it out from the bottom.
21.) Disconnect the Tie Fighter from the clip, then remove the grey mechanical piece and trans red round plate from it.
Take a Cool White 30cm Bit Light and bend the connector end of the cable into a hook as shown below. The hook will help us then thread the light through the Tie Fighter. Thread the connector side of the cable through the back of the Tie Fighter and out the bottom.
Before you completely pull the cable all the way out, carefully bend the Bit Light LED on a 90 degree angle so that it will face directly up and sit flat against the edge of the inside.
Reconnect the Trans Red round plate, then bring the cable up and secure it in between the right wing and centre brick as shown below:
Reconnect the mechanical clip piece, then reconnect the Tie Fighter to the docking bay.
Caution – Do not forcefully push the mechanical clip piece all the way in or you may damage the Bit Light inside.
22.) Turn the docking bay around to the front and disconnect the following pieces from the middle.
Lay the Bit Light cable down in between studs as shown below, then secure it by reconnecting sections over the top.
23.) Take a Cool White 30cm Bit Light and bend the cable up on a 90 degree angle around 1cm from the LED. Ensuring the LED is facing forward, place it in between studs as shown below. Secure it in place by reconnecting the following wall section. If you look from the other side, you should see the LED peaking out to shine onto the docking bay.
Repeat this step to install another Cool White 30cm Bit Light to the other wall section. Reconnect the remaining section on top.
24.) Turn the docking bay around to the back and disconnect sections from the right corner as shown below:
Take a Flashing Red 30cm Bit Light and bend the cable up on a 90 degree angle around 1cm from the LED. Ensuring the LED is facing forward, place it in between studs as shown below. Secure it in place by reconnecting the corner pieces we removed earlier. If you look from the other side, you should see the LED peaking out in the corner to shine onto the docking bay
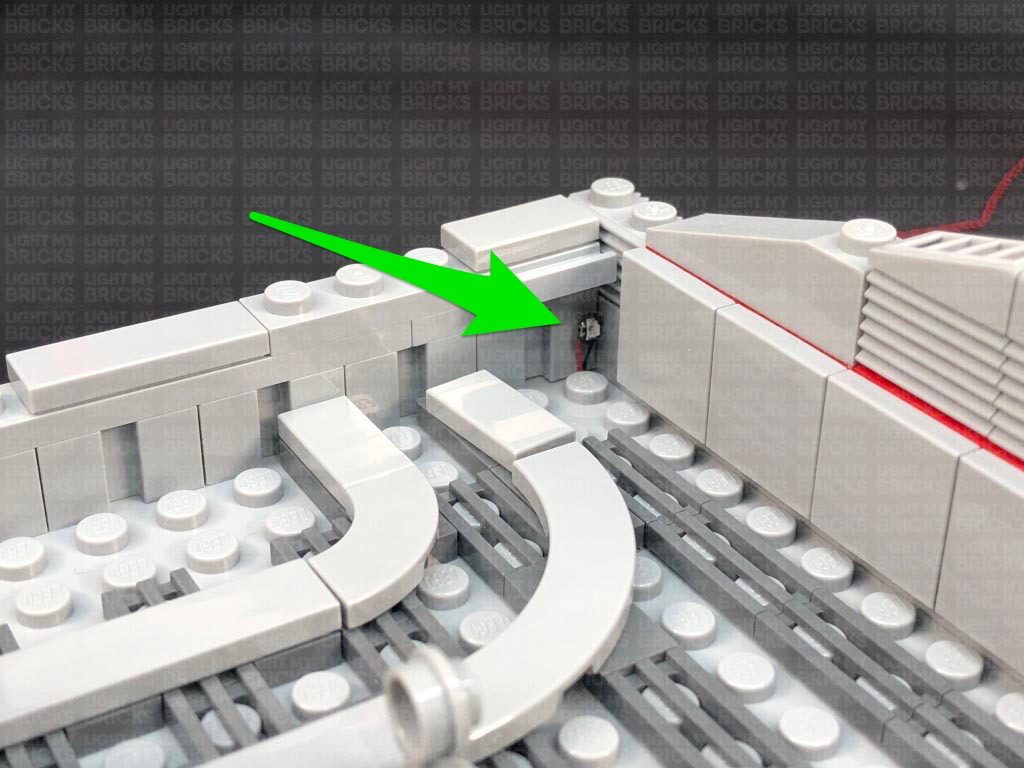 25.) Turn the docking bay over to the back left corner and install another Flashing Red 30cm Bit Light to this side.
26.) Place the Docking Bay onto it’s back so we can access underneath. Lay the top three cables down, then secure them underneath the blue 2×2 rounded bottom plates by first disconnecting them, laying the cables down, then reconnecting them over the top.
Secure the flashing red bit light cables by threading each one inside the gaps as shown below.
Connect all five cables to a 6-Port Expansion Board then take a 5cm Connecting Cable and connect it to the remaining port.
27.) Bring the docking bay underneath the Star Destroyer, then thread the expansion board through to the inside of the ship. Connect the other end of the 5cm Connecting Cable to the 12-port expansion board near the front..
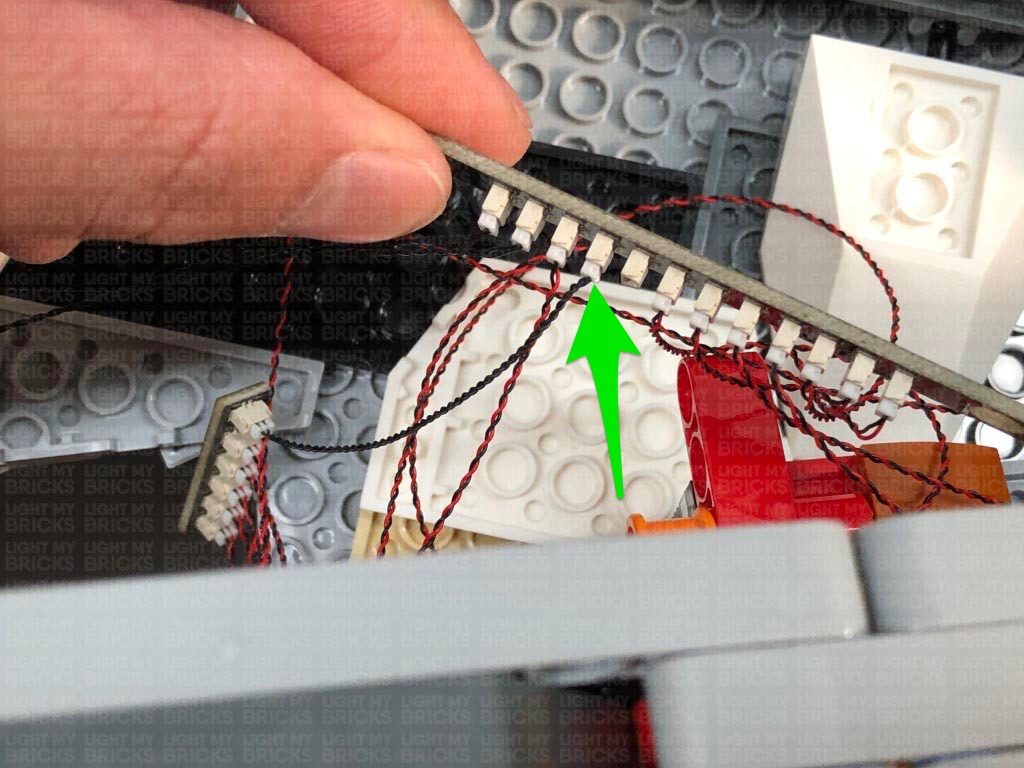 Bring the docking bay up and reconnect it to the ship by pushing the orange technic pins in to secure everything into place.
Turn on the power to test the lights installed to the docking bay are working OK. Reposition the Tie Fighter as desired.
Note: If you experience any issues with the lights not working and suspect an issue with a component, please try a different port on the expansion board to verify where the fault lies (with the light, expansion board, or effects board). To correct any issues with expansion board ports, please view the section addressing expansion board issues on our online troubleshooting guide.
28.) Ensure all cables from the docking bay lights and side of the ship lights are neatly tucked in before reconnecting the bottom right panel to the ship.
Reconnect the 2×2 rounded bottom plate as well as the pieces that secure the front of the ship together.
29.) Carefully turn the ship around to the left side, then take the Tantive and disassemble sections from the back jets as shown below:
Take one of the jet sections of 4 and disassemble them, then take a White 30cm Micro Bit Light and place the LED inside the top of the white round brick. Flip the white round brick over and while ensuring the bit light is still inside, reconnect the white brick to the white 1×4 plate as shown below:
Repeat this step to install 3x White 30cm Micro Bit Lights to the jets on this section ensuring the cables are all facing the same way.
With the cables all facing up, reconnect this section to the of the bottom side of the Tantive.
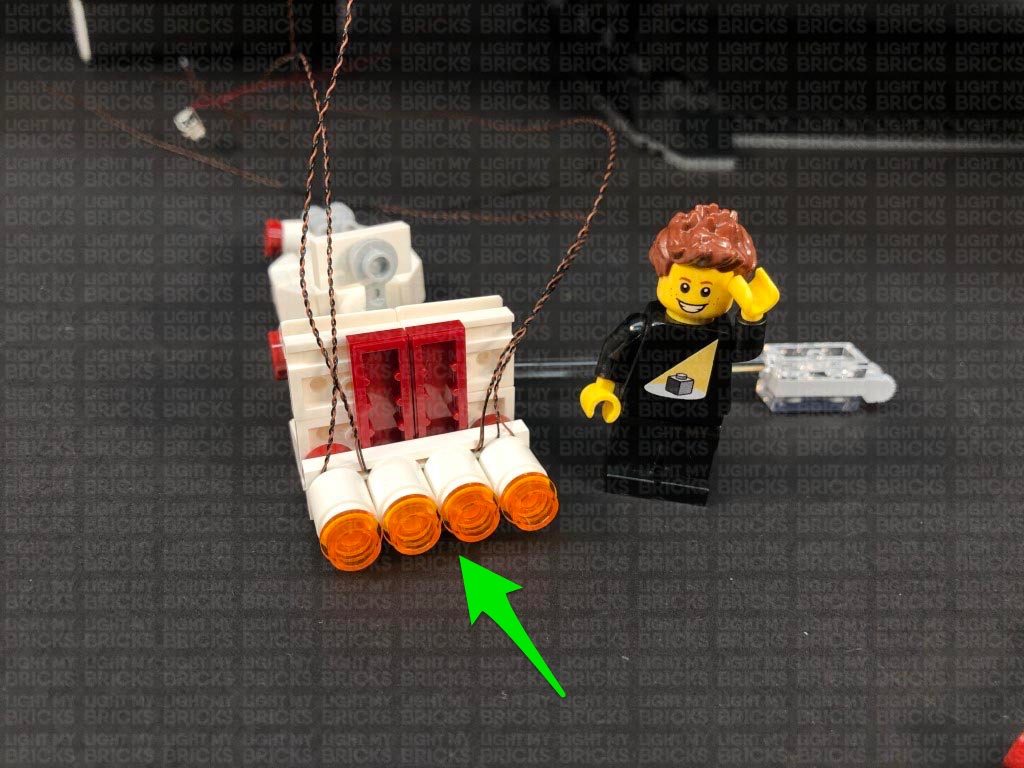 30.) Take the middle jet section and disconnect the three jets. Using the same method as per previous step, install 3x White 30cm Micro Bit Lights to this section ensuring the cables are all laid the same way.
Ensuring the cables are all facing up, reconnect this middle section to the back of the Tantive, then bring the three cables toward the right and secure them down underneath the corner of the red tile.
31.) Disassemble the last jet section and install the remaining 4x White 30cm Micro Bit Lights ensuring the cables are all facing the same way.
Turn the jet section over so that the cables are underneath of it and laid to the right side, then reconnect this section to the back of the Tantive. Bring all the cables out the right side as shown below:
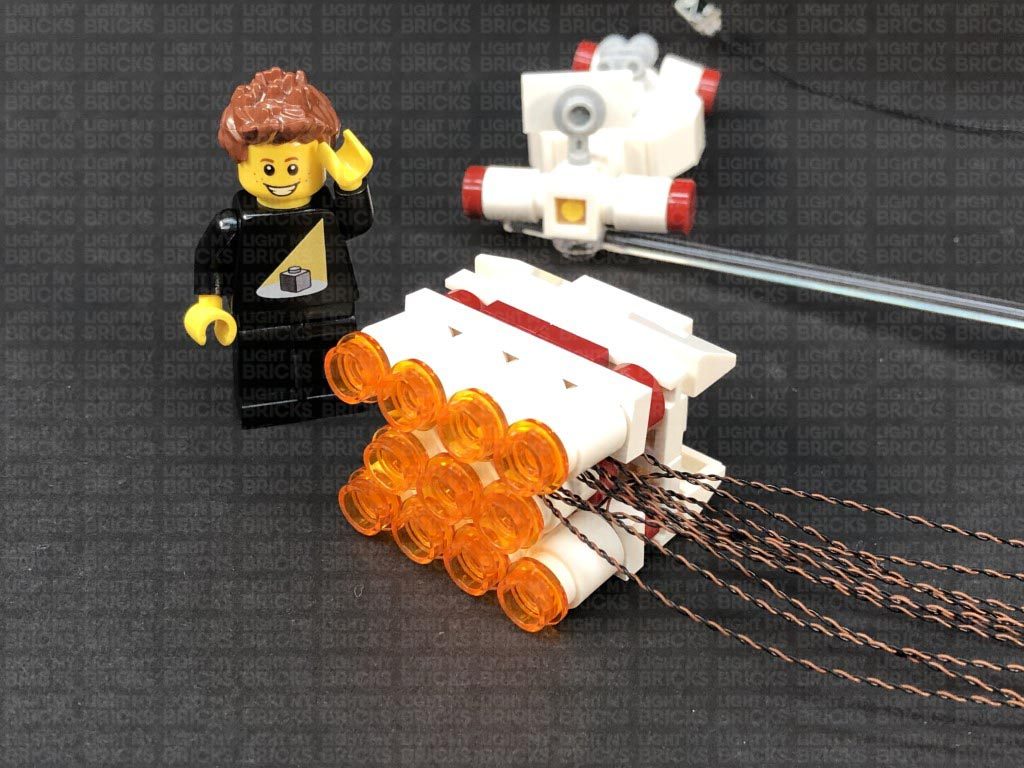 32.) Twist and wind all 11 cables around each other all the way to the ends to form one larger cable, then reassemble the Tantive and reconnect the trans clear bar underneath.
33.) Reconnect the Tantive to the side of the star destroyer, then wind the cables around the trans clear bar as shown below:
Partially disconnect the bottom panel via the blue piece as shown below, then thread the cables through the gap we just created. Pull the cables out from the inside of the ship.
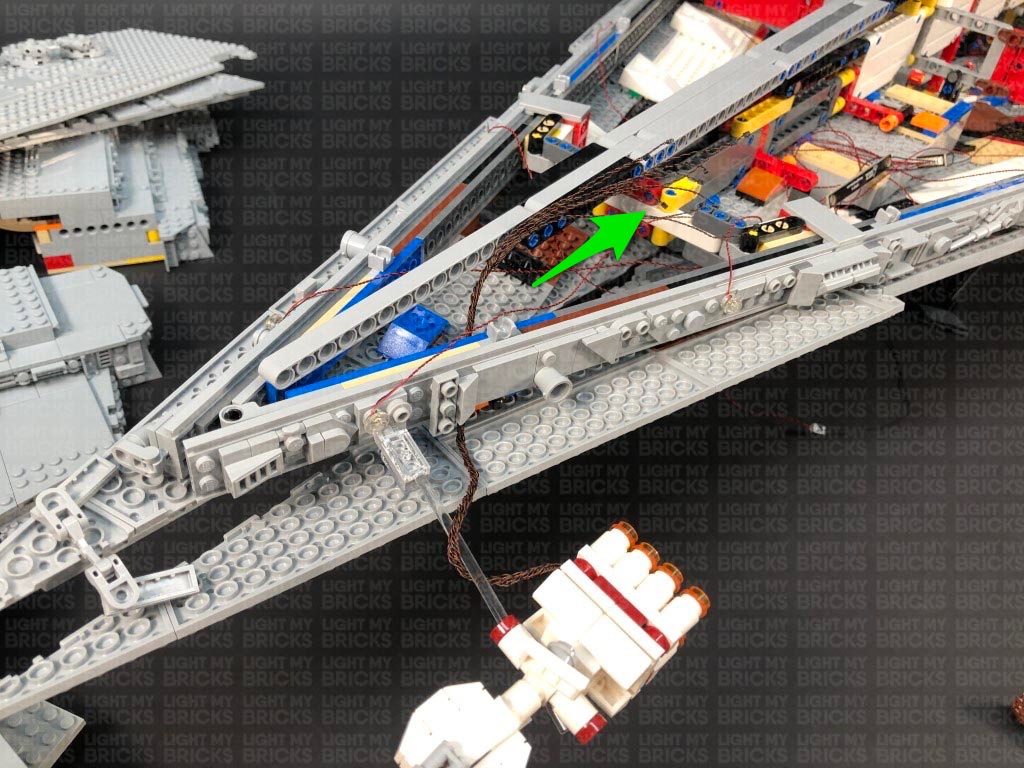 Reconnect the bottom panel via the blue piece to secure the cables and close up the gap in between the bottom and middle section.
34.) Connect 4 out of the 11 micro bit light cables to a new Micro 4-Port Expansion Board, then connect a 5cm Connecting Cable to the large port. Connect the other end of the 5cm Connecting cable to one of the OUT ports on a Flicker Effects Board (FFX).
Connect the remaining 7 micro bit light cables to a Micro 8-Port Expansion Board, then connect a new 5cm Connecting Cable to the large port on the board. Connect the other end of the 5cm cable to a different OUT port on the Flicker Effects Board.
Take a 15cm Connecting Cable and connect it to the IN port on the Flicker Effects Board. Bring the other end of the 15cm cable over to the right and connect it to a spare port on the 12-Port Expansion Board toward the front of the ship.
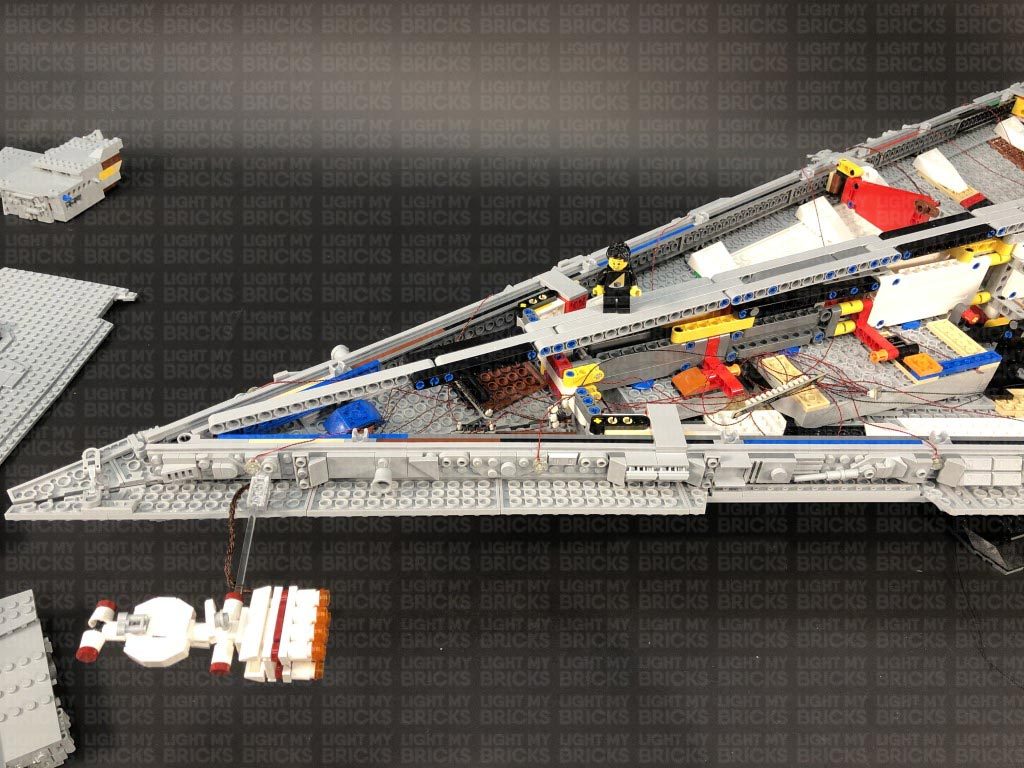 Turn ON the power to test the lights for the Tantive are working and flickering OK.
Note: If you experience any issues with the lights not working and suspect an issue with a component, please try a different port on the expansion board to verify where the fault lies (with the light, expansion board, or effects board). To correct any issues with expansion board ports, please view the section addressing expansion board issues on our online troubleshooting guide.
35.) We now need to reposition the two expansion boards toward the back of the ship. Locate the two 12-Port Expansion boards toward the back and disconnect the 15cm Cable from the left side’s expansion board.
Pull the cable out from the right side of the ship, then re-thread the cable through a higher position above. Pull the cable back out from the left side, then bring the 12-port expansion board to a higher position to allow you to reconnect the cable to the next available port.
Reposition both 12-Port Expansion Boards to higher positions on the back of the ship as shown below:
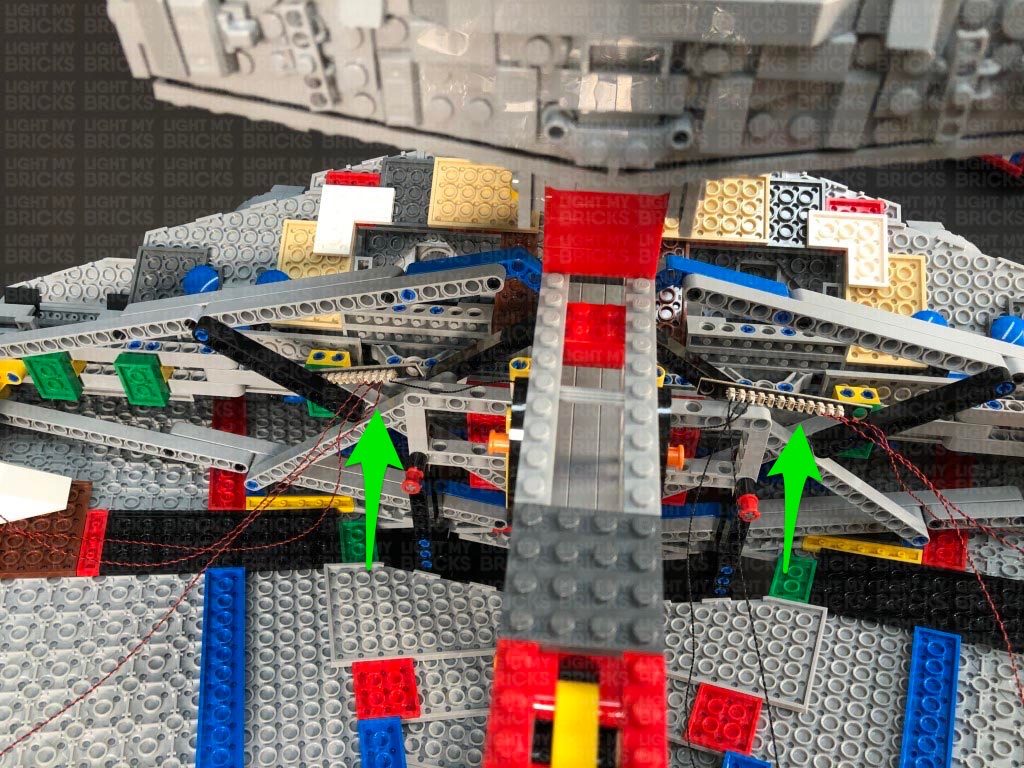 36.) We will now install some lights to the tower and bridge. Follow the below images to disconnect the surrounding sections and pieces on top and on the sides.
Turn the ship around to the right side to continue to disconnect pieces and sections.
37.) Take a Cool White 30cm Bit Light and with the cable facing up, place it in between the following studs on the front of the tower. Secure the Bit Light in place by connecting a provided Trans Clear Tile 1×2 over the top. Lay the cable towards the inside of the tower and connect it to a new 6-Port Expansion Board.
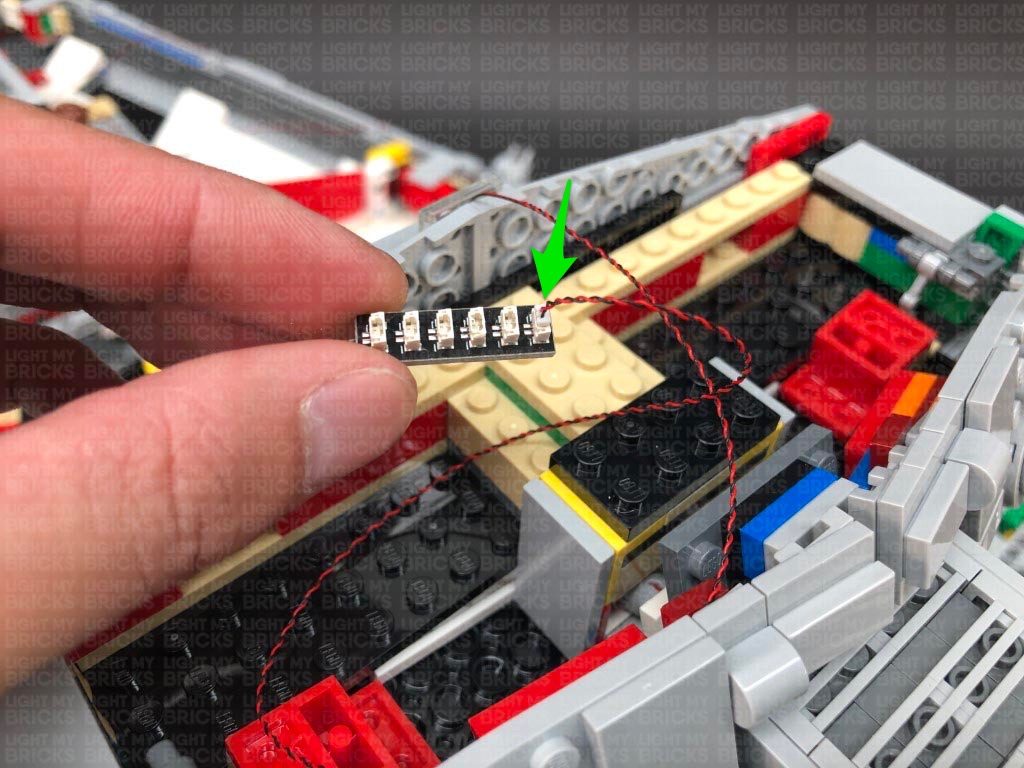 38.) Turn the ship around to the left side and disconnect the wall panel section on the left, as well as the middle section along the back. Disconnect the yellow angled brick underneath.
Take a Cool White 30cm Bit Light and with the LED facing down, place it slightly over the edge of the grey plate underneath the yellow angled brick we removed. Ensuring the cable is laid in between studs, secure the Bit Light in place by reconnecting the yellow brick.
If you look from underneath, you should see the Bit Light peaking out to shine down.
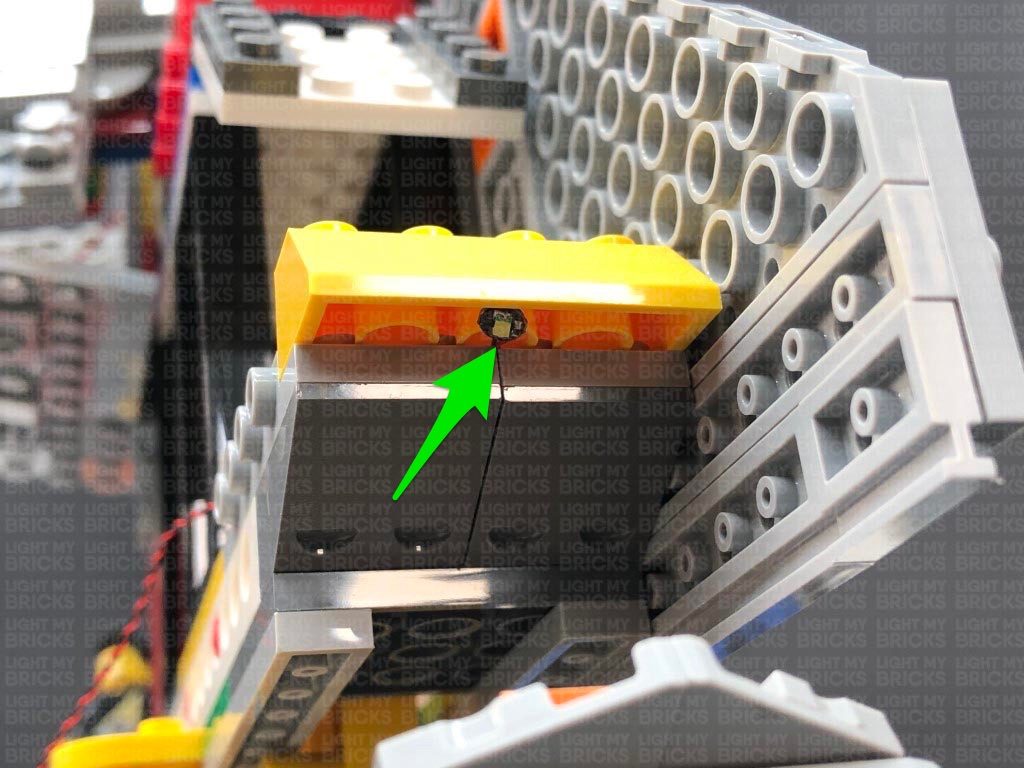 Thread the bit light cable up the following space that leads to the top of the tower. Pull the cable all the way up, then connect it to a spare port on the 6-Port Expansion Board.
39.) Take a new 30cm Connecting Cable and thread one end of the cable up the same space we threaded the bit light cable. Pull the cable up from the top of the tower and connect it to a spare port on the 6-Port Expansion Board.
Thread the other end of the 30cm cable down the space that leads to the right side of the ship, then turn the ship around to the right side and pull the cable all the way out. Connect the cable to a spare port on the 12-Port Expansion Board on this side.
Turn the ship around to the left side again and reconnect the middle section to the back, as well as the left wall panel.
40.) Turn the ship around to the back and disconnect the following pieces from the left side of the tower.
Take a Cool White 30cm Bit Light and with the cable facing up. place it directly over the following stud. Secure the Bit Light in place by connecting a provided Trans Clear Round Plate 1×1 over the top, then reconnect the sections we removed earlier. Connect the Bit Light cable to a new 6-Port Expansion Board.
41.) Using the same method used as per previous step, install another Cool White 30cm Bit Light to the right side of the tower securing it in place using another provided Trans Clear Round Plate 1×1, then connect the Bit Light to the same 6-Port Expansion Board in the previous step.
42.) Take a 5cm Connecting Cable and connect it to the 6-Port Expansion Board from previous step. Connect the other end of the 5cm cable to one of the OUT ports on a Multi Effects Board (3PFX). Take another 5cm Connecting Cable and connect it to the IN port (+5V) on the Multi effects Board. Connect the other end of the 5cm cable to a spare port on the 6-Port Expansion Board from step 37 – 38.
Configure the Multi Effects Board to the ’emergency’ effect by flicking the 3-way switch to the middle and turning the speed wheel all the way to the left for the slowest speed. Turn ON the power to test the lights and effects installed to the tower are working OK.
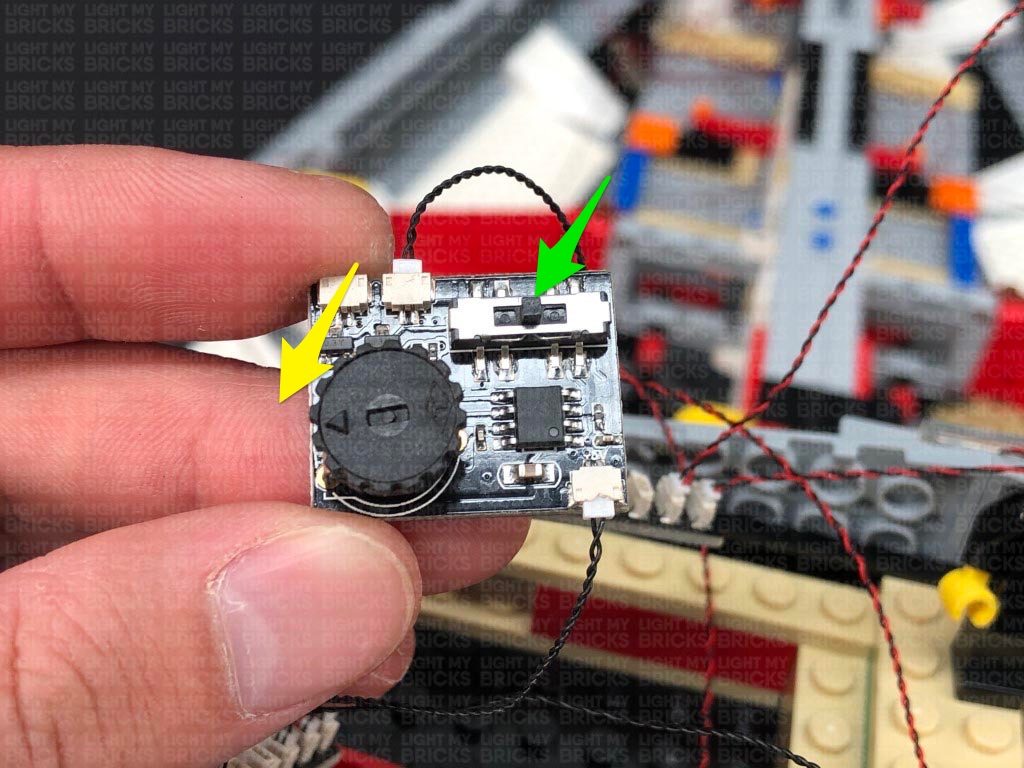 Note: If you experience any issues with the lights not working and suspect an issue with a component, please try a different port on the expansion board to verify where the fault lies (with the light, expansion board, or effects board). To correct any issues with expansion board ports, please view the section addressing expansion board issues on our online troubleshooting guide.
43.) Take one of the tower roof panels and disconnect and disassemble the generator dome section as shown below
Take a Cool White 30cm Large Bit Light and thread the connector end of the cable through the top of the round plate. Pull the cable all the way out from underneath, then carefully bend the Bit Light on a 90 degree angle so that it sits flat against the top of the plate. Reconnect the base section with angled tiles underneath the round plate to secure the Bit Light in place.
 Reconnect the dome piece, then bring the cable down and lay it in between studs before reconnecting the angled 1×2 tile over the top.
44.) Thread the Large Bit Light cable through the top of the rigid round brick before reconnecting this brick to the bottom of the dome section.
Disconnect the following antenna piece from the roof panel, then reconnect the dome section ensuring the cable is facing the outside as shown below. Reconnect the antenna piece we removed earlier, then fold the cable underneath the roof panel so that it is laid towards the inside.
45.) Follow the previous two steps to install another Cool White 30cm Large Bit Light to the generator dome on the left roof panel.
46.) Clear the area inside the bridge by pulling all the cables over to the left side, then reconnect the right roof panel ensuring the Large Bit Light cable is still accessible. Connect the large bit light to a new 6-Port Expansion Board.
Connect a new 5cm Connecting Cable to the 6-Port Expansion Board, then connect the other end of the 5cm cable to the second OUT port on the Multi Effects Board.
Neaten up all the cables by grouping them together and twisting and folding them together into a neat bunch, then tuck everything inside the left side, leaving the 6-port expansion board from this step still accessible.
46.) Take the left roof panel and place it over the left side of the tower. Ensure the bit light cable is folded underneath the panel, then connect it to the same 6-Port expansion board the other generator dome light is connected to.
Tuck all the cables inside the tower before securely reconnecting the roof panel to the tower. Reconnect the pieces on each side of the bridge as well as the top radar section we removed earlier.
Turn ON the power to test all the lights installed to the tower and bridge are working OK. The generator dome lights and two lights installed to the back of the tower should be flashing in alternate sequence using the ’emergency’ flash effect from the multi effects board.
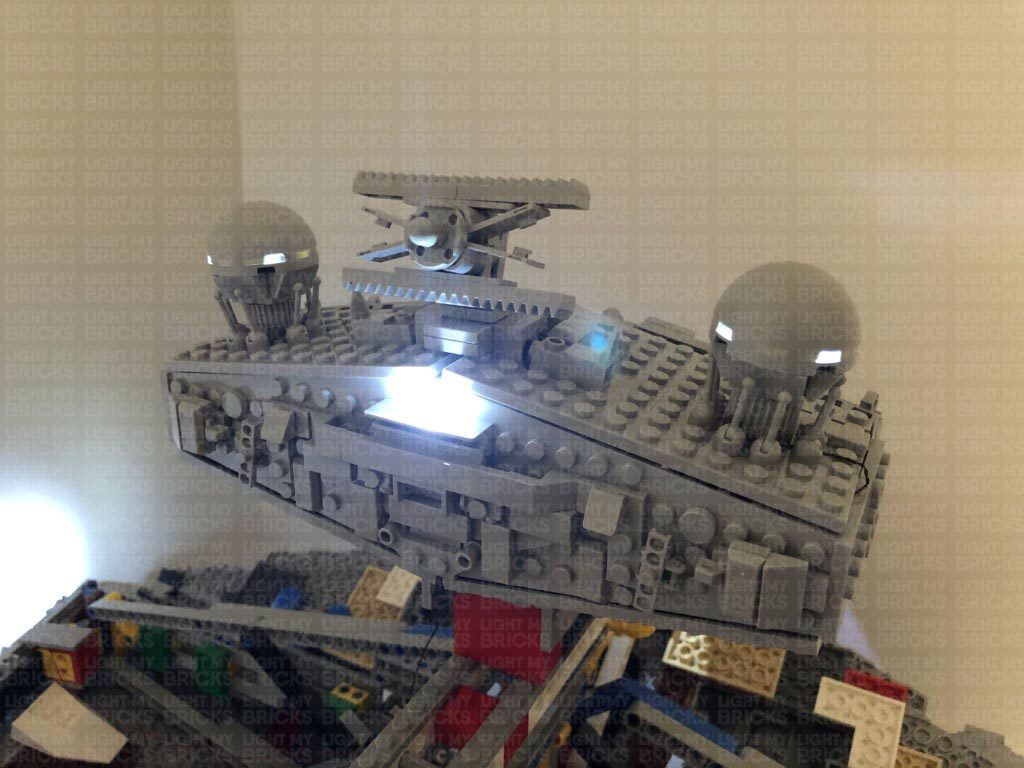 Note: If you experience any issues with the lights not working and suspect an issue with a component, please try a different port on the expansion board to verify where the fault lies (with the light, expansion board, or effects board). To correct any issues with expansion board ports, please view the section addressing expansion board issues on our online troubleshooting guide.
This completes part 1 of the installation of the Light My Bricks Star Wars UCS Imperial Star Destroyer Light Kit.
Click here to access part 2 of the instructions.
Light My Bricks: LEGO Star Wars Tantive IV 75244 Lighting Kit
The following page is the instructions for the Light My Bricks LEGO Star Wars Tantive IV (75244) LED light kit.
If you run into any issues, please refer to the online troubleshooting guide.
To ensure a trouble-free installation of your light kit, please read and follow each step carefully. These instructions can be downloaded in PDF format here
Please note: This page lists instructions for the LED light kit only. If you are wishing to purchase the Light My Bricks LEGO Star Wars Tantive IV (75244) LED light kit , please click here to view the product page
Package Contents:
- 11x White 30cm Bit Lights
- 10x Cool White 30cm Bit Lights
- 4x Red 30cm Bit Lights
- 2x Flashing Red 30cm Bit Lights
- 4x 6-Port Expansion Boards
- 1x 8-Port Expansion Boards
- 1x 12-Port Expansion Boards
- 1x Multi Effects Board
- 1x Gun Effects Board
- 1x Set of Wireless Power Connectors (possitive and negative)
- 2x 5cm Connecting Cables
- 3x 15cm Connecting Cables
- 1x 30cm Connecting Cable
- 6x Adhesive Squares
- 1x USB Power Cable 30cm
LEGO Pieces:
- 4x Trans Clear Round Plate 1×1
- 1x Trans Clear Plate 1×2
Important things to note:
Laying cables in between and underneath bricks
Cables can fit in between and underneath LEGO® bricks, plates, and tiles providing they are laid correctly between the LEGO® studs. Do NOT forcefully join LEGO® together around cables; instead ensure they are laying comfortably in between each stud.
Connecting cable connectors to Expansion Boards
Take extra care when inserting connectors to ports of Expansion Boards. Connectors can be inserted only one way. With the expansion board facing up, look for the soldered “=” symbol on the left side of the port. The connector side with the wires exposed should be facing toward the soldered “=” symbol as you insert into the port. If a plug won’t fit easily into a port connector, do not force it.
Connecting cable connectors to Strip Lights
Take extra care when inserting connectors to ports on the Strip Lights. Connectors can be inserted only one way. With the Strip Light facing up, ensure the side of the connector with the wires exposed is facing down. If a plug won’t fit easily into a port connector, don’t force it. Doing so will damage the plug and the connector.
Installing Bit Lights under LEGO® bricks and plates.
When installing Bit Lights under LEGO® pieces, ensure they are placed the correct way up (Yellow LED component exposed). You can either place them directly on top of LEGO® studs or in between.
OK, Let’s Begin!
1.) We will first install lights to the cockpit. Start by disconnecting the roof section on each side, then disconnect the following middle sections as shown below: Disassemble the middle section as shown below, then take the red and trans dark clear pieces. 2.) Take 2x Cool White 30cm Bit Lights and with the cables facing the right side, place both of them over the studs of the red plate. Secure them in place by reconnecting the trans dark clear plates over the top. The 2 LEDs should fit nicely inside the studs of the trans dark clear plates. Reconnect the following section on top, then flip it over and push the cables down into the corner before reconnecting it to the two white arch bricks. Lay the two cables down the middle in between studs before reconnecting the right section over the top of the cables. Flip this section over and ensure both cables are tucked in between white bricks, then flip it back over and reconnect the middle section on top. 3.) Take a new Cool White 30cm Bit Light and using an Adhesive Square, stick it underneath the middle section in the below position with cable facing the back.
Slip the Bit Light Cable in between the two centre arched bricks, then lay it out toward the back before reconnecting the grey 2×3 plate over the top of the cables. Ensure the cable is laid in between studs.
4.) Connect the cables from the three bit lights we have just installed to a 6-Port Expansion Board. Take your USB Power Cable and connect it to the expansion board. Connect the USB end to a USB Power Bank (sold separately) and turn it ON to test the lights are working OK.
Note: If you experience any issues with the lights not working and suspect an issue with a component, please try a different port on the expansion board to verify where the fault lies (with the light or expansion board). To correct any issues with expansion board ports, please view the section addressing expansion board issues on our online troubleshooting guide.
Disconnect the USB Power Cable from the expansion board, then reconnect the middle section back to the front of the ship. Neaten up the wiring and eliminate excess cable from the Bit Lights by grouping them together and twisting/folding them together into a neat bunch as shown below. Place the expansion board in to the middle section behind.
5.) Remove cabin roof as well upper cannon section, then take a 15cm Connecting Cable and connect it to the 6-Port Expansion Board.
Bring the other end of the 15cm Connecting Cable toward the back, then slip it in between the middle and side sections as shown below.
Disconnect the following white square plate and lay the cable in between studs underneath, before reconnecting the square plate over the top.
6.) Open the lower compartment, then bring the cable out the side to connect to the first port on a 12-Port Expansion Board
Reconnect the USB Power Cable to the last port on the 12-Port Expansion Board and connect up the USB Power Bank to test the cockpit lights are working OK.
Note: If you experience any issues with the lights not working and suspect an issue with a component, please try a different port on the expansion board to verify where the fault lies (with the light or expansion board). To correct any issues with expansion board ports, please view the section addressing expansion board issues on our online troubleshooting guide.
Reconnect the middle section behind the cockpit, as well as the two front side sections.
7.) Take a 5cm Connecting Cable and connect it to the 12-Port Expansion Board, connect the other end of the cable to the IN (+5V) port on the Gun Effects Board (G3FX V1).
Place the Tantive IV onto it’s side to allow us to disconnect the lower cannon section, then disassemble this section as shown below:
8.) Take a Red 30cm Bit Light and thread the connector end of the cable all the way through the top of one of the grey cone pieces. Carefully bend the Bit Light so that the LED sits flat against the top of the cone piece, then reconnect grey bar at the bottom before reconnecting it back to the cannon base. Ensure the cable is facing toward the middle.
Repeat this step to install another Red 30cm Bit Light to the other cannon.
9.) Turn the cannon section over to the top side and bring both cables down toward the back before reconnecting it back to the white round brick.
Thread the two cables through the lower compartment of the ship before reconnecting the lower cannons underneath. Flip the ship back over and connect the two bit light cables to OUT ports 3 and 4 of the Gun Effects Board.
The Gun Effects Board has 3 different gun effects, which can be configured via the 3-way switch. The effect used in the product video example is the Cannon (blaster) effect which can be set by flicking the switch to the far right. Turn your USB Power Bank ON and choose your desired effect. Watch the lower cannons fire away. Alternatively, you can set your desired gun effect via flicking to any of the other switch settings.
Note: If you experience any issues with the lights not working and suspect an issue with a component, please try a different port on the expansion board to verify where the fault lies (with the light or expansion board). To correct any issues with expansion board ports, please view the section addressing expansion board issues on our online troubleshooting guide.
10.) We will now install the upper cannon lights. Take the upper cannon section and disconnect the top as shown below, then disconnect the two cone pieces.
Using the same method used for the lower cannons, install another 2x Red 30cm Bit Lights to the upper cannons.
11.) Take the bottom section of the upper cannons and disconnect the back
Turn the cannons over and bring both cables down the middle before reconnecting back to the bottom section. Ensuring both cables are laid down the middle and in between studs, reconnect the back section.
12.) Reconnect the upper cannon section to the top of the ship, then lay the two bit light cables down behind to connect to OUT ports 1 and 2 on the Gun Effects Board. Turn the USB Power Bank ON to test both upper and lower cannons are working OK.
Note: If you experience any issues with the lights not working and suspect an issue with a component, please try a different port on the expansion board to verify where the fault lies (with the light or expansion board). To correct any issues with expansion board ports, please view the section addressing expansion board issues on our online troubleshooting guide.
Neaten up excess cables from the Red Bit Lights by grouping them together and twisting/folding them into a neat bunch as shown below:
13.) We will now install lights to the inside of the cabin area. First disconnect the corner table, then disconnect the black plate with bar from underneath. Take a Cool White 30cm Bit Light and with the cable facing the back, stick it underneath the table in the following position using an Adhesive Square. Reconnect the black plate with bar over the top of the cable, then turn the table over and reconnect it to the cabin area.
Turn the Tantive over to the other side and open up the lower compartment. Thread the other end of the Bit Light cable through the following hole of the white technic brick underneath. Thread the cable all the way through to the other side, then turn the Tantive back around and pull the cable all the way out. Connect the Bit Light to the next port on the 12-Port Expansion Board.
Turn ON the USB Power Bank to test the light under the table is working OK.
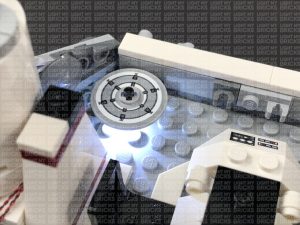 Note: If you experience any issues with the lights not working and suspect an issue with a component, please try a different port on the expansion board to verify where the fault lies (with the light or expansion board). To correct any issues with expansion board ports, please view the section addressing expansion board issues on our online troubleshooting guide.
14.) We will now install some lights to the top section of the cabin. First disconnect the wall section behind the upper cannons, then remove the plates above and underneath the two white angled bricks.
Take 2x Cool White 30cm Bit Lights and with the cables facing behind, place them over the studs of the angled white bricks. Secure them in place by connecting a provided Trans Clear Plate 1×2 over the top. Reconnect this section to the front of the cabin area and then run the cables down behind the wall. Pull out the corner wall section, then bring the cables underneath to connect them to the next available ports on the 12-Port Expansion Board. Turn the USB Power Bank ON to test the lights are working OK.
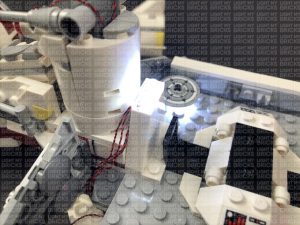 Note: If you experience any issues with the lights not working and suspect an issue with a component, please try a different port on the expansion board to verify where the fault lies (with the light or expansion board). To correct any issues with expansion board ports, please view the section addressing expansion board issues on our online troubleshooting guide.
15.) Take the Negative side of the Wireless Power Connector (flat tile) and with the cable facing the front (same way as the Bit Light Cables) connect it over the trans clear plate. Run the cable down behind the wall, then underneath to connect it to the next port on the 12-Port Expansion Board.
Neaten up cabling running down the side by tucking them into the corner, then secure them to the wall using tape. Fold in the corner wall section to secure down all the cables.
16.) We will now install some flashing red lights to the back of the cabin floors. In order to get to them, follow the below images to disconnect the following sections:
Disconnect the white 1×2 bricks with trans red round plate underneath them from each side. Disconnect the trans red round plates from underneath
17.) Take a Flashing Red 30cm Bit Light and with the cable facing toward the back, place it over the corner stud on the floor of the cabin. Secure the Bit Light in place by reconnecting one of the trans red round plates over the top. Repeat this step to install another Flashing Red 30cm Bit Light to the other side of the cabin floor.
Take the bit light cable from the left side (closest to you) and connect it to the 12-Port Expansion Board.
18.) Turn the Tantive IV over onto it’s left side (pull towards you) and take the bit light cable from the right side and thread it all the way through the following hole of the white technic brick underneath.
Turn the Tantive IV over onto it’s right side and pull the cable all the way out from underneath. Connect the bit light cable to the next available port on the 12-Port Expansion Board.
Turn the USB Power Bank ON to test the flashing red lights on the cabin floor are working OK.
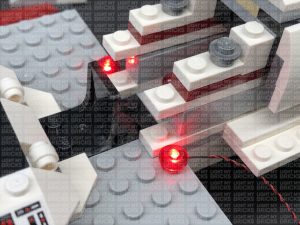 Note: If you experience any issues with the lights not working and suspect an issue with a component, please try a different port on the expansion board to verify where the fault lies (with the light or expansion board). To correct any issues with expansion board ports, please view the section addressing expansion board issues on our online troubleshooting guide.
19.) Take a 30cm Connecting Cable and connect it to the 12-Port Expansion Board. Pull the other end of the cable up in to the cabin, then thread it through the middle section behind, toward the back of the ship. Lay the cable in between studs as shown below before reconnecting one of the white 1×2 bricks over the top. Secure down the white plate on top to close up all gaps.
Reconnect all the sections to the cabin floor which we removed earlier.
20.) We will now neaten up all the messy cables underneath the cabin. Twist and fold the cables into two neat bunches and ensure the bunches are thin, as shown below
Disconnect the lower compartment section, then push the two bunches of cables on the right all the way into the technic brick holes as per below:
Lay the larger bunch of cables (left) from the cannon lights across the middle, toward the back, then place the Gun Effects Board flat up against underneath the cabin floor plate. Place the 12-Port Expansion Board upside down underneath the cabin floor plate (with flat side out). The expansion board should be sitting nicely in between the cabin floor plate and the grey clips. Reconnect the lower compartment section and fold it up to secure all the components and cables neatly inside.
21.) Remove the spare laser pieces from behind, then disconnect the white 1×4 tile from the back. Lay the other end of the 30cm Connecting Cable inside before reconnecting the white tile over the top. Replace the spare laser pieces.
22.) Take the cabin roof section and disconnect the following dishes before disconnecting each side as shown below:
Disconnect the following pieces from the left section, then take a Cool White 30cm Bit Light and with the cable facing back, place it over the following stud. Secure the Bit Light in place by connecting a provided Trans Clear Round Plate 1×1 over the top.
With the cable laid in between studs, reconnect the sections we removed earlier, then reconnect this left section to the middle.
23.) Take the right section and disconnect the following pieces. Ensuring the cable is facing down, install another Cool White 30cm Bit Light, securing it in place with another provided Trans Clear Round Plate 1×1. Reconnect sections we removed earlier, then reconnect the right section to the middle.
24.) Turn the cabin roof over and connect the two bit light cables to a new 6-Port Expansion Board.
Take the Positive side of the Wireless Power Connector (1×2 plate side) and fold the cable across the top of the plate, in between studs. Connect it to underneath the cabin roof in the below position (with the cable facing inside), then connect the cable to the 6-Port Expansion Board.
Test the wireless power connection by taking the Cabin Roof and connecting it directly on top of the cabin. Ensure the two wireless connectors connect with each other. Turn the USB Power Bank ON and the lights on the cabin roof should illuminate.
Troubleshooting: If the roof lights do not turn ON, check that the wireless power connector cables are correctly connected into the expansion board ports. Ensure both wireless connector positive and negative are in line with each other and that the wireless power connector cables are facing the same way.
Remove the cabin roof again and turn it over. Neaten up the cables by folding and twisting them around each other into a neat bunch. Lay the expansion board and bunched up cables along the middle just above the black plate. Fold the two side sections in, which will secure the cables and expansion board in place. Securely reconnect the cabin roof over the cabin.
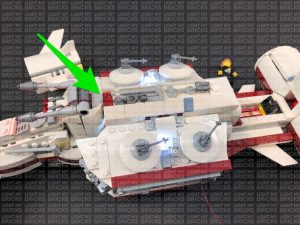 25.) We will now install some lights to the side of the Tantive IV, first remove the following sections from each side by pulling them out as shown below.
Turn the ship onto it’s side so we can access underneath and disconnect the technic pin from the bottom of the black technic brick. Turn the ship over and completely remove the radar section by pulling it all the way out.
Continue to disconnect the following pieces on top of the ship.
26.) Take the two side sections we removed earlier and disconnect the front plate from each one.
Take a Cool White 30cm Bit Light and thread the connector end of the cable through the + hole on the front plate from the left section. Pull the cable all the way out from the other side until you can neatly place the Bit Light over the white stud in between the grey pieces. Secure the Bit Light in place by connecting a provided Trans Clear Round Plate 1×1 over the top.
Take the back section from behind and thread the Bit Light cable through top space. Thread the cable through this section and out the middle hole of the red technic brick. Pull the cable all the way out from underneath, then securely reconnect the front plate.
Repeat this step to install another Cool White 30cm Bit Light to the front plate for the right section, securing it in place using another provided Trans Clear Round Plate 1×1. Thread the cable through the top space and out the middle hole of the red technic brick underneath before reconnecting the front plate.
27.) Take the left section and thread the cable through the back of the middle section and underneath the red and yellow technic pieces. Pull the cable all the way out from the front side, then securely reconnect the left section to the side of the ship.
Repeat this step to reconnect the right side section.
Ensure both cables are neatly pulled over and laid in between studs.
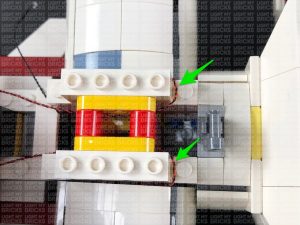 28.) Connect the two Cool White Bit Lights as well as the 30cm Connecting Cable from the front side to a new 6-Port Expansion Board. Neaten up the cables by twisting and folding them around each other to form a neat bunch
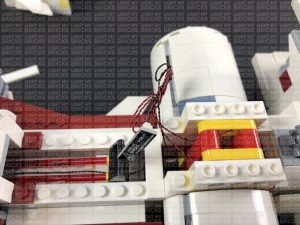 Take a 5cm Connecting Cable and connect it to the 6-Port Expansion Board. Thread the other end of the cable toward the back, underneath the red and yellow technic bricks, then connect it to the IN port on the Multi Effects Board (side with one port).
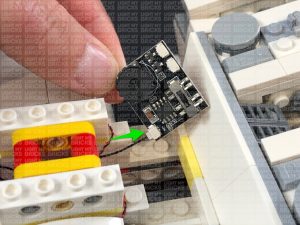 Reconnect the white 1×4 tile to the front side of this section as well as the roof of the spare laser section.
29.) We will now install lights to the back jets starting with the bottom jets. Turn the Tantive IV over and disconnect the four jets from the bottom by disconnecting them at the technic pins.
Turn the jet sections over, then remove the barrel sections from each jet. Disassemble the left one as shown below:
30.) Take a White 30cm Bit Light and thread the connector side of the cable through the bottom of the grey round 2×2 plate. Pull the cable all the way out from the other side, then carefully bend the Bit Light on a 90 degree angle so that it sits flat against the edge of the middle hole. Secure the Bit Light in place by reconnecting the trans orange 2×2 rounded plate.
Reconnect the technic bar to the other side of the grey round 2×2 plate, then thread the Bit Light cable through one of the holes in the technic barrel. Pull the cable all the way out from the other side, then reconnect the technic bar ensuring the cable is facing the inside as shown below (toward the middle):
Note – Because the LED is installed, it will prevent you from being able to completely push in the technic bar. Do not forcefully push the technic bar all the way in. Doing so will damage the Bit Light.
31.) Repeat previous step to install another 3x White 30cm Bit Lights to each of the remaining bottom jets.
32.) Secure the cable for the far left jet and the far right jet underneath the following sections in the middle.
Turn the Tantive IV back over and disconnect the four upper jet sections from the top of the ship.
33.) Turn the Tantive IV back over to the bottom side and reconnect the far right jet. Thread the Bit Light cable through the top of the following space toward the left of it, then pull the cable all the way out from underneath.
Take the middle jet to the left, and while ensuring the cable is laid up the middle toward the front, reconnect the jet. Thread the Bit Light cable through the same space we threaded the right jet light through, then pull the cable all the way out from underneath.
34.) Repeat the previous step to reconnect the remaining two bottom jets, while threading each of their Bit Light cables through the following space, and pulling them all the way out from underneath.
35.) Turn the Tantive IV back over to the top side and connect the four Bit Light cables from the bottom four jets to a 6-Port Expansion Board.
Take a 15cm Connecting Cable and connect it to the same 6-Port Expansion Board. Take the other end of the cable and thread it through the following space which leads into the middle area where we left the Multi Effects Board. Pull the cable out from the other side and connect it to one of the OUT ports on the Multi Effects Board.
Turn the USB Power Bank ON and configure the rear jets effect by flicking the switch on the Multi Effects Board to the far right for the “Flicker Effect”. Adjust the speed of the flicker by turning the speed wheel. Alternatively you can choose your desired effect by flicking the switch to either the “Pulse” or “Emergency” effect.
Note: If you experience any issues with the lights not working and suspect an issue with a component, please try a different port on the expansion board to verify where the fault lies (with the light or expansion board). To correct any issues with expansion board ports, please view the section addressing expansion board issues on our online troubleshooting guide.
36.) Neaten up the cables from the bottom four jets by folding and twisting them around each other into a neat bunch as shown below:
Use 2x Adhesive Squares to mount the 6-Port Expansion Board to back of the Tantive IV in the following position, then tuck the bunched up cables inside the following space.
37.) Remove the three middle jet sections, then disassemble them as per below:
Take a White 30cm Bit Light and thread the connector side of the cable through the bottom of the grey round 2×2 plate. Pull the cable all the way out from the other side, then carefully bend the Bit Light on a 90 degree angle so that it sits flat against the edge of the plate. Secure the Bit Light in place by reconnecting the trans orange 2×2 rounded plate.
Reconnect the black technic bar to the other side of the grey round 2×2 plate, then thread the Bit Light cable through one of the holes in the technic barrel. Pull the cable all the way out from the other side, then reconnect the technic bar.
Note – Because the LED is installed, it will prevent you from being able to completely push in the technic bar. Do not forcefully push the technic bar all the way in. Doing so will damage the Bit Light.
38.) Reconnect the barrel to the section behind, then bring the cable down and underneath the bottom before reconnecting the jet section to the middle row on the back of the Tantive IV. The cable should be pulled out from underneath and toward the front.
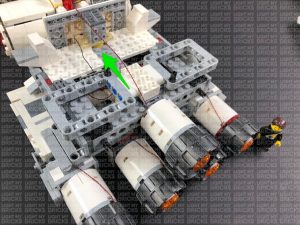 Repeat this step to install 2x White 30cm Bit Lights to the remaining two middle jet sections, then reconnect each one to the each side of the middle jet.
39.) Take the three Bit Light cables from the middle jets and thread them underneath the following technic pieces, pulling them all the way out from the other side. Connect the three cables to an 8-Port Expansion Board
Take the remaining 15cm Connecting Cable and connect it to the next port on the 8-Port Expansion Board. Thread the other end of the cable through the following space which leads into the area where the Multi Effects Board is. Pull the cable all the way out from the other side and connect it to the remaining OUT port on the Multi Effects Board.
Turn the USB Power Bank ON the test the middle jets are working OK.
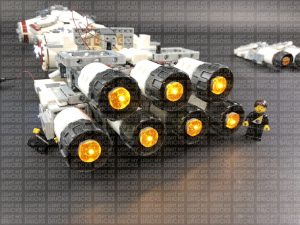 Note: If you experience any issues with the lights not working and suspect an issue with a component, please try a different port on the expansion board to verify where the fault lies (with the light or expansion board). To correct any issues with expansion board ports, please view the section addressing expansion board issues on our online troubleshooting guide.
40.) Tuck the Multi Effects Board into the middle space, then reconnect the white 1×4 tile as well as the remaining sections we disconnected earlier.
Reconnect the radar section and secure it by reconnecting the technic pin to the bottom of the black technic brick underneath the ship.
41.) Take the four upper jet sections and flip them over so that the bottom sides are facing up, then disconnect the barrel sections from each one.
Using the same method used for the four bottom jet sections (step 30), install another 4x White 30cm Bit Lights to the four upper jets.
42.) Take the far left upper jet section and reconnect it to the top of the Tantive IV while ensuring the cable is facing the inside (the middle). Connect the Bit Light cable from this jet to the next available port on the 8-Port Expansion Board.
Take the far right upper jet section and reconnect it to the top of the Tantive IV while ensuring the cable is facing the inside (the middle). Connect the Bit Light cable from this jet to the next available port on the 8-Port Expansion Board.
43.) Neaten up cables from the three middle jet sections underneath, by grouping them together and twisting and folding them around each other into a neat bunch.
Pull the cable from the far right upper jet over to the left side before reconnecting the next jet section to the left of it. Connect it’s Bit Light Cable to the next port on the 8-Port Expansion Board.
Group the three upper jet bit light cables together and twist/fold them around each other into a neat bunch.
44.) Before you reconnect the remaining upper jet section, connect it’s Bit Light cable to the remaining port on the 8-Port Expansion Board.
Tuck the bunch of cables from the upper jet lights into the following space, then using the remaining 2x Adhesive Squares, mount the 8-Port Expansion Board to the back of the ship in the following position.
45.) Eliminate some excess cable from the remaining jet section by twisting/folding the wire around itself into a neat bunch before securely reconnecting the remaining jet section to the top of the ship.
Turn the USB Power Bank ON to test all the rear jet lights are working OK.
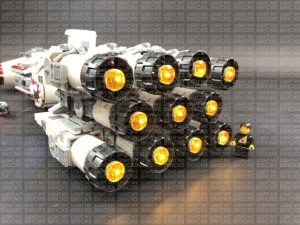 Note: If you experience any issues with the lights not working and suspect an issue with a component, please try a different port on the expansion board to verify where the fault lies (with the light or expansion board). To correct any issues with expansion board ports, please view the section addressing expansion board issues on our online troubleshooting guide.
This finally completes installation of the Light My Bricks LEGO Star Wars Tantive IV Lighting Kit.
If you experience any issues during this installation, please refer to our online troubleshooting guide. If you have any other issues or questions please email the customer service team: info@lightmybricks.com
We thank you for purchasing this product and hope you enjoy!
Light My Bricks: LEGO Star Wars Ewok Village 10236 Lighting Kit

The following page is the instructions for the Light My Bricks LEGO Star Wars Ewok Village (10236) LED light kit.
If you run into any issues, please refer to the online troubleshooting guide.
To ensure a trouble-free installation of your light kit, please read and follow each step carefully. These instructions can be downloaded in PDF format here
Please note: This page lists instructions for the LED light kit only. If you are wishing to purchase the Light My Bricks LEGO Star Wars Ewok Village (10236) LED light kit , please click here to view the product page
Package Contents:
- 7x White 30cm Bit Lights
- 5x Orange 30cm Bit Lights
- 12x Green 30cm Bit Lights
- 4x White 15cm Micro Bit Lights
- 2x Green Strip Lights
- 1x Green Light My Bricks Lightsaber
- 2x Flicker Effects Boards
- 1x Micro 2 to 4-Port Expansion Board
- 1x 2-Port Expansion Board
- 5x 6-Port Expansion Boards
- 1x 8-Port Expansion Board
- 5x 5cm Connecting Cables
- 3x 15cm Connecting Cables
- 2x 30cm Connecting Cables
- 1x 50cm Connecting Cable
- 1x USB Power Cable
- 24x Adhesive Squares
LEGO Pieces:
- 2x Plate 1×6 (any colour)
- 7x Trans Orange Round Plate 1×1 with open stud
Important things to note:
Laying cables in between and underneath bricks
Cables can fit in between and underneath LEGO® bricks, plates, and tiles providing they are laid correctly between the LEGO® studs. Do NOT forcefully join LEGO® together around cables; instead ensure they are laying comfortably in between each stud.
Connecting cable connectors to Expansion Boards
Take extra care when inserting connectors to ports of Expansion Boards. Connectors can be inserted only one way. With the expansion board facing up, look for the soldered “=” symbol on the left side of the port. The connector side with the wires exposed should be facing toward the soldered “=” symbol as you insert into the port. If a plug won’t fit easily into a port connector, do not force it.
Connecting cable connectors to Strip Lights
Take extra care when inserting connectors to ports on the Strip Lights. Connectors can be inserted only one way. With the Strip Light facing up, ensure the side of the connector with the wires exposed is facing down. If a plug won’t fit easily into a port connector, don’t force it. Doing so will damage the plug and the connector.
Connecting micro cable connectors to Micro Expansion Board Ports
Take extra care when inserting the micro connectors to micro ports of Micro Expansion Boards. Connecting Micro Bit Lights to Micro Expansion Boards is similar to connecting lights and cables to Strip Lights. With the expansion board facing up, ensure the side of the connector with the wires exposed is facing down. If a plug won’t fit easily into a port connector, do not force it. Use your fingernail to push the plastic part of the connector to the micro port.Installing Bit Lights under LEGO® bricks and plates.
When installing Bit Lights under LEGO® pieces, ensure they are placed the correct way up (Yellow LED component exposed). You can either place them directly on top of LEGO® studs or in between.
OK, Let’s Begin!
1.) First remove the left section of the village by disconnecting it at the bridge. Take the main section of the village and turn it onto it’s back so we can access underneath. Take 2x Green Strip Lights and using their adhesive backing, stick them onto the bases of the provided 2x Plate 1×6. Connect the two strip lights together using a 15cm Connecting Cable then take another 15cm Connecting Cable and connect it to the right strip light’s other port. 2.) Take another 15cm Connecting Cable and connect it to the left strip light’s other port, then mount both strip lights underneath the village in the following positions. Secure the 15cm Connecting Cable connected between the two strip lights underneath the following plates by first disconnecting them, then reconnecting them over the cables ensuring they are carefully laid in between studs. Tuck any remaining excess cable from the 15cm cable up into the space toward the left of the left strip light, then flip the set back over. 3.) Turn the set around to the back, then take the other end of the 15cm connecting cable and connect it to a 6-port Expansion Board. Connect the USB power Cable to the end port on the expansion board, then connect it up to your USB Power Bank (sold separately) to test the green strip lights are working OK. Note: If you experience any issues with the lights not working and suspect an issue with a component, please try a different port on the expansion board to verify where the fault lies (with the light or expansion board). To correct any issues with expansion board ports, please view the section addressing expansion board issues on our online troubleshooting guide.
4.) Take a 30cm Connecting Cable and connect it to a spare port on the expansion board, then bring it up and thread it all the way through the space behind C3PO’s throne.
Open the secret door behind the tree and place the expansion board inside. With the connecting cables laid out the top and USB cable laid down the bottom, close the door. Secure both connecting cables and prevent them from dangling down by laying them underneath the following tree section.
Take the other end of the 30cm Connecting Cable and connect it to a 8-Port Expansion Board
5.) Turn the village set back around to the front as we will now install lights to the upper parts of the tree starting with the right side.
Take a Green 30cm Bit Light and thread the connector end of the cable through the top of the following hole on the right tree branch. Thread it all the way through then carefully bend the LED component so that it sits flat against the top edge of the hole.
Thread the other side of the cable through the back, then pull it all the way out from the other side, then secure the cable by laying it underneath the branch section above. Ensure the cable is neatly laid in between LEGO studs.
6.) Take another Green 30cm Bit Light and thread the connector end of the cable through the top of the following hole on the right tree branch. Thread it all the way through, thread the other side of the cable through the space underneath and pull it all the way out from the other side.
Carefully bend the LED component so that it sits flat against the top edge of the hole.
Repeat the previous 2 steps to install another 2x Green 30cm Bit Lights to the tree section in the following positions.
 7.) Turn the village around the back and group all four green bit light cables together on the right side. Connect the lights to the 8-Port Expansion Board below, then turn the USB Power Bank ON to test the green tree lights are working OK.
Note: If you experience any issues with the lights not working and suspect an issue with a component, please try a different port on the expansion board to verify where the fault lies (with the light or expansion board). To correct any issues with expansion board ports, please view the section addressing expansion board issues on our online troubleshooting guide.
Disconnect the four lights from the expansion board, then twist/wind the cables around each other at the top of the tree trunk. Secure the cable from the left side underneath the following LEGO piece.
Continue to twist/wind the four cables around each all the way to the end so they all come together to form one larger cable.
 Reconnect the Bit Light cables to the 8-port expansion board, then wind any excess cable around the larger cable.
Secure the bit light cables to the right side of the tree using tape. This will prevent the cables from being seen from the front of the set.
 8.) Turn the set back around to the front as we will now install another two green lights to the middle tree. First disconnect the following tree section.
Take a Green 30cm Bit Light and thread it through the top of the following hole on the right side. Thread it all the way through, then carefully bend the LED component so that it sits flat against the edge of the hole. Bring the cable behind toward the back.
Take another Green 30cm Bit Light and thread it through the top of the following hole on the left side. Thread it all the way through, then carefully bend the LED component so that it sits flat against the edge of the hole. Bring the cable behind toward the back.
Reconnect the set of tree branches that we removed earlier.
 9.) Turn the set around to the back and bring the cable on the right over to the left side, then twist/wind the two cables around each other all the way to the end so they come together forming a larger cable.
Connect the two lights to the 8-port expansion board below, then turn ON the USB Power Bank to test the lights we have just installed are working OK.
Note: If you experience any issues with the lights not working and suspect an issue with a component, please try a different port on the expansion board to verify where the fault lies (with the light or expansion board). To correct any issues with expansion board ports, please view the section addressing expansion board issues on our online troubleshooting guide.
10.) Bring the two green bit light cables we just installed, inside the tree, then secure them underneath the following section.
Hide the cables underneath behind C3PO’s throne, then neatly place the 8-port expansion board behind the brown railing.
Take the other end of the 15cm Connecting Cable from the Green Strip Light closest to the middle of the set and thread it through to the back of the set. Turn the set around to the back and connect the 15cm connecting cable to a new 6-Port Expansion Board
11.) Turn the set back around to the front as we will install a few more green lights to the tree on the left. First disconnect the flying Ewok, then follow the same methods used in previous steps to install another 3x Green 30cm Bit Lights to this tree.
12.) Turn the set around to the back and bring the cable on the left toward the right and secure them underneath the following two sections as shown below:
Group the three cables near the top of the lower tree branch and twist/wind the cables around each other other all the way to the end so they come together forming one larger cable.
Thread the cables through the gaps in between the tree and brown railings, then connect them to the 6-port expansion board below. Turn ON the USB Power Bank to test the three green lights are working OK.
Note: If you experience any issues with the lights not working and suspect an issue with a component, please try a different port on the expansion board to verify where the fault lies (with the light or expansion board). To correct any issues with expansion board ports, please view the section addressing expansion board issues on our online troubleshooting guide.
Wind the excess cables closest to the expansion board around the larger cable.
13.) Take a 50cm Connecting Cable and connect it to the 6-port expansion board. Bring the cable around to the front and thread it through the bottom of the tree platform, then pull it all the way out as shown below:
Bring the set around to the back again, then take 2x Adhesive Squares and stick them to the back of the 6-port Expansion Board. Mount the expansion board underneath the tree platform, then wind any excess cable from the 15cm connecting cable on the right, around the brown railing.
Secure the green bit light cables to the right side of the tree using tape. This will avoid cables being seen from the front of the set.
14.) We will now light up all the fire torches around the village starting with the right side. Disconnect the two torches on either side of the right tree, then disconnect the flame pieces from them as shown below:
Take a White 30cm Bit Light and carefully bend the cable up on a 90 degree angle. Turn the Bit Light upside down over the top of a provided Trans Orange Round Plate 1×1 with Open Stud. Hold the Bit Light in place with your thumb and index finger, then connect the trans orange plate upside down over one of the brown torch pieces while securing the Bit Light in place. Ensure the cable is facing the back of the torch.
Disconnect the black plate from the bottom of the torch section, then bring the cable around the front and thread it in between the clips leading out the back. Reconnect the bottom piece securing the cable in place, then reconnect the flame piece on top of the torch.
15.) Repeat the previous step to install another White 30cm Bit Light to the other fire torch using another provided Trans Orange Round Plate 1×1 with Open Stud. Reconnect both fire torches to the tree, then turn the set around to the back and pull out both cables.
16.) Turn the set back around to the front and disconnect the fire pit section from the black plate as shown below. Disconnect the four flame pieces, then rotate the clips so they are directly facing the four sides.
Take an Orange 30cm Bit Light and stick the LED component to an Adhesive Square. Stick the Bit Light to one of the corners, then tuck the cable in underneath the clip as shown below:
Using another Adhesive Square, stick another Orange 30cm Bit Light to the next corner of the black plate, then tuck the cable underneath the clip behind.
 Install one more Orange 30cm Bit Light using another Adhesive Square to the next corner to the right, ensuring the cable is facing the same way as the others.
17.) Turn the black plate around to the back, then group the three cables and wind/twist them around each other to secure them in place. Reconnect all four flame pieces, then slightly bend them down on an angle to prevent the Bit Lights from being too visible.
Reconnect the plate back to the tree platform, then thread the cables though to the back. Disconnect the right side of the rotisserie and bring the cables inside before reconnecting it.
18.) Turn the set around to the back and connect all five cables from the lights we have just installed to a new 6-Port Expansion Board. Connect a 5cm Connecting Cable to the remaining port, then connect the other end of the cable to one of the OUT ports on a Flicker Effects Board.
Take another 5cm Connecting Cable and connect it to the OUT port on the Flicker Effects Board, then connect the other end of the cable to the remaining port on the 8-Port Expansion Board nearby (The expansion board where we connected the green bit lights to).
Turn ON the USB Power Bank to test the lights we have installed so far are working and flickering OK.
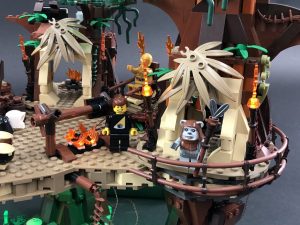 Note: If you experience any issues with the lights not working and suspect an issue with a component, please try a different port on the expansion board to verify where the fault lies (with the light, expansion board, or effects board). To correct any issues with expansion board ports, please view the section addressing expansion board issues on our online troubleshooting guide.
19.) Disconnect the five flickering lights from the 6-port expansion board, then group them together at the edge of the platform and twist/wind them around each other to lock them in place. Bring cables from both sides underneath the platform, then continue to twist/wind the cables around each other all the way to the ends so they come together forming one larger cable.
Thread the cables down through the space between the tree and the brown rail, then reconnect all five cables back to the 6-port expansion board. Wind any excess cable around the group of cables then continue to fold and twist the cables so they form a neat bunch as shown below:
20.) We will now light up the fire torches surrounding C3PO’s throne. From the back of the set, disconnect the four fire torches, then disassemble them as shown below:
Take one of the White 15cm Micro Bit Lights and thread the LED side of the cable up the bottom end of one of the brown fire torch pieces. Thread the bit light to the top, but ensure the LED does not go up past the first section of the inside of the torch piece.
(It is extremely important that the Bit Light is not sticking too far out of the brown torch piece otherwise the cable will snap when you reconnect the flame piece)
Reconnect the torch pole underneath to prevent the light cable from slipping out, then reconnect one of the flame pieces.
Repeat this step to install another White 15cm Micro Bit Light to the other larger fire torch, then reconnect both torches to the back of the throne.
(It is extremely important that the Bit Light is not sticking too far out of the brown torch piece otherwise the cable will snap when you reconnect the flame piece)
21.) Take another White 15cm Micro Bit Light and carefully bend the cable up on a 90 degree angle near the LED. Thread the LED component through the hole on the top of the torch base as shown below, then reconnect the flame piece to secure the micro bit light in place.
Repeat this step to install another White 15cm Micro Bit Light to the other fire torch, then reconnect the two torches to the back of the throne.
22.) Take the Micro 4 Port Expansion Board and connect the four micro bit lights to it. Ensure you are carefully connecting them the correct way. Use the below images as a guide.
Take a 5cm Connecting Cable and connect one side to the larger port on the Micro 4-Port Expansion Board. Connect the other side of the 5cm cable to one of the OUT ports on the Flicker Effects Board nearby.
Turn ON the USB Power Bank to test for four flickering lights we have just installed are working OK
23.) Group the four micro bit light cables and twist/fold them around each other into a neat bunch.
Use 2x Adhesive Squares to mount the 6-Port Expansion Board towards the far left side underneath the tree platform in the following position:
Tuck the bunched up cables inside underneath the tree platform in between the tree and rail.
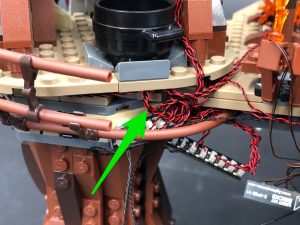 Use Adhesive Squares (2 for each expansion board) to mount the 8-Port Expansion Board and Micro 4-Port Expansion Board underneath the tree platform in the following positions:
24.) We will now light up the fire torches to the left of C3PO. Disconnect the torches from either side of the tree hut and using the same method used in step 14 to install another 2x White 30cm Bit Lights to the two fire torches using another 2x provided Trans Orange Round Plate 1×1 with Open Stud.
Reconnect both torches to either side of the tree hut, then bring both cables out toward the back. Turn the set around to the back and connect the two bit light cables to a new 6-Port Expansion Board.
25.) Disconnect the fire pit from this section, then disconnect the flame pieces.
Take an Orange 30cm Bit Light and using an Adhesive Square, mount it to the centre of the black tiles as shown below, then reconnect one of the flame pieces.
Take another Orange 30cm Bit Light and using an Adhesive Square, mount it to the dark grey stud toward the left, then reconnect the remaining flame piece.
Turn the fire pit around to the back and reconnect it inside the tree hut.
26.) Connect the two orange bit lights along with a new 5cm Connecting Cable to the 6-Port Expansion Board. Bring the cables along with the expansion board around to the left side, then connect the other end of the 5cm cable to the remaining OUT port on the Flicker Effects Board.
Turn ON the USB Power Bank to test that all flickering lights installed so far are working OK.
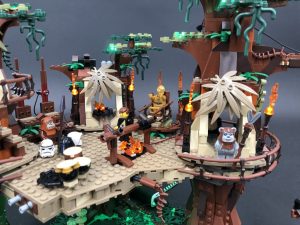 Note: If you experience any issues with the lights not working and suspect an issue with a component, please try a different port on the expansion board to verify where the fault lies (with the light, expansion board, or effects board). To correct any issues with expansion board ports, please view the section addressing expansion board issues on our online troubleshooting guide.
27.) Disconnect the 5cm cable from the 6-port expansion board from previous step, then group together the four bit light cables directly underneath the platform. Twist/wind the cables around each other to lock them in place, then continue to twist them around each other all the way to the end. Wind any excess cable around the larger group of cables, then reconnect the 5cm cable to the expansion board.
Use 2x Adhesive Squares to mount the flicker effects board behind C3PO’s throne as shown below:
Use another 2x Adhesive Squares to mount the 6-port expansion board from previous step to the right of the flicker effects board as shown below:
Neaten up cabling by twisting/folding any excess cable, then secure the cable to the back of the tree platform using tape. Do your best to prevent any cables from dangling down and being seen from the front of the set.
28.) We will light up the remaining fire torch on the left side of the village. Disconnect this torch follow the same method used in step 14 to install another White 30cm Bit Light to this torch using another provided Trans Orange Round Plate 1×1 with Open Stud.
Before we reconnect the torch to the side of the hut, ensure you lay the cable through the clips differently this time as this torch is facing the opposite direction.
29.) Bring the cable around to the back and thread the cable down inside the brown rails, then connect it to a 2-Port Expansion Board.
Take a 30cm Connecting Cable and connect it to 2-Port Expansion Board, then bring the other end of the cable around to the left side behind the tree logs and connect it to the remaining port on the 6-Port Expansion Board on the right of the flicker effects board.
Hide the 30cm connecting cable underneath the tree platforms, then stick the 2-port Expansion Board underneath the tree platform on the right using another 2x Adhesive Squares.
Twist/wind/fold excess cable from the white 30cm bit light, then tuck it inside the brown railing.
Secure the cable to the side of the tree using the same tape we used to secure the other bit light cables from step 11. Use extra tape as required to do your best to secure the cables as close to the inside of the tree hut as possible to prevent them from being seen from the front of the set.
30.) We will now install lights to the left section of the village. First, take a Green 30cm Bit Light and thread the connector side of the cable through the following hole on top of the tree branches. Thread it all the way through, then slightly bend the LED component so that it sits flat against the edge of the hole.
Repeat the same process to install another Green 30cm Bit Light to the right side of the tree.
31.) Disconnect the following tree section toward the middle, then install another Green 30cm Bit Light to the following hole underneath before reconnecting the tree section.
32.) Take Luke Skywalker and disconnect his lightsaber to replace with the provided Light My Bricks Green Lightsaber. Re-position Luke on the bottom right side of the tree as shown below:
33.) Turn the tree around to the back and slightly disconnect the roof of the tree hut to lay the green bit light cable from the right side through the gap and out to the left side. Ensure the cable is laid in between studs before reconnecting the roof to secure the cable in place.
Connect the three green bit light cables, along with the lightsaber cable to a new 6-Port Expansion Board. Take the other end of the 50cm Connecting Cable from the right section of the set and connect it to the expansion board. Turn ON the USB Power Bank to test the lights on the left side of the set are working OK.
Note: If you experience any issues with the lights not working and suspect an issue with a component, please try a different port on the expansion board to verify where the fault lies (with the light, expansion board, or effects board). To correct any issues with expansion board ports, please view the section addressing expansion board issues on our online troubleshooting guide.
34.) Disconnect the 50cm Connecting Cable along with the four bit light cables from the expansion board. Group together the three green bit light cables near the top of the tree and twist/wind them around each other all the way to the ends of the cables. Reconnect the three cables to the 6-port expansion board, then continue to wind any more excess cable around the larger group of cables. Reconnect the Lightsaber cable.
35.) Disconnect the remaining torches from each side of the tree hut and install another 2x White 30cm Bit Lights to them, the same way we did for all other torches using the remaining provided 2x Trans Orange Round Plate 1×1 with open stud.
Reconnect both fire torches, then turn the section around to the back. Bring the two cables together and twist/wind them around each other (underneath the trap door) to lock them in place.
Connect the white bit light cables to two of the OUT ports on a new Flicker Effects Board. Take the other end of the 50cm Connecting Cable from the right section and connect it to the IN port on the effects board. Turn the USB Power Bank ON to test the flicker lights from the torches are working OK.
36.) Disconnect the 50cm Connecting Cable from the flicker effects board and connect a new 5cm Connecting Cable to the IN port instead. Connect the other end of the 5cm cable to the 6-Port Expansion Board.
Using 2x Adhesive Squares, stick the 6-port Expansion Board to the back of the tree in the below position:
Secure the cables from the green bit lights inside the tree hut and down the back of the tree using tape.
Eliminate excess cable by twisting/folding the cables around each other to form a neat bunch.
37.) Turn both sections around to the back and reconnect the bridge to the main section.
Thread the other end of the 50cm connecting cable up the space below the black rope on the bridge, then pull the cable all the way out the top. Thread the cable back down the space on the next clip along then bring the cable to the other side of the bridge. Thread the cable through the clips and pull it all the way out.
Secure the cable along the back side of the bridge by disconnecting clips, bring the cable in, then reconnecting the clips.
Connect the 50cm Connecting Cable to the 6-port Expansion board.
38.) Mount the Flicker Effects Board to the back of the tree using an Adhesive Square.
Hide the lightsaber cable underneath the tree base. Alternatively, you can re-position Luke and his saber anywhere else in the set by simply connecting the lightsaber cable to a spare expansion board port. Remember to only connect the lightsaber light to an expansion board that is not connected to the flicker effects board otherwise the lightsaber will also flicker.
Note: If you experience any issues with the lights not working and suspect an issue with a component, please try a different port on the expansion board to verify where the fault lies (with the light, expansion board, or effects board). To correct any issues with expansion board ports, please view the section addressing expansion board issues on our online troubleshooting guide.
27.) Disconnect the 5cm cable from the 6-port expansion board from previous step, then group together the four bit light cables directly underneath the platform. Twist/wind the cables around each other to lock them in place, then continue to twist them around each other all the way to the end. Wind any excess cable around the larger group of cables, then reconnect the 5cm cable to the expansion board.
Use 2x Adhesive Squares to mount the flicker effects board behind C3PO’s throne as shown below:
Use another 2x Adhesive Squares to mount the 6-port expansion board from previous step to the right of the flicker effects board as shown below:
Neaten up cabling by twisting/folding any excess cable, then secure the cable to the back of the tree platform using tape. Do your best to prevent any cables from dangling down and being seen from the front of the set.
28.) We will light up the remaining fire torch on the left side of the village. Disconnect this torch follow the same method used in step 14 to install another White 30cm Bit Light to this torch using another provided Trans Orange Round Plate 1×1 with Open Stud.
Before we reconnect the torch to the side of the hut, ensure you lay the cable through the clips differently this time as this torch is facing the opposite direction.
29.) Bring the cable around to the back and thread the cable down inside the brown rails, then connect it to a 2-Port Expansion Board.
Take a 30cm Connecting Cable and connect it to 2-Port Expansion Board, then bring the other end of the cable around to the left side behind the tree logs and connect it to the remaining port on the 6-Port Expansion Board on the right of the flicker effects board.
Hide the 30cm connecting cable underneath the tree platforms, then stick the 2-port Expansion Board underneath the tree platform on the right using another 2x Adhesive Squares.
Twist/wind/fold excess cable from the white 30cm bit light, then tuck it inside the brown railing.
Secure the cable to the side of the tree using the same tape we used to secure the other bit light cables from step 11. Use extra tape as required to do your best to secure the cables as close to the inside of the tree hut as possible to prevent them from being seen from the front of the set.
30.) We will now install lights to the left section of the village. First, take a Green 30cm Bit Light and thread the connector side of the cable through the following hole on top of the tree branches. Thread it all the way through, then slightly bend the LED component so that it sits flat against the edge of the hole.
Repeat the same process to install another Green 30cm Bit Light to the right side of the tree.
31.) Disconnect the following tree section toward the middle, then install another Green 30cm Bit Light to the following hole underneath before reconnecting the tree section.
32.) Take Luke Skywalker and disconnect his lightsaber to replace with the provided Light My Bricks Green Lightsaber. Re-position Luke on the bottom right side of the tree as shown below:
33.) Turn the tree around to the back and slightly disconnect the roof of the tree hut to lay the green bit light cable from the right side through the gap and out to the left side. Ensure the cable is laid in between studs before reconnecting the roof to secure the cable in place.
Connect the three green bit light cables, along with the lightsaber cable to a new 6-Port Expansion Board. Take the other end of the 50cm Connecting Cable from the right section of the set and connect it to the expansion board. Turn ON the USB Power Bank to test the lights on the left side of the set are working OK.
Note: If you experience any issues with the lights not working and suspect an issue with a component, please try a different port on the expansion board to verify where the fault lies (with the light, expansion board, or effects board). To correct any issues with expansion board ports, please view the section addressing expansion board issues on our online troubleshooting guide.
34.) Disconnect the 50cm Connecting Cable along with the four bit light cables from the expansion board. Group together the three green bit light cables near the top of the tree and twist/wind them around each other all the way to the ends of the cables. Reconnect the three cables to the 6-port expansion board, then continue to wind any more excess cable around the larger group of cables. Reconnect the Lightsaber cable.
35.) Disconnect the remaining torches from each side of the tree hut and install another 2x White 30cm Bit Lights to them, the same way we did for all other torches using the remaining provided 2x Trans Orange Round Plate 1×1 with open stud.
Reconnect both fire torches, then turn the section around to the back. Bring the two cables together and twist/wind them around each other (underneath the trap door) to lock them in place.
Connect the white bit light cables to two of the OUT ports on a new Flicker Effects Board. Take the other end of the 50cm Connecting Cable from the right section and connect it to the IN port on the effects board. Turn the USB Power Bank ON to test the flicker lights from the torches are working OK.
36.) Disconnect the 50cm Connecting Cable from the flicker effects board and connect a new 5cm Connecting Cable to the IN port instead. Connect the other end of the 5cm cable to the 6-Port Expansion Board.
Using 2x Adhesive Squares, stick the 6-port Expansion Board to the back of the tree in the below position:
Secure the cables from the green bit lights inside the tree hut and down the back of the tree using tape.
Eliminate excess cable by twisting/folding the cables around each other to form a neat bunch.
37.) Turn both sections around to the back and reconnect the bridge to the main section.
Thread the other end of the 50cm connecting cable up the space below the black rope on the bridge, then pull the cable all the way out the top. Thread the cable back down the space on the next clip along then bring the cable to the other side of the bridge. Thread the cable through the clips and pull it all the way out.
Secure the cable along the back side of the bridge by disconnecting clips, bring the cable in, then reconnecting the clips.
Connect the 50cm Connecting Cable to the 6-port Expansion board.
38.) Mount the Flicker Effects Board to the back of the tree using an Adhesive Square.
Hide the lightsaber cable underneath the tree base. Alternatively, you can re-position Luke and his saber anywhere else in the set by simply connecting the lightsaber cable to a spare expansion board port. Remember to only connect the lightsaber light to an expansion board that is not connected to the flicker effects board otherwise the lightsaber will also flicker.
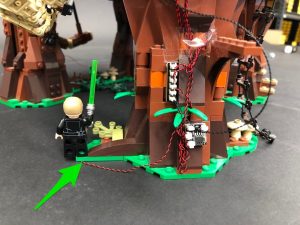
This finally completes installation of the Light My Bricks Ewok Village Light Kit. We thank you for purchasing this product and hope you enjoy!

Light My Bricks: LEGO Star Wars Darth Vader Castle 75251 Lighting Kit
The following page is the instructions for the Light My Bricks LEGO Star Wars Darth Vader Castle (75251) LED light kit.
If you run into any issues, please refer to the online troubleshooting guide.
To ensure a trouble-free installation of your light kit, please read and follow each step carefully. These instructions can be downloaded in PDF format here
Please note: This page lists instructions for the LED light kit only. If you are wishing to purchase the Light My Bricks LEGO Star Wars Darth Vader Castle (75251) LED light kit , please click here to view the product page
Package Contents:
- 5x White 15cm Bit Lights
- 2x Cool White 30cm Bit Lights
- 1x Pink 30cm Bit Light
- 1x Flashing White 30cm Bit Light
- 5x Red Strip Lights
- 2x White Strip Lights
- 1x Red Light My Bricks Lightsaber
- 1x Multi Effects Board
- 1x Flicker Effects Board
- 3x 6-Port Expansion Board
- 6x 5cm Connecting Cables
- 3x 15cm Connecting Cables
- 2x 30cm Connecting Cables
- 1x AA Battery Pack
- 4x Adhesive Squares
LEGO Pieces:
- 7x Black Plate 1×6
- 1x Trans Green Round Plate 1×1
- 1x Trans Light Blue Round Plate 1×1
Important things to note:
Laying cables in between and underneath bricks
Cables can fit in between and underneath LEGO® bricks, plates, and tiles providing they are laid correctly between the LEGO® studs. Do NOT forcefully join LEGO® together around cables; instead ensure they are laying comfortably in between each stud.
Connecting cable connectors to Expansion Boards
Take extra care when inserting connectors to ports of Expansion Boards. Connectors can be inserted only one way. With the expansion board facing up, look for the soldered “=” symbol on the left side of the port. The connector side with the wires exposed should be facing toward the soldered “=” symbol as you insert into the port. If a plug won’t fit easily into a port connector, do not force it.
Connecting cable connectors to Strip Lights
Take extra care when inserting connectors to ports on the Strip Lights. Connectors can be inserted only one way. With the Strip Light facing up, ensure the side of the connector with the wires exposed is facing down. If a plug won’t fit easily into a port connector, don’t force it. Doing so will damage the plug and the connector.
Installing Bit Lights under LEGO® bricks and plates.
When installing Bit Lights under LEGO® pieces, ensure they are placed the correct way up (Yellow LED component exposed). You can either place them directly on top of LEGO® studs or in between.
OK, Let’s Begin!
1.) We will start by first installing lights to the lava at the front of the castle. First disconnect the following black tiles at the front, then turn the castle around and remove the tie fighter. Gently press up against the following sections to lift up the entire top half of the castle. Turn the base of the castle back around to the front and remove following sections: 2.) Take the following section and disconnect all the trans coloured pieces, then take 2x White 15cm Bit Lights and with the cables facing up, place the bit lights down in the following positions, in between studs. Secure the lights in place by reconnecting the trans coloured section over the top. Ensure both Bit Lights are secured directly in between studs as shown below: 3.) Take both cables and thread them through the space on the right, which leads to the inside of the castle. Pull the cables all the way out from the inside, then reconnect the lava section. Ensure both cables are neatly laid along the right of the following light grey stud. 4.) Take another White 15cm Bit Light and with the other end of the cable facing the right, place the bit light in between the two grey studs. Ensuring the cable is laid toward the right around the side closest to the front, secure the bit light in place by reconnecting the trans orange wall piece over the top. It is very important that the cable is laid on the side of the grey stud closest to the front. This will prevent the cable from snapping later on when the pieces are reconnected on top. Take the other end of the Bit Light cable and thread it through the space on the right, then pull it all the way out from the inside of the castle. Reconnect the two dark grey wall sections starting with the one on the right. Ensure the three cables are laid around the far left stud before reconnecting the left wall section over the top. 5.) Take your AA Battery Pack and insert 3x AA Batteries to it. Connect the battery pack cable to a 6-Port Expansion Board, then connect the three bit light cables to it. Turn the battery pack ON to test that all three lights are working OK. Note: If you experience any issues with the lights not working and suspect an issue with a component, please try a different port on the expansion board to verify where the fault lies (with the light or expansion board). To correct any issues with expansion board ports, please view the section addressing expansion board issues on our online troubleshooting guide. 6.) Take the following section we removed earlier and disconnect the light grey plate from underneath. Disconnect the trans orange section, then reconnect the light grey plate to the front of the castle. Take 2x White 15cm Bit Lights and with the cables facing the back, place them over the two trans orange round tiles. Ensuring both cables are laid in between the studs in the centre, reconnect the trans orange section over the top to secure them in place. Reconnect the section we removed the light grey plate from earlier, ensuring the cables are first laid in between studs. Continue to reconnect surrounding sections we removed in step 1. 7.) From the inside of the castle, connect the two bit light cables we just installed to the next ports along the 6-port expansion board, then turn ON the battery Pack to test all the lava lights are working OK. Note: If you experience any issues with the lights not working and suspect an issue with a component, please try a different port on the expansion board to verify where the fault lies (with the light or expansion board). To correct any issues with expansion board ports, please view the section addressing expansion board issues on our online troubleshooting guide. Disconnect the AA Battery Pack, then take a Multi Effects Board and connect a 5cm Connecting Cable to one of the OUT ports (side with 2 ports). Connect the other end of the 5cm cable to the 6-port expansion board, then connect your AA Battery Pack to the IN port on the multi-effects board (side with 1 port) 8.) We will now configure the Multi Effects Board. Turn ON the AA Battery Pack and configure your desired effect by simply flicking the switch and adjusting the speed wheel. To configure the effect used in the Light My Bricks example, set the switch to the far right for ‘pulse’ effect. Turn the wheel all the way to left for the slowest speed.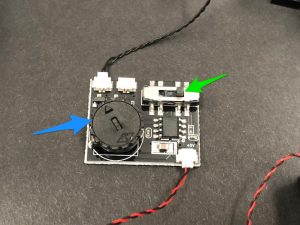 Once you are happy with the chosen effect, disconnect the AA Battery Pack from the effects board. Take a new 5cm Connecting Cable and connect it to a new 6-Port Expansion Board. Connect the other end of the 5cm cable to the IN port on the Multi Effects Board (where we disconnected the battery pack from).
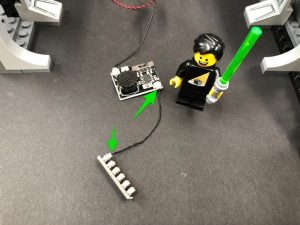 9.) Thread your AA Battery Pack through the space on the left side of the castle. Pull the cable in from the inside and connect it to the second 6-port expansion board we installed.
Neaten up cabling from the inside of the castle by grouping all the cables from the lava section and twisting/folding them together to form a neat bunch.
10.) We will now install a light to the pink diamond on the outside of the castle. First disconnect the wall section it sits on then disconnect the trans pink piece. Take a Pink 30cm Bit Light and with the cable facing behind, place it over the red stud. Secure the Bit Light in place by reconnecting the trans pink piece over the top.
Turn this section around to the back, then fold the cable down the back of the section.
Reconnect this section to the castle base, then thread the pink bit light cable through the same space we threaded the battery pack cable through. Pull it all the way out from the inside then connect it to the second 6-port expansion board we installed. Turn ON the battery pack to test the light is working OK.
Note: If you experience any issues with the lights not working and suspect an issue with a component, please try a different port on the expansion board to verify where the fault lies (with the light or expansion board). To correct any issues with expansion board ports, please view the section addressing expansion board issues on our online troubleshooting guide.
11.) We will now install a flashing light over to the right side of the castle. First disconnect the control panel section, then disconnect the trans green round tile. Take a Flashing White 30cm Bit Light and with the cable facing behind, place it over the black stud. Secure the light in place by connecting a provided Trans Green Round Plate 1×1 over the top.
Reconnect the control panel, then thread the other end of the cable through the following space. Pull it all the way out from the inside of the castle, then thread the cable in between the wall and control panel. Continue to thread it around the next wall section to lead back inside the castle.
Hide the cable by disconnecting the following section, then reconnecting it over the top of the cable as shown below.
Connect the flashing white bit light cable it to the next spare port on the 6-port expansion board, then turn ON the battery pack to test the light is working OK.
Note: If you experience any issues with the lights not working and suspect an issue with a component, please try a different port on the expansion board to verify where the fault lies (with the light or expansion board). To correct any issues with expansion board ports, please view the section addressing expansion board issues on our online troubleshooting guide.
12.) Disconnect the Battery Pack cable from the expansion board inside the castle, then neaten up cabling by grouping all cables connected to the second 6-port expansion board and twisting/folding around each other to form a neat bunch.
Lift up the section so we can access underneath, then secure the flashing white 30cm bit light cable underneath the following 2×2 plate.
Take a 15cm Connecting cable and connect one end to a spare port on the second 6-port Expansion Board.
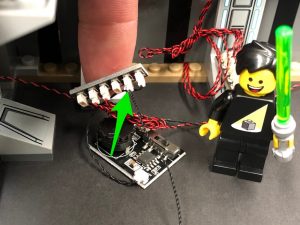 13.) We will now install lights to the main section of the castle. First pull out the black technic pin on the right side, then disconnect the two walls by unclipping them from the bottom.
Remove the Darth Vader’s bacta tank, disconnect the top of it as shown below:
14.) Take a Cool White 30cm Bit Light and with the led facing down and cable laid behind, place if over the top of the tank, then secure it in place by reconnecting the top section. If you look up from the front of the tank, you should be able to see the Bit Light facing down.
Turn the tank around to the back and fold the cable down and secure it underneath the black angled brick at the bottom.
Reconnect the bacta tank then thread the cable behind and out the right side of this section.
15.) Remove the Darth Sidious hologram from the level above and disassemble it as shown below:
Take another Cool White 30cm Bit Light and place it over the black base’s stud. Secure the bit light in place by connecting a provided Trans Light Blue Round Plate 1×1 over the top, then reconnect the hologram piece ensuring the cable is facing the back.
Reconnect this section back to the castle, then lay the cable behind Darth Vader’s throne and around to the right.
16.) Take both ends of the Cool White Bit Light cables and connect each to one of the OUT ports on a Flicker effects Board
Secure both cables underneath the following light grey plate with clip, then fold/twist the two cables around each other into a neat bunch as shown below:
Test the flickering lights by connecting your AA Battery Pack to the IN port on the Flicker Effects Board. Turn the battery pack on to see the bacta tank and hologram come to life.
Note: If you experience any issues with the lights not working and suspect an issue with a component, please try a different port on the expansion board to verify where the fault lies (with the light, expansion board or effects board). To correct any issues with expansion board ports, please view the section addressing expansion board issues on our online troubleshooting guide.
17.) Disconnect the AA Battery Pack, then connect a 5cm Connecting Cable to the IN port on the flicker effects board. Connect the other end of the cable to a new 6-Port Expansion Board.
18.) Take 2x Red Strip Lights and using their adhesive backing, stick them to the bases of the provided 2x Black Plate 1×6, then connect the two strip lights together using a 5cm Connecting Cable.
Take a 30cm Connecting Cable and connect one end to the right strip light, then take a 15cm Connecting Cable and connect one end to the left strip light.
19.) Lift up the base where the darth vader meditation chamber is, then mount both Red Strip Lights underneath it in the below positions. Ensure the 30cm Connecting cable is closest to the back.
Take the other end of the 30cm Connecting Cable and thread it up the following space, which leads to the floor above (darth vader chamber). Pull the cable all the way out.
Connect the other end of the 30cm cable to the 6-Port Expansion Board below, then connect your AA Battery Pack to another spare port on the expansion board. Turn ON the battery pack to test the red strip lights are working OK.
Note: If you experience any issues with the lights not working and suspect an issue with a component, please try a different port on the expansion board to verify where the fault lies (with the light or expansion board). To correct any issues with expansion board ports, please view the section addressing expansion board issues on our online troubleshooting guide.
20.) Take the entire left wall section and reconnect it by clipping it to the base of this section as shown below:
Take another Red Strip Light and using it’s adhesive backing, stick it to the bast of another provided Black Plate 1×6. Take the other end of the 15cm Connecting Cable from the red strip light from previous step and connect it to the Red Strip light from this step.
Take a new 15cm Connecting Cable and connect it to the other port on the Red Strip Light, then Mount the strip light underneath the top level as shown below. Ensure the spare end of the 15cm cable is facing the left.
21.) Take another 2x Red Strip Lights and using their adhesive backings, stick them to the bases of another provided 2x Black Plate 1×6.
Take the other end of the 15cm Connecting Cable and thread it up to the top level and connect it to one of the Red Strip Lights. Take a new 30cm Connecting Cable and connect one end to the other side of the Red Strip Light.
22.) Mount the Red Strip Light to the inside of the left wall in the following position. Ensure you loop the 15cm connecting cable underneath the 1×6 plate in order to eliminate excess cable.
Bring the other end of the 30cm Connecting Cable underneath the top level to bring it around to the right side. Connect it to the other spare Red Strip Light from previous step.
23.) Before reconnecting the main right wall section, ensure the bit light cables and connecting cable are laid to the left side of the light grey clip.
Mount the Red Strip Light from previous step to the inside of the right wall in the following position. Eliminate excess cable by looping the connecting cable underneath the black 1×6 plate.
24.) Take Darth Vader and disconnect his lightsaber and replace it with the provided Red Light My Bricks Lightsaber.
Place Darth Vader in his chamber (or anywhere on this floor) and bring the lightsaber cable behind and thread it through space in between this floor and the right wall. Pull the cable down from the outside, then secure it underneath the right wall.
Securely reconnect the right wall section by pushing in the black technic pin on the right, then connect the lightsaber cable to the 6-port Expansion Board underneath.
Connect the AA Battery Pack to a spare port on the 6-port Expansion Board and turn it ON to test all the lights in this main section are working OK.
Note: If you experience any issues with the lights not working and suspect an issue with a component, please try a different port on the expansion board to verify where the fault lies (with the light, expansion board or effects board). To correct any issues with expansion board ports, please view the section addressing expansion board issues on our online troubleshooting guide.
25.) Disconnect the AA Battery Pack and place it at the bottom of the castle on the left side. Thread the cable through the gap on the left side that leads to the inside of the castle. Connect the cable to a spare port on the second 6-port expansion board from step 8. Ensure you do not connect the battery pack to the 6-port expansion board with the “lava lights” connected to it.
Secure the cable in place by laying it underneath the tan coloured 1×1 angled tile.
26.) Carefully turn the main section of the castle onto it’s front so we can access underneath. Take 2x White Strip Lights and using their adhesive backings, stick them to the bases of provided 2x Black Plate 1×6. Connect the two strip lights together using a 5cm Connecting Cable.
Take a new 5cm Connecting Cable and connect it to the other end of one of the white strip lights. Connect the other end of the cable to the 6-port expansion board underneath this section.
27.) Mount both strip lights underneath the main section of the castle in the following positions. Ensure the strip light connected to the expansion board is closest to the back.
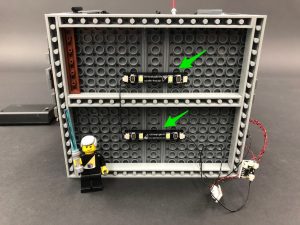 Take 4x Adhesive Squares and stick two to the back of the expansion board, and another two to the back of the flicker effects board. Mount both expansion board and effects board to the side of the underneath section as shown below:
28.) Take the main section of the castle over the top of the base section. Locate the other end of the 15cm Connecting Cable from step 12 and connect it to a spare port on the 6-port expansion board underneath the main section of the castle.
Securely reconnect the main section on top of the base section ensuring you first connect the right side (to prevent pinching cables on the right side)
29.) Reconnect the black tiles along the front of the castle to secure the main section down, then place the tie fighter back to the bottom section of the castle.
This finally completes installation of the Light My Bricks Darth Vader Castle Light Kit. We thank YOU for purchasing this product and hope you enjoy!
Light My Bricks: LEGO Star Wars UCS Y-Wing Starfighter 75181 Lighting Kit
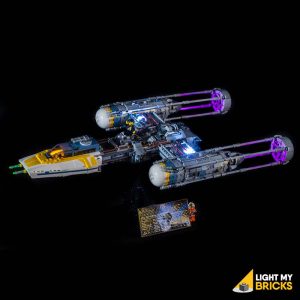
The following page is the instructions for the Light My Bricks LEGO Star Wars UCS Y-Wing Starfighter (75181) LED light kit.
If you run into any issues, please refer to the online troubleshooting guide.
To ensure a trouble-free installation of your light kit, please read and follow each step carefully. These instructions can be downloaded in PDF format here
Please note: This page lists instructions for the LED light kit only. If you are wishing to purchase the Light My Bricks LEGO Star Wars UCS Y-Wing Starfighter (75181) LED light kit , please click here to view the product page
Package Contents:
- 4x Cool White 30cm Bit Lights
- 2x Green 30cm Bit Lights
- 2x Pink 30cm Bit Lights
- 1x Multi Effects Board
- 1x Flicker Effects Board
- 1x 8-Port Expansion Board
- 1x 2-Port Expansion Board
- 1x 15cm Connecting Cable
- 2x 30cm Connecting Cables
- 6x Adhesive Squares
- 1x USB Power Cable
LEGO Pieces:
- 2x Trans Clear Round Plate 1×1
- 2x Trans Bright Green Lightsaber Bar
Important things to note:
Laying cables in between and underneath bricks
Cables can fit in between and underneath LEGO® bricks, plates, and tiles providing they are laid correctly between the LEGO® studs. Do NOT forcefully join LEGO® together around cables; instead ensure they are laying comfortably in between each stud.
Connecting cable connectors to Expansion Boards
Take extra care when inserting connectors to ports of Expansion Boards. Connectors can be inserted only one way. With the expansion board facing up, look for the soldered “=” symbol on the left side of the port. The connector side with the wires exposed should be facing toward the soldered “=” symbol as you insert into the port. If a plug won’t fit easily into a port connector, do not force it.
Connecting cable connectors to Strip Lights
Take extra care when inserting connectors to ports on the Strip Lights. Connectors can be inserted only one way. With the Strip Light facing up, ensure the side of the connector with the wires exposed is facing down. If a plug won’t fit easily into a port connector, don’t force it. Doing so will damage the plug and the connector.
Installing Bit Lights under LEGO® bricks and plates.
When installing Bit Lights under LEGO® pieces, ensure they are placed the correct way up (Yellow LED component exposed). You can either place them directly on top of LEGO® studs or in between.
OK, Let’s Begin!
1.) We will first install lights to the cannons on the front of the star fighter. First disconnect the following pieces surrounding the front, then disconnect the two cannon sections. Continue to remove sections which make up the windows and roof cannons. 2.) Disassemble the two cannons as per below, then discard the two grey bars and replace them with the provided 2x Trans Bright Green Lightsaber bars that come in this kit. Take a Green 30cm Bit Light and thread the connector end of the cable through the top of the technic piece on one of the cannon bases as shown below: Thread the cable all the way through and before pulling the Bit Light inside the technic piece, slightly bend the LED so that it is facing up. 3.) Insert one of the Trans Bright Green Bars inside, then reconnect the other cannon pieces. Repeat steps 2 and 3 to install another Green 30cm Bit Light to the other cannon section, then reconnect both to the front of the starfighter. 4.) Disconnect the following tiles along the top of the starfighter, then disconnect all the angled bricks along the left side as shown below. Lift up the white top and bottom flap piece on the back of this cockpit section: Take the cable from the left cannon and thread it toward the end of the cockpit, in between the gaps underneath the pieces we removed earlier, then slip it in between the light grey round 2×2 plate and side of the ship. Pull the cable underneath and then secure it in place by closing the top and bottom flap pieces. 5.) Repeat previous step to secure the cable along the right side of the starfighter. 6.) Take the Multi Effects Board and connect both bit light cables from the cannons to the OUT ports (side with 2 ports). Take the AA Battery Pack and insert 3x AA Batteries to it. Connect the battery pack cable to the IN port (side with 1 port). Turn ON the battery pack to test the cannon lights are working OK, then adjust the settings on the Multi Effects Board for the “firing” effect. Set the switch to the middle setting and turn the speed wheel all the way to the left for the slowest speed. If you’re using the USB Power Cable, connect this to the board this instead of the battery pack, and connect the other end to a USB Power Bank or wall adaptor (sold separately) and turn it ON to test and configure the lights and effects Your cannons should be firing away like the below example video:
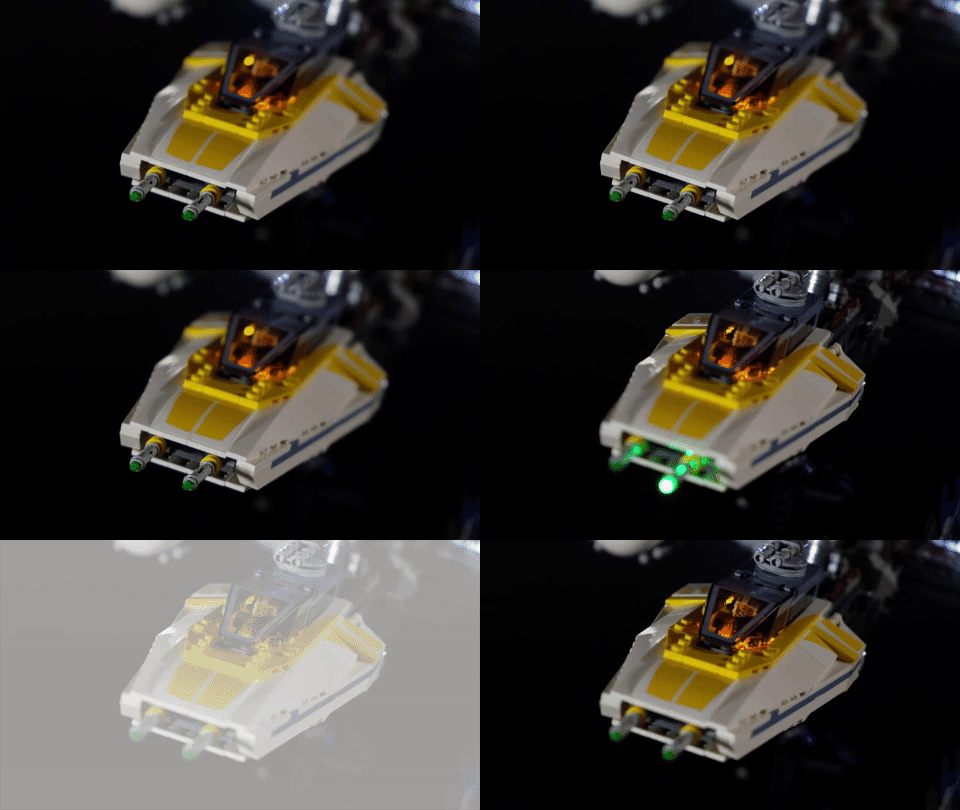 7.) Once you are happy with the cannon effect, disconnect the AA Battery Pack / USB Cable and connect a 15cm Connecting Cable to the IN port. Take 4x Adhesive Squares and stick them to the back of the multi effects board, then flip the Y-Wing over and stick the effects board underneath in the following position.
8.) Flip the Y-Wing back over and place it back onto it’s stand, then eliminate excess cable from the right cannon bit light by tucking the cable in behind pieces along the side of the ship as shown below:
Pull any remaining excess cable toward the front of the starfighter as shown below:
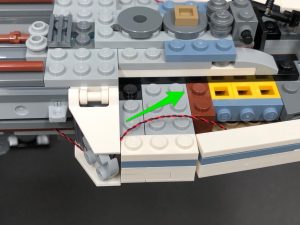 9.) Turn the Y-Wing around to the left side and repeat the previous step to eliminate excess cable from the left cannon bit light by tucking the cable behind pieces along the left side of the Y-Wing.
10.) Turn the Y-Wing back around to the right side, then take the other end of the 15cm Connecting Cable from the multi effects board and pull it toward the front then up and secure it in place by opening and closing the dark grey technic piece (which pulls out and folds back in over the cable).
Take an 8-Port Expansion Board and connect the other end of the 15cm Connecting Cable to it, then set it aside for now.
11.) Turn the Y-Wing around to the left side, then disconnect the following pieces from the front of the cockpit.
Take the following section and disconnect the trans orange 1×2 plate from underneath.
Take 2x Cool White 30cm Bit Lights and hold them together as shown below. With both cables facing the front of the cockpit, place them over the two light grey studs then secure them down by reconnecting the trans orange 1×2 plate over the top.
12.) Lay each cable out the side in between studs as shown below, then run the cable down each side of the starfighter ensuring you tuck it under the white flap piece toward the back of the cockpit.
Reconnect the front sections of the cockpit we removed earlier.
13.) Take each cable from the cock pit and connect them to the 8-Port Expansion Board from step 10.
Place the expansion board inside the below space, then disconnect the following pieces so that we can lay and hide the excess cable from the cockpit lights underneath them.
14.) Lay both cables down in between studs as shown below, then reconnect pieces over the top. Continue to lay each cable in between studs and reconnect pieces over the top. Ensure you pull any excess cable out toward the front of the vehicle.
Disconnect the following pieces to secure the 15cm Connecting Cable underneath, then reconnect the pieces over the top, ensuring the cable is laid in between studs.
15.) Eliminate excess cables from both sides of the cockpit lights by pulling each cable toward the front, then twisting and folding them around each other before tucking them down each side of the star fighter.
Test the cockpit lights by connecting the AA Battery Pack / USB Cable to the expansion board and turning ON to verify all is working OK.
16.) Disconnect the AA Battery Pack / USB Cable and reconnect all the angled bricks and tiles we removed earlier which made up the front exterior of the Y-Wing
17.) We will now install some white lights on the back of the Y-Wing. Take a Cool White 30cm Bit Light and from the back of the plane, thread it through in between the light grey bars and place it over the top of the following stud above the left wing. Secure it in place by connecting a provided Trans Clear Round Plate 1×1 over the top.
Pull the other end of the cable down from the behind the left wing then thread the cable through the following space underneath the wing in between bars.
Lift the Starfighter off from the stand and flip it over so we can access underneath. Pull the cable all the way out from the back of the wing then thread it up along underneath the wing in between the brown bars.
Thread the cable up underneath the dark grey bar on the top left corner of the wing, then pull the cable diagonally up across the bottom of the plane (over the multi effects board). Flip the plane over so that we are facing the right side of the plane, then pull the cable all the way up from underneath and secure it underneath the dark grey technic piece (which pulls out and folds back in over the cable).
18.) Turn the Y-Wing over so we are facing the left side again. Disconnect the following two pieces on top of the right wing.
Take the remaining Cool White 30cm Bit Light and with the cable facing down, place it on top of the following stud above the right wing. Secure the Bit Light in place by connecting a provided Trans Clear Round Plate 1×1 over the top.
Lay the cable down toward the centre of the Y-Wing underneath the following pieces, then thread it down the following gap to lead to underneath. Turn the plane around so that we can access the right side. Thread the rest of the cable down underneath all the following bars and sections.
Pull the cable underneath and toward the front of the plane, then pull it up the following corner and tuck it in underneath the dark grey technic bar (which pulls out and folds in over the cable). Ensure the two cables are pulled up tight so there are no excess cables dangling down.
19.) Turn the Y-Wing back around to it’s left side, then take the two cables we pulled up and connect them to the next available ports on the 8-Port Expansion Board.
Hide the two cables underneath the following sections:
Test the wing lights are working OK by connecting up the AA Battery Pack /USB Cable to the expansion board and turning ON to verify all is working OK.
Disconnect the AA Battery Pack / USB Cable
20.) We will now install pink lights to the back jets. First disconnect the jet sections from each side and disassemble them as shown below:
21.) Take a Pink 30cm Bit Light and place the LED component over the centre of one of the jet section’s white bricks. Push the bit light inside the centre hole, then press the cable down the side of the brick . Reconnect the trans pink dish over the top to secure the bit light in place. The LED should be peaking out the hole of the trans pink dish.
Push the cable down the corner side the brick and then lay it in between studs before reconnecting the dark grey cone piece over the top. Tuck the cable in through the following gap below to prevent it from dangling down.
Repeat this step to install another Pink 30cm Bit Light to the other jet section.
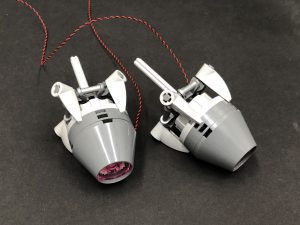 22.) Reconnect each jet section ensuring the cables are facing down and not visible from above the Starfighter.
Flip the Starfighter over and disconnect the following pieces from underneath the right wing. Lay the cables up the starfighter in between studs accordingly, then thread the cable up underneath the brown bar. Reconnect the pieces over the top of the cable.
Repeat this process to thread and lay cables underneath pieces for the left jet’s cable.
23.) Take the Flicker Effects Board and connect a 30cm Connecting Cable to the IN port. Connect the cable from each jet light to one of the OUT ports on the effects board. Stick 2x Adhesive Squares to the back of the flicker effects board and mount it underneath the Y-Wing in the following position. Thread the other end of the 30cm Connecting Cable underneath the centre section.
Follow the below images to lay the cable from each jet light underneath the following pieces.
24.) Lay the other end of the 30cm Connecting Cable up the side of underneath of the Y-Wing then pull it down over the front side and tuck it in underneath the dark grey technic bar (which pulls out and folds back in over the top of the cable).
Flip the Y-Wing over so you are facing the left side of the Y-Wing, then pull the cable up and connect it to a spare port on the 8-port Expansion Board. Test the jet light effects by connecting the AA Battery Pack / USB Cable to the expansion board and turning it ON to verify all is working OK.
The Pink lights should be flickering like the below example video:
 25.) Disconnect the AA Battery Pack / USB Cable and take the remaining 30cm Connecting Cable and connect it to a spare port on the Expansion Board then disconnect the following brown bar.
Pull the 30cm Connecting Cable from the flicker effects board up to eliminate any excess cable dangling down, then tuck the cable in between the following pieces. Take the other 30cm Connecting Cable we just connected up to the board, and tuck it in between the same pieces, then reconnect the brown bar over the top of the two cables.
Twist and fold the excess cable from the flicker effects board,, then tuck everything inside the space underneath. You can place the R2-BHD Droid inside this space to hide the components.
26.) Turn the Y-Wing to its right side then pull the spare end of the 30cm Connecting Cable down and tuck it in underneath the dark grey technic piece (that pulls out and folds back in over the top of the cable). Continue to tuck and thread the cable in behind pieces and spaces, then bring it all the way down and connect it to the 2-Port Expansion Board.
27.) Lastly, connect the AA Battery Pack /USB cable to the other end of the 2-port Expansion Board, then neatly place it behind the back stand.
This finally completes installation of the Light My Bricks Star Wars UCS Y-Wing Starfighter. We thank you and hope you enjoy this product!
